Brother International MFC-790CW Software Users Manual - English - Page 120
Stop/Exit, B/W 200 dpi - manual pdf
 |
UPC - 012502620501
View all Brother International MFC-790CW manuals
Add to My Manuals
Save this manual to your list of manuals |
Page 120 highlights
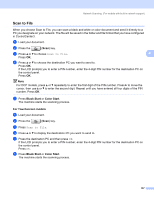
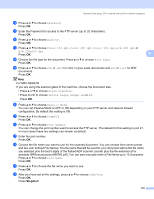
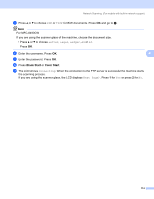
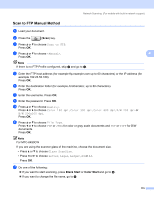
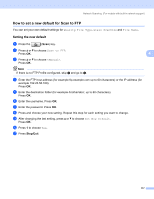
Network Scanning (For models with built-in network support) n Press a or b to choose Password. Press OK. o Enter the Password for access to the FTP server (up to 32 characters). Press OK. p Press a or b to choose Quality. Press OK. q Press a or b to choose Color 150 dpi, Color 300 dpi, Color 600 dpi, B/W 200 dpi or B/W 200x100 dpi. Press OK. 4 r Choose the file type for the document. Press a or b to choose File Type. Press OK. s Press a or b to choose PDF or JPEG for color or gray scale documents and PDF or TIFF for B/W documents. Press OK. Note For MFC-6490CW If you are using the scanner glass of the machine, choose the document size. • Press a or b to choose Glass ScanSize. • Press d or c to choose Letter, Legal, Ledger, A4 or A3. Press OK. t Press a or b to choose Passive Mode. You can set Passive Mode to OFF or ON depending on your FTP server and network firewall configuration. By default this setting is ON. u Press d or c to choose On or Off. Press OK. v Press a or b to choose Port Number. You can change the port number used to access the FTP server. The default for this setting is port 21. In most cases these two settings can remain as default. w Enter the port number. Press OK. x Choose the file name you want to use for the scanned document. You can choose from seven preset and two user defined File Names. The file name that will be used for your document will be the file name you selected plus the last 6 digits of the flatbed/ADF scanner counter plus the file extension (For example, BRNxxxxxxxxxxxx098765.pdf). You can also manually enter a File Name up to 15 characters. Press a or b to choose File Name. Press OK. y Press a or b to choose the file name you want to use. Press OK. z After you have set all the settings, press a or b to choose Complete. Press OK. Press Stop/Exit. 112
-
 1
1 -
2
-
3
-
4
-
5
-
6
-
7
-
8
-
9
-
10
-
11
-
12
-
13
-
14
-
15
-
16
-
17
-
18
-
19
-
20
-
21
-
22
-
23
-
24
-
25
-
26
-
27
-
28
-
29
-
30
-
31
-
32
-
33
-
34
-
35
-
36
-
37
-
38
-
39
-
40
-
41
-
42
-
43
-
44
-
45
-
46
-
47
-
48
-
49
-
50
-
51
-
52
-
53
-
54
-
55
-
56
-
57
-
58
-
59
-
60
-
61
-
62
-
63
-
64
-
65
-
66
-
67
-
68
-
69
-
70
-
71
-
72
-
73
-
74
-
75
-
76
-
77
-
78
-
79
-
80
-
81
-
82
-
83
-
84
-
85
-
86
-
87
-
88
-
89
-
90
-
91
-
92
-
93
-
94
-
95
-
96
-
97
-
98
-
99
-
100
-
101
-
102
-
103
-
104
-
105
-
106
-
107
-
108
-
109
-
110
-
111
-
112
-
113
-
114
-
 115
115 -
 116
116 -
 117
117 -
 118
118 -
 119
119 -
 120
120 -
 121
121 -
 122
122 -
 123
123 -
 124
124 -
 125
125 -
126
-
127
-
128
-
129
-
130
-
131
-
132
-
133
-
134
-
135
-
136
-
137
-
138
-
139
-
140
-
141
-
142
-
143
-
144
-
145
-
146
-
147
-
148
-
149
-
150
-
151
-
152
-
153
-
154
-
155
-
156
-
157
-
158
-
159
-
160
-
161
-
162
-
163
-
164
-
165
-
166
-
167
-
168
-
169
-
170
-
171
-
172
-
173
-
174
-
175
-
176
-
177
-
178
-
179
-
180
-
181
-
182
-
183
-
184
-
185
-
186
-
187
-
188
-
189
-
190
-
191
-
192
-
193
-
194
-
195
-
196
-
197
-
198
-
199
-
200
-
201
-
202
-
203
-
204
-
205
-
206
-
207
-
208
-
209
-
210
-
211
-
212
-
213
-
214
-
215
-
216
-
217
-
218
-
219
-
220
-
221
-
222
-
223
-
224
-
225
-
226
-
227
-
228
-
229
-
230
-
231
-
232
-
233
-
234
-
235
-
236
-
237
-
238
-
239
-
240
-
241
-
242
-
243
-
244
-
245
-
246
-
247
-
248
-
249
-
250
-
251
-
252
-
253
-
254
-
255
-
256
 |
 |