Brother International PE-300S Users Manual - English - Page 35
Changing the Embroidery foot and the zipper foot - embroidery and sewing machine
 |
View all Brother International PE-300S manuals
Add to My Manuals
Save this manual to your list of manuals |
Page 35 highlights
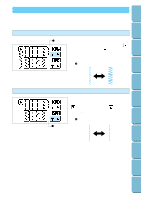
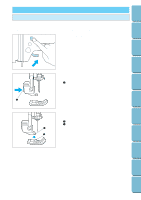
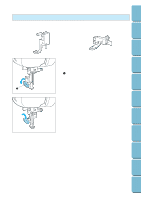
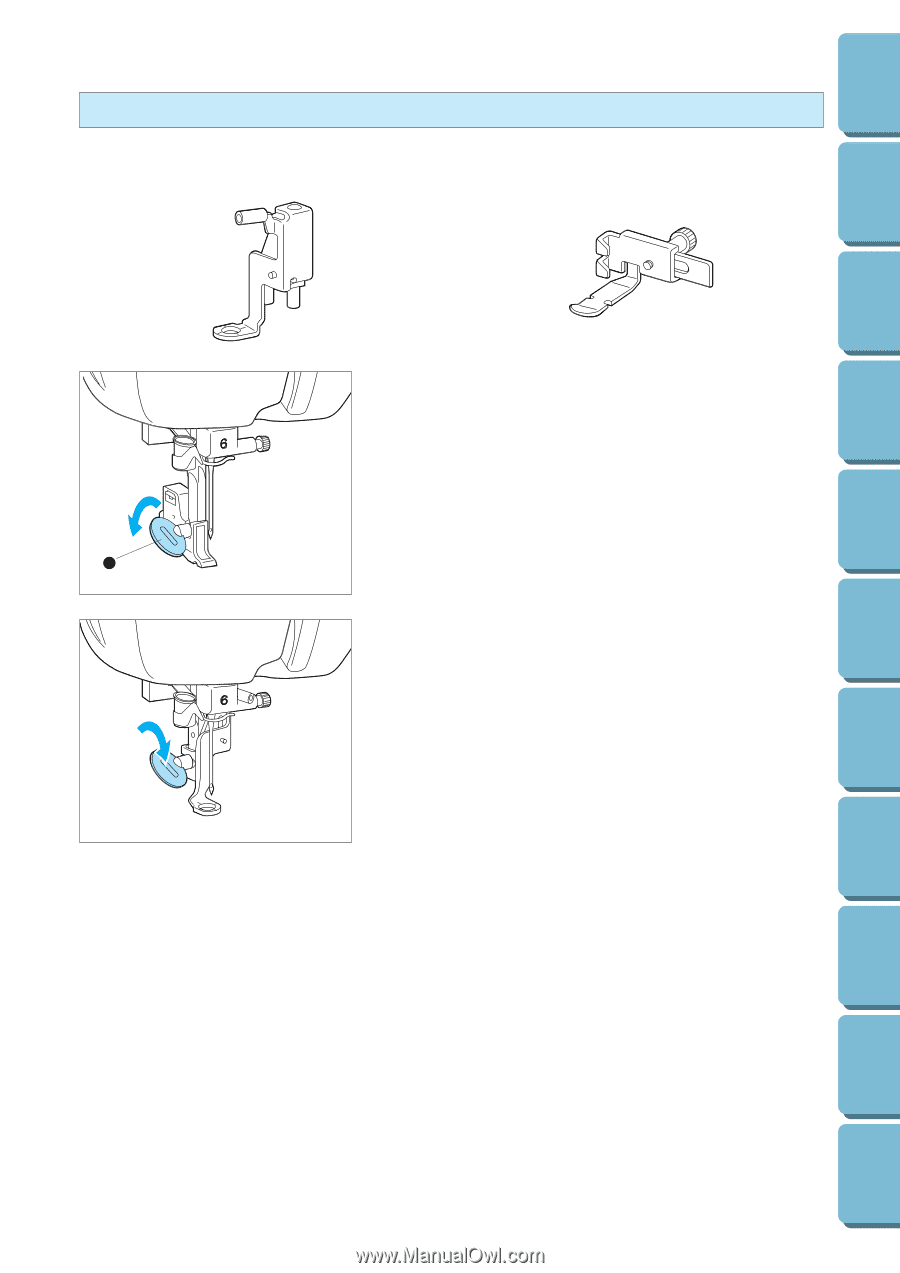
Contents Setting Up Basic Sewing Machine Operation Utility Stitches Changing the Embroidery foot and the zipper foot Embroidery foot "Q" Zipper foot "I" 1. Push the "NEEDLE POSITION" button to raise the needle, and then turn off the power. 2. Remove the screw on the presser foot holder. 1 Disk-shaped screwdriver 1 3. Change the foot and screw back on tightly. Embroidering Maintenance Troubleshooting Error Messages Sewing Chart Patterns (Programmed in Machine) Patterns (Memory Card) 32
-
 1
1 -
2
-
3
-
4
-
5
-
6
-
7
-
8
-
9
-
10
-
11
-
12
-
13
-
14
-
15
-
16
-
17
-
18
-
19
-
20
-
21
-
22
-
23
-
24
-
25
-
26
-
27
-
28
-
29
-
 30
30 -
 31
31 -
 32
32 -
 33
33 -
 34
34 -
 35
35 -
 36
36 -
 37
37 -
 38
38 -
 39
39 -
 40
40 -
41
-
42
-
43
-
44
-
45
-
46
-
47
-
48
-
49
-
50
-
51
-
52
-
53
-
54
-
55
-
56
-
57
-
58
-
59
-
60
-
61
-
62
-
63
-
64
-
65
-
66
-
67
-
68
-
69
-
70
-
71
-
72
-
73
-
74
-
75
-
76
-
77
-
78
-
79
-
80
-
81
-
82
-
83
-
84
-
85
-
86
-
87
-
88
-
89
-
90
-
91
-
92
-
93
-
94
-
95
-
96
-
97
-
98
-
99
-
100
-
101
-
102
-
103
-
104
-
105
-
106
-
107
-
108
-
109
-
110
-
111
 |
 |
32
Contents
Setting Up
Basic Sewing
Machine
Operation
Utility Stitches
Embroidering
Maintenance
Troubleshooting
Error
Messages
Sewing Chart
Patterns
(Programmed
in Machine)
Patterns
(Memory Card)
1.
Push the “NEEDLE POSITION” button to raise the needle,
and then turn off the power.
2.
Remove the screw on the presser foot holder.
1
Disk-shaped screwdriver
3.
Change the foot and screw back on tightly.
Changing the Embroidery foot and the zipper foot
Embroidery foot “Q”
Zipper foot “I”
1