Brother International PT1500PC Quick Setup Guide - Spanish - Page 20
Hiding/displaying P-touch Quick Editor (Windows only), Quitting P-touch Quick Editor, Printing a label - pt 1500pc p touch label printer
 |
UPC - 012502600459
View all Brother International PT1500PC manuals
Add to My Manuals
Save this manual to your list of manuals |
Page 20 highlights
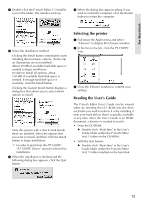
3 Select the desired print settings. Cut Marks: This option allows you to select whether or not to print cut marks (:), which indicate where to cut the label so that the left and right margins are equal. Mirror Printing: This option allows you to print the text in reverse so it can be attached to a window. Copies: This option allows enter the number of copies to be printed. 4 (Windows) Click the OK button. (Macintosh) Click [Print]. The layout is printed. (Windows) To begin printing: 1 Either click the Print button ( ), or click the arrow beside the Print button, and click [Print] in the drop-down menu. 2 Select the desired print settings. 3 Click the OK button. Hiding/displaying P-touch Quick Editor (Windows only) P-touch Quick Editor can be hidden by clicking the Hide button ( ). Re-display P-touch Quick Editor by clicking its icon in the system tray, at the right of the taskbar. Quitting P-touch Quick Editor • (Windows) Do either of the following: Right-click the P-touch Quick Editor icon in the system tray, and then click [Exit] in the menu that appears. Right-click in the label view (or text box), and then click [Exit] in the menu that appears. (Macintosh) Do either of the following: Click [Quit] in the [File] menu Hold down the Control key and click in the label view (or text box), and then click [Quit] in the menu that appears. Printing a label 1 Turn on the PT-1500PC and start up the computer. 2 Start up either P-touch Quick Editor or P-touch Editor Ver. 3.1, and make sure that the PT-1500PC is selected as the printer. 3 Design your label. 4 Click the [Print] command in the application, select the desired print settings, and then click the Print button. The status indicator of the PT-1500PC flashes while it is receiving the data. After the label is printed, press in on the tape cutter button to cut off the label. While printing multiple copies, the PT1500PC may stop printing for a short while in order for the print head to cool down. Printing will continue once the print head has sufficiently cooled down. To feed out extra tape, hold down the Power/Feed key for a few seconds. Feed 18
-
 1
1 -
2
-
3
-
4
-
5
-
6
-
7
-
8
-
9
-
10
-
11
-
12
-
13
-
14
-
 15
15 -
 16
16 -
 17
17 -
 18
18 -
 19
19 -
 20
20 -
 21
21 -
 22
22 -
 23
23 -
 24
24 -
 25
25 -
26
-
27
-
28
-
29
-
30
-
31
-
32
-
33
-
34
-
35
-
36
-
37
-
38
-
39
-
40
-
41
-
42
-
43
-
44
-
45
-
46
-
47
-
48
-
49
-
50
-
51
-
52
-
53
-
54
-
55
 |
 |
