Brother International VX-807 Users Manual - English - Page 23
Buttonholes
 |
View all Brother International VX-807 manuals
Add to My Manuals
Save this manual to your list of manuals |
Page 23 highlights
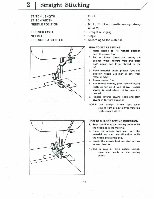
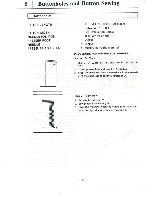
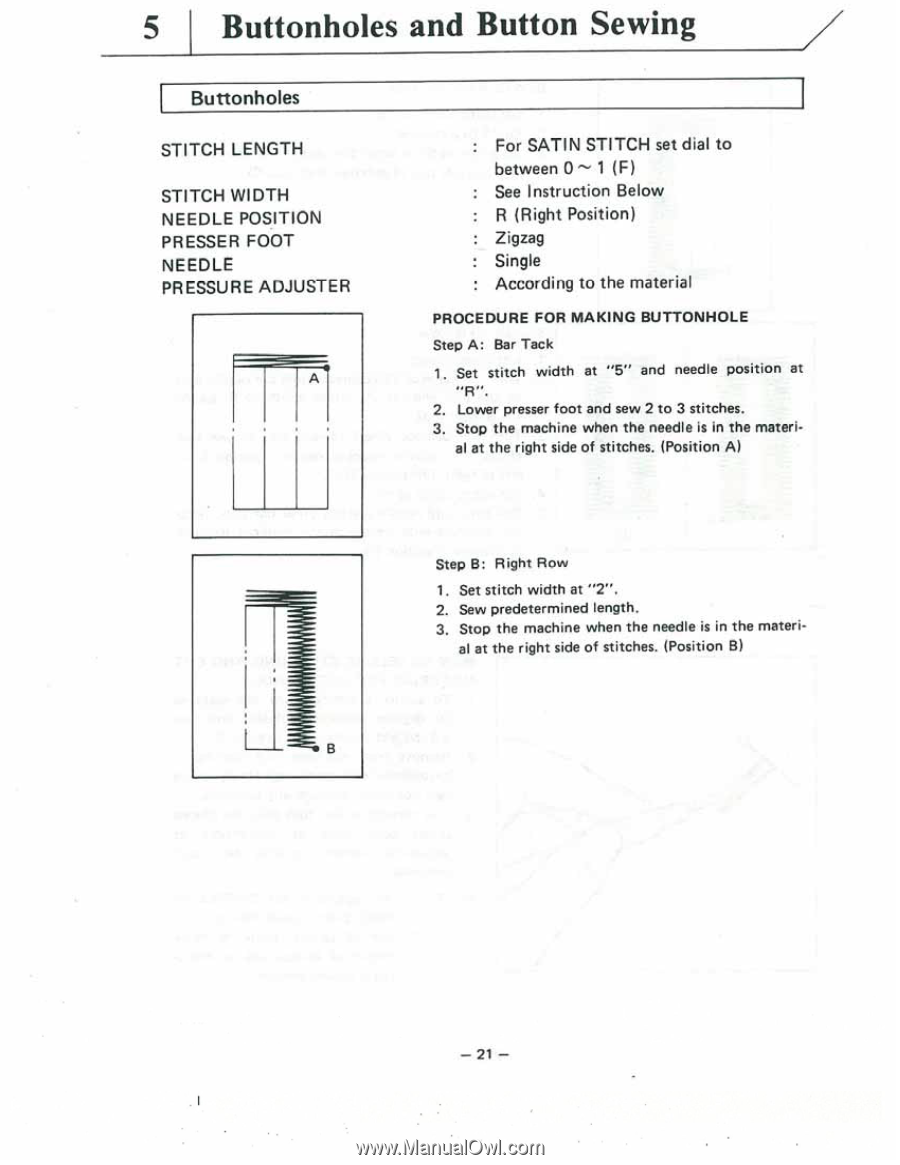
5 I Buttonholes and Button Sewing Buttonholes STITCH LENGTH STITCH WIDTH NEEDLE POSITION PRESSER FOOT NEEDLE PRESSURE ADJUSTER For SATIN STITCH set dial to between 0 - 1 (F) See Instruction Below R (Right Position) Zigzag Single According to the material PROCEDURE FOR MAKING BUTTONHOLE Step A: Bar Tack 1. Set stitch width at "5" and needle position at "Rn. 2. Lower presser foot and sew 2 to 3 stitches. 3. Stop the machine when the needle is in the materi- al at the right side of stitches. (Position A) Step B: Right Row 1. Set stitch width at "2". 2. Sew predetermined length. 3. Stop the machine when the needle is in the materi- al at the right side of stitches. (Position B) - 21 -
-
 1
1 -
2
-
3
-
4
-
5
-
6
-
7
-
8
-
9
-
10
-
11
-
12
-
13
-
14
-
15
-
16
-
17
-
 18
18 -
 19
19 -
 20
20 -
 21
21 -
 22
22 -
 23
23 -
 24
24 -
 25
25 -
 26
26 -
 27
27 -
 28
28 -
29
-
30
-
31
-
32
-
33
-
34
-
35
-
36
-
37
-
38
-
39
-
40
 |
 |
5
I
Buttonholes
and
Button
Sewing
Buttonholes
STITCH
LENGTH
STITCH
WIDTH
NEEDLE
POSITION
PRESSER
FOOT
NEEDLE
PRESSURE
ADJUSTER
For
SATIN
STITCH
set
dial
to
between
0
—
1
(F)
See
Instruction
Below
R
(Right
Position)
Zigzag
Single
According
to
the
material
PROCEDURE
FOR
MAKING
BUTTONHOLE
Step
A:
Bar
Tack
1.
Set
stitch
width
at
"5"
and
needle
position
at
"Rn.
2.
Lower
presser
foot
and
sew
2
to
3
stitches.
3.
Stop
the
machine
when
the
needle
is
in
the
materi-
al
at
the
right
side
of
stitches.
(Position
A)
Step
B:
Right
Row
1.
Set
stitch
width
at
"2".
2.
Sew
predetermined
length.
3.
Stop
the
machine
when
the
needle
is
in
the
materi-
al
at
the
right
side
of
stitches.
(Position
B)
—
21
—