Brother International VX-807 Users Manual - English - Page 24
stitching.
 |
View all Brother International VX-807 manuals
Add to My Manuals
Save this manual to your list of manuals |
Page 24 highlights
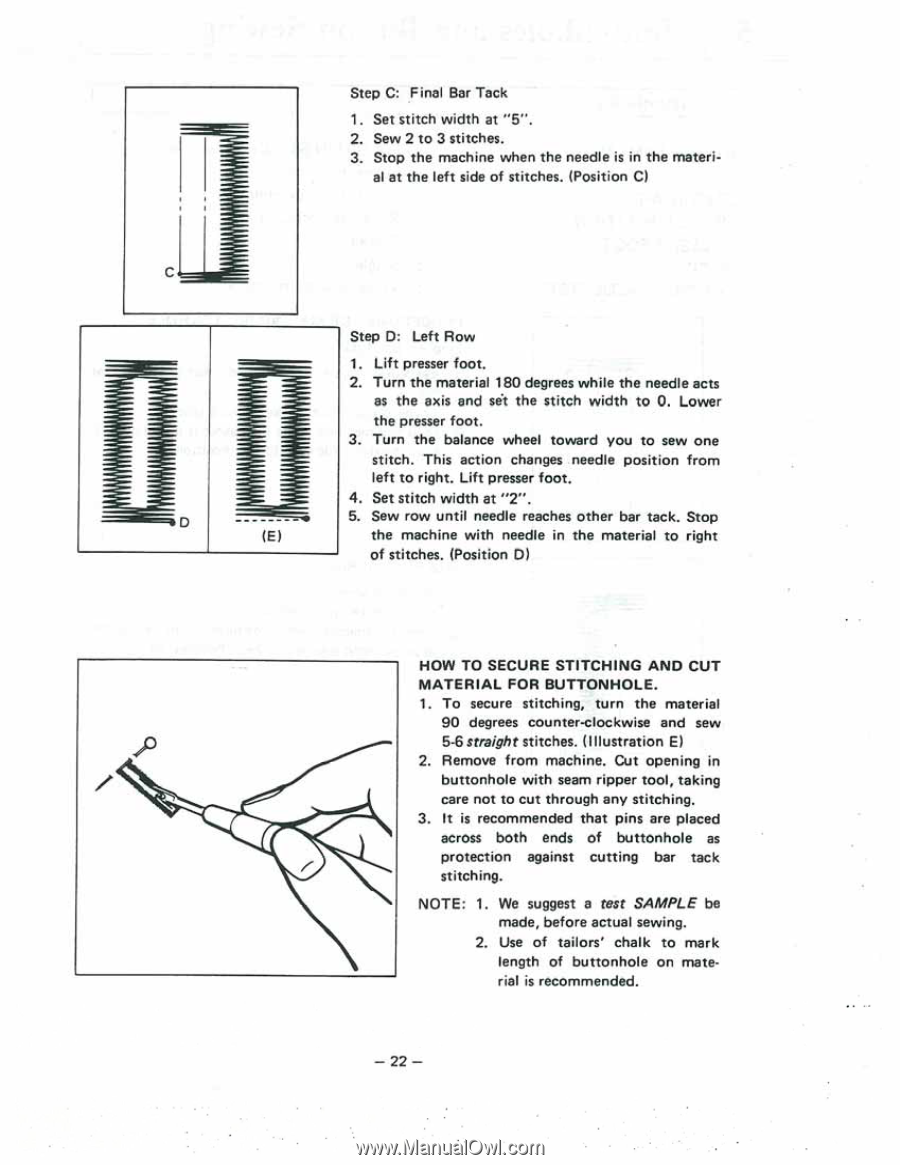
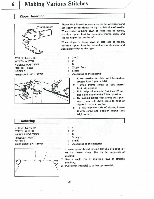
Step C: Final Bar Tack 1. Set stitch width at "5". 2. Sew 2 to 3 stitches. 3. Stop the machine when the needle is in the materi- al at the left side of stitches. (Position C) Step D: Left Row 1. Lift presser foot. 2. Turn the material 180 degrees while the needle acts as the axis and set the stitch width to 0. Lower the presser foot. 3. Turn the balance wheel toward you to sew one stitch. This action changes needle position from left to right. Lift presser foot. 4. Set stitch width at "2". 5. Sew row until needle reaches other bar tack. Stop (E) the machine with needle in the material to right of stitches. (Position 0) HOW TO SECURE STITCHING AND CUT MATERIAL FOR BUTTONHOLE. 1. To secure stitching, turn the material 90 degrees counter-clockwise and sew 5-6 straight stitches. (Illustration E) 2. Remove from machine. Cut opening in buttonhole with seam ripper tool, taking care not to cut through any stitching. 3. It is recommended that pins are placed across both ends of buttonhole as protection against cutting bar tack stitching. NOTE: 1. We suggest a test SAMPLE be made, before actual sewing. 2. Use of tailors' chalk to mark length of buttonhole on material is recommended. - 22 -
-
 1
1 -
2
-
3
-
4
-
5
-
6
-
7
-
8
-
9
-
10
-
11
-
12
-
13
-
14
-
15
-
16
-
17
-
18
-
 19
19 -
 20
20 -
 21
21 -
 22
22 -
 23
23 -
 24
24 -
 25
25 -
 26
26 -
 27
27 -
 28
28 -
 29
29 -
30
-
31
-
32
-
33
-
34
-
35
-
36
-
37
-
38
-
39
-
40
 |
 |