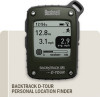
Bushnell Backtrack D-Tour Owner's Manual - Page 7
Fig. 11, Fig. 12, Fig. 10 - http com
 |
View all Bushnell Backtrack D-Tour manuals
Add to My Manuals
Save this manual to your list of manuals |
Page 7 highlights
RECORDING A NEW TRIP (ROUTE) • Press TRIP (3) to enter Trip mode. HOLD the TRIP button to start recording new trip data. The display shows a moving "hiker" icon, along with updated readouts of elapsed distance and average speed during your trip (Fig. 10). Keep the D-Tour powered ON during your trip. • To stop recording the trip data, HOLD the TRIP button again. • The D-Tour automatically saves the data it collects between the time you start and stop recording your trip, including the date and time of the trip, total distance traveled, your average speed, and changes in altitude and temperature. • Press the TRIP button to view the distance and average speed of your last trip, along with a remaining memory indicator (% of trip data memory used) (Fig. 11). The D-Tour can store up to 48 hours of total trip data (can be multiple trips on different days). VIEWING TRIP DATA After recording at least one trip, connecting the D-Tour to your computer will enable you to see the path you took on any of 4 types of map, view a trip data graph, and share your trip via email or social media. To get the software: • Go to http://backtrackdtour.com/ and follow the directions to create an account (free) and register your D-Tour, and download the software app (Fig. 13, next pg.). Your account provides online backup for all your trip data. (Serial number is inside the battery compartment-(Fig. 12)). After registering, you'll be taken to a screen to download the D-Tour application (Fig. 14) (Adobe Air® is required-it will be installed automatically if you do not already have it on your Fig. 10 Fig. 11 Fig. 12 7
-
 1
1 -
 2
2 -
 3
3 -
 4
4 -
 5
5 -
 6
6 -
 7
7 -
 8
8 -
 9
9 -
 10
10 -
 11
11 -
 12
12 -
13
-
14
-
15
-
16
-
17
-
18
-
19
-
20
-
21
-
22
-
23
-
24
-
25
-
26
-
27
-
28
-
29
-
30
-
31
-
32
-
33
-
34
-
35
-
36
-
37
-
38
-
39
-
40
-
41
-
42
-
43
-
44
-
45
-
46
-
47
-
48
-
49
-
50
-
51
-
52
-
53
-
54
-
55
-
56
-
57
-
58
-
59
-
60
-
61
-
62
-
63
-
64
 |
 |
