Campbell Scientific NL201 NL200/NL201 Network Link Interface - Page 17
Configuring the NL200/201
 |
View all Campbell Scientific NL201 manuals
Add to My Manuals
Save this manual to your list of manuals |
Page 17 highlights
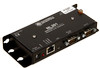
NL200/201 Network Link Interface Ethernet 10Base-T (full and half duplex), 100Base-TX (full and half duplex), Auto-MDIX Auto-IP (APIPA), IPv4, IPv6, ICMP/Ping, ICMPv6/Ping, TCP, DHCP Client, SLAAC, DNS Client, HTTPS Proxy, Telnet Server, TLS, PakBus, Mobus TCP/IP Miscellaneous Supports 20 simultaneous TCP connections Up to 10 of the 20 TCP connections can be used for TLS PakBus router supports 50 routes Supports up to 15 concurrent Modbus server transactions Compliance RoHS Compliant The NL200/NL201 is encased in metal and meets requirements for a Class B device under European standards: APPLICATION OF COUNCIL DIRECTIVE(S) 2004/108/EC STANDARD(S) TO WHICH CONFORMITY IS DECLARED: EN61326-1;2013 6. Configuring the NL200/201 The NL200/201 is configured using the Device Configuration Utility (DevConfig). You can connect your NL200/201 to DevConfig using either a network connection or USB. 6.1 Configuring the NL200/201 via USB NOTE INSTALL the DEVICE DRIVER BEFORE plugging the NL200/201 into your PC for the first time. You will need the device driver properly installed before you can connect to the NL200/201 via USB. See Appendix D, NL200/201 Driver Installation Instructions, for instructions on installing the device driver. • Ensure the NL200/201 is powered. • Connect the supplied USB cable between a USB port on your computer and the USB port on the NL200/201. • Open DevConfig. • Under Device Type, select "NL200". • Click the Browse button next to "Communication Port". • Select the port labeled "NL200". 9
-
 1
1 -
2
-
3
-
4
-
5
-
6
-
7
-
8
-
9
-
10
-
11
-
 12
12 -
 13
13 -
 14
14 -
 15
15 -
 16
16 -
 17
17 -
 18
18 -
 19
19 -
 20
20 -
 21
21 -
 22
22 -
23
-
24
-
25
-
26
-
27
-
28
-
29
-
30
-
31
-
32
-
33
-
34
-
35
-
36
-
37
-
38
-
39
-
40
-
41
-
42
-
43
-
44
-
45
-
46
-
47
-
48
-
49
-
50
-
51
-
52
-
53
-
54
-
55
-
56
-
57
-
58
-
59
-
60
-
61
-
62
 |
 |
