Campbell Scientific NL201 NL200/NL201 Network Link Interface - Page 20
Operation, 7.1 PakBus Router, 7.1.1 Physical Setup, 7.1.2 Configuring the NL200/201
 |
View all Campbell Scientific NL201 manuals
Add to My Manuals
Save this manual to your list of manuals |
Page 20 highlights
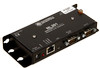
NL200/201 Network Link Interface 7. Operation This section describes how to configure your NL200/201 for different operational modes. See Section 4, Overview, for help in determining which mode to use. 7.1 PakBus Router When the RS-232 or CS I/O port is configured as a PakBus router, the NL200/201 can route packets to other devices in the network that it has in its routing table. These are devices that the NL200/201 has learned about through beaconing or allowed-neighbor lists. Beacon Interval - Devices in a PakBus network may broadcast a hellomessage to other devices in order to determine "neighbor" devices. Neighbor devices are devices that can be communicated with directly by the current device without being routed through an intermediate device. A beacon in a PakBus network helps to ensure that all devices in the network are aware of which other devices are viable in the network. The beacon interval determines how often a beacon will be sent out. Set the beacon interval to 0 to disable beacons. Verify Interval - This interval, in seconds, determines the rate at which the NL200/201 will attempt to start a hello transaction with a neighbor if no other communication has taken place within the interval. If Verify Interval is set to 0, the verify interval becomes 2.5 times the Beacon Interval. If both the Beacon Interval and Verify Interval are set to 0, the verify interval becomes 300 seconds. PakBus Neighbors Allowed - You can set a list of "acceptable neighbors" which the NL200/201 expects to hear from within set intervals (the Verify Interval). If the NL200/201 does not hear from neighbors in this list within the Verify Interval, it will attempt to contact them on its own. It will ignore all devices it hears that are not on the PakBus Neighbors Allowed list except if the PakBus address is ≥4000. Hellos from devices with PakBus address ≥4000 are automatically accepted as neighbors. 7.1.1 Physical Setup Using the supplied serial cable, connect the NL200/201's CS I/O port or RS232 port to the datalogger's CS I/O or RS-232 port, respectively. The NL201 will be powered if connected via CS I/O. Alternatively, power the NL200 or NL201 through the barrel-connector jack located on the edge of the device. Connect the NL200/201 to your network using an Ethernet cable, attaching one end of the cable to the NL200/201's Ethernet port and the other end to your network. Ensure that the device is powered up by inspecting the Power LED. 7.1.2 Configuring the NL200/201 RS-232 PakBus Router • Connect to the NL200/201 in DevConfig (see Section 6, Configuring the NL200/201). 12
-
 1
1 -
2
-
3
-
4
-
5
-
6
-
7
-
8
-
9
-
10
-
11
-
12
-
13
-
14
-
 15
15 -
 16
16 -
 17
17 -
 18
18 -
 19
19 -
 20
20 -
 21
21 -
 22
22 -
 23
23 -
 24
24 -
 25
25 -
26
-
27
-
28
-
29
-
30
-
31
-
32
-
33
-
34
-
35
-
36
-
37
-
38
-
39
-
40
-
41
-
42
-
43
-
44
-
45
-
46
-
47
-
48
-
49
-
50
-
51
-
52
-
53
-
54
-
55
-
56
-
57
-
58
-
59
-
60
-
61
-
62
 |
 |
