Campbell Scientific NL201 NL200/NL201 Network Link Interface - Page 32
Troubleshooting, The yellow Link/Act light
 |
View all Campbell Scientific NL201 manuals
Add to My Manuals
Save this manual to your list of manuals |
Page 32 highlights
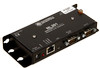
NL200/201 Network Link Interface 9. Troubleshooting This section covers some common problems that might be encountered when using the NL200/201. This is not comprehensive but should provide some insight and ability to correct simple errors without a call to Campbell Scientific technical support. When your Campbell Scientific software cannot establish a link to a remote datalogger that is connected to the NL200/201, do the following: 1. Check all your power connections. • Your NL200/201 and any hub and/or router being used must be connected to power. Check power indicator lights to make sure your devices are powered. 2. Check all your cables. • Verify that your Ethernet cable is securely plugged in between your NL200/201 and your hub, router, or PC. The yellow Link/Act light on the NL200/201 should start blinking when it is connected to the Ethernet. • If an Ethernet cable is connected but the Link/Act light is not blinking, try a new Ethernet cable. You can also try moving the existing Ethernet cable to a functioning system to determine if the cable is working. 3. Power cycle the NL200/201 and your hub/router/PC. • Turn off or unplug your hub/router/PC and NL200/201. Wait 10 seconds and then plug them back in or turn them on. A full restart may take 30 to 60 seconds. 4. Check the settings of the NL200/201. • Make sure the assigned NL200/201 IP address (DHCP or static) and the IP address of the PC you are trying to connect from are able to communicate with each other. (Your network administrator can help you with this.) For example, the following addresses are able to communicate: NL200/201: IP address: 192.168.0.2, Network Mask: 255.255.255.0 PC: IP address: 192.168.0.3, Network Mask: 255.255.255.0 • If you are using DHCP to assign an IP address to the NL200/201, use DevConfig to read the IP address assigned to your NL200/201. This is done through a USB connection to the NL200/201 while the NL200/201 is connected to your network. • The IP address assigned to the NL200/201 must be unique on your network. 24
-
 1
1 -
2
-
3
-
4
-
5
-
6
-
7
-
8
-
9
-
10
-
11
-
12
-
13
-
14
-
15
-
16
-
17
-
18
-
19
-
20
-
21
-
22
-
23
-
24
-
25
-
26
-
 27
27 -
 28
28 -
 29
29 -
 30
30 -
 31
31 -
 32
32 -
 33
33 -
 34
34 -
 35
35 -
 36
36 -
 37
37 -
38
-
39
-
40
-
41
-
42
-
43
-
44
-
45
-
46
-
47
-
48
-
49
-
50
-
51
-
52
-
53
-
54
-
55
-
56
-
57
-
58
-
59
-
60
-
61
-
62
 |
 |
