Canon 2812B004 Quick Start Guide - Page 64
Template bundled with the dome, a hole for in-ceiling bracket.
 |
UPC - 013803099478
View all Canon 2812B004 manuals
Add to My Manuals
Save this manual to your list of manuals |
Page 64 highlights
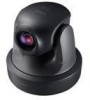
Step 4 Install the Camera 2. Determine the installation position of the camera. Apply the bundled template onto the dome to determine the hole positions for backside ceiling bracket and in-ceiling bracket, and mark the positions using a pencil, etc. Template bundled with the dome Backside ceiling bracket Camera direction ø7.0mm Height 10.0mm 3. Open in the ceiling the holes (3 locations) for installing the backside ceiling bracket, as well as a hole for in-ceiling bracket. Note After the holes have been opened, be careful not to let shavings, etc., enter the dome when the indoor dome housing is installed. 4. Install the backside ceiling bracket in the ceiling. Access from inside the ceiling and insert the projections of the backside ceiling bracket into the holes opened in step 3. Tip It is recommended that the backside ceiling bracket be temporarily secured with doublesided adhesive tape, etc., so that the backside ceiling bracket will not separate when the dome is secured later on. 2-22
-
 1
1 -
2
-
3
-
4
-
5
-
6
-
7
-
8
-
9
-
10
-
11
-
12
-
13
-
14
-
15
-
16
-
17
-
18
-
19
-
20
-
21
-
22
-
23
-
24
-
25
-
26
-
27
-
28
-
29
-
30
-
31
-
32
-
33
-
34
-
35
-
36
-
37
-
38
-
39
-
40
-
41
-
42
-
43
-
44
-
45
-
46
-
47
-
48
-
49
-
50
-
51
-
52
-
53
-
54
-
55
-
56
-
57
-
58
-
 59
59 -
 60
60 -
 61
61 -
 62
62 -
 63
63 -
 64
64 -
 65
65 -
 66
66 -
 67
67 -
 68
68 -
 69
69 -
70
-
71
-
72
-
73
-
74
-
75
-
76
-
77
-
78
 |
 |
