Canon 3305211 User Manual - Page 109
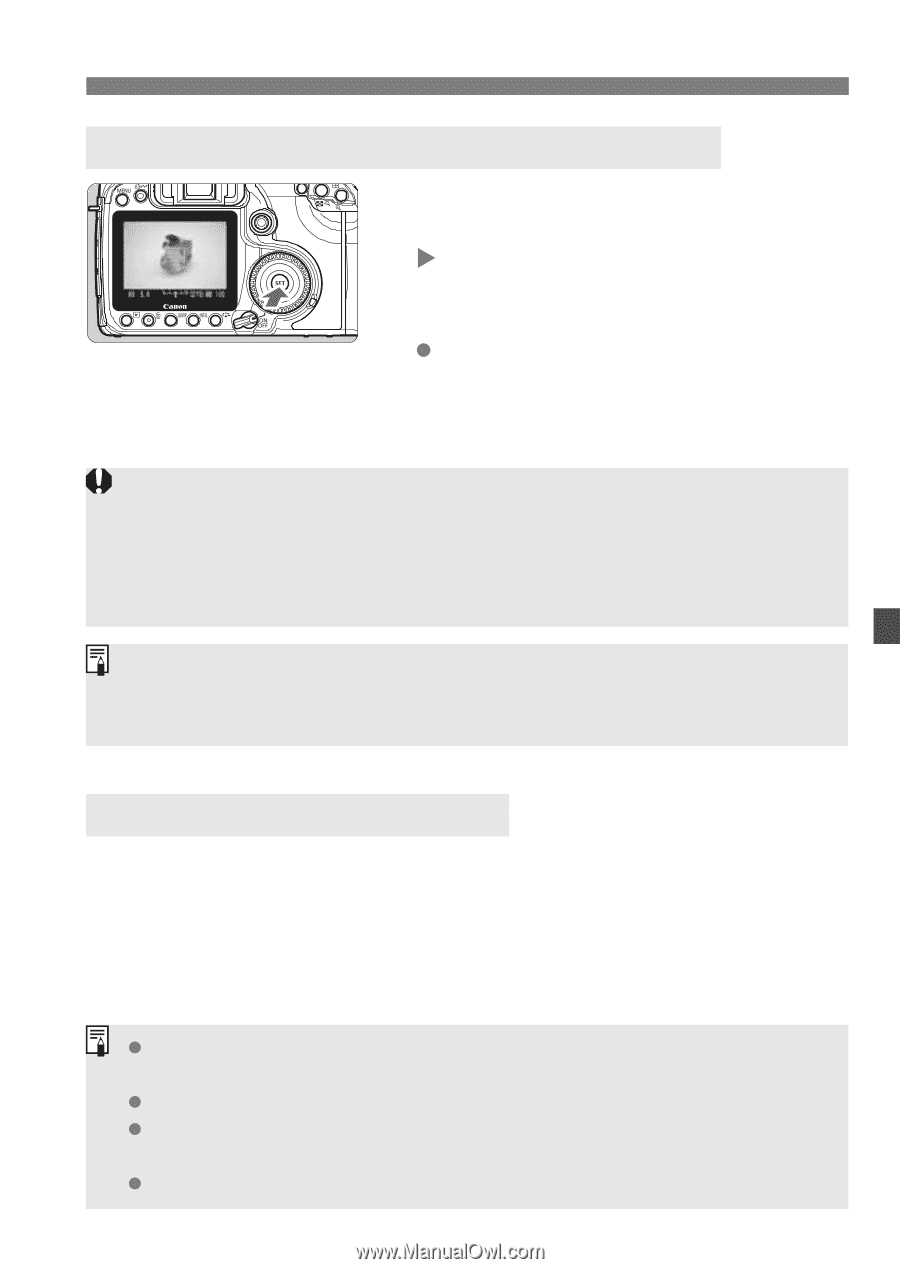
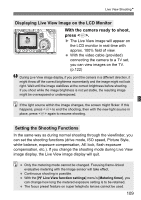
With the camera ready to shoot, press <, >., Displaying Live View Image on the LCD Monitor,
 |
UPC - 689076851770
View all Canon 3305211 manuals
Add to My Manuals
Save this manual to your list of manuals |
Page 109 highlights
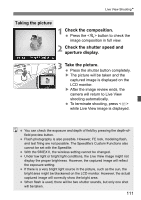
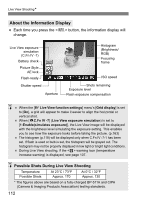
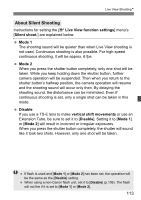
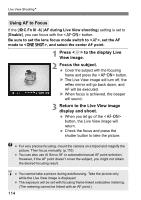
Live View ShootingN Displaying Live View Image on the LCD Monitor With the camera ready to shoot, press . X The Live View image will appear on the LCD monitor in real-time with approx. 100% field of view. With the video cable (provided) connecting the camera to a TV set, you can view images on the TV. (p.122) During Live View image display, if you point the camera in a different direction, it might throw off the correct brightness momentarily and the image might not look right. Wait until the image stabilizes at the correct brightness before shooting. If you shoot while the image brightness is not yet stable, the resulting image might be overexposed or underexposed. If the light source within the image changes, the screen might flicker. If this happens, press to end the shooting, then with the new light source in place, press again to resume shooting. Setting the Shooting Functions In the same way as during normal shooting through the viewfinder, you can set the shooting functions (drive mode, ISO speed, Picture Style, white balance, exposure compensation, AE lock, flash exposure compensation, etc.). If you change the shooting mode during Live View image display, the Live View image display will quit. Only the metering mode cannot be changed. Focusing frame-linked evaluative metering with the image sensor will take effect. Continuous shooting is possible. With the [6 Live View function settings] menu's [Metering timer], you can change how long the metered exposure setting is to be retained. The focus preset feature on super telephoto lenses cannot be used. 109
-
 1
1 -
2
-
3
-
4
-
5
-
6
-
7
-
8
-
9
-
10
-
11
-
12
-
13
-
14
-
15
-
16
-
17
-
18
-
19
-
20
-
21
-
22
-
23
-
24
-
25
-
26
-
27
-
28
-
29
-
30
-
31
-
32
-
33
-
34
-
35
-
36
-
37
-
38
-
39
-
40
-
41
-
42
-
43
-
44
-
45
-
46
-
47
-
48
-
49
-
50
-
51
-
52
-
53
-
54
-
55
-
56
-
57
-
58
-
59
-
60
-
61
-
62
-
63
-
64
-
65
-
66
-
67
-
68
-
69
-
70
-
71
-
72
-
73
-
74
-
75
-
76
-
77
-
78
-
79
-
80
-
81
-
82
-
83
-
84
-
85
-
86
-
87
-
88
-
89
-
90
-
91
-
92
-
93
-
94
-
95
-
96
-
97
-
98
-
99
-
100
-
101
-
102
-
103
-
 104
104 -
 105
105 -
 106
106 -
 107
107 -
 108
108 -
 109
109 -
 110
110 -
 111
111 -
 112
112 -
 113
113 -
 114
114 -
115
-
116
-
117
-
118
-
119
-
120
-
121
-
122
-
123
-
124
-
125
-
126
-
127
-
128
-
129
-
130
-
131
-
132
-
133
-
134
-
135
-
136
-
137
-
138
-
139
-
140
-
141
-
142
-
143
-
144
-
145
-
146
-
147
-
148
-
149
-
150
-
151
-
152
-
153
-
154
-
155
-
156
-
157
-
158
-
159
-
160
-
161
-
162
-
163
-
164
-
165
-
166
-
167
-
168
-
169
-
170
-
171
-
172
-
173
-
174
-
175
-
176
-
177
-
178
-
179
-
180
-
181
-
182
-
183
-
184
-
185
-
186
-
187
-
188
-
189
-
190
-
191
-
192
-
193
-
194
-
195
-
196
 |
 |