Canon 8089A004 EOS Rebel Ti manual - Page 43
Automatic Depth-of-Field AE
 |
UPC - 081097003402
View all Canon 8089A004 manuals
Add to My Manuals
Save this manual to your list of manuals |
Page 43 highlights
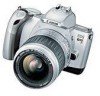
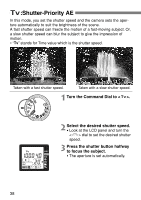
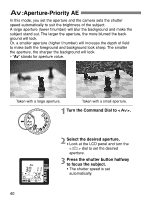
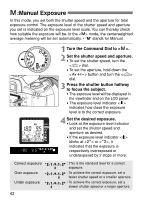
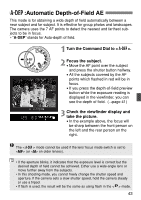
:Automatic Depth-of-Field AE This mode is for obtaining a wide depth of field automatically between a near subject and far subject. It is effective for group photos and landscapes. The camera uses the 7 AF points to detect the nearest and farthest subjects to be in focus. ∗ "A-DEP" stands for Auto-depth of field. 1 Turn the Command Dial to < >. 2 Focus the subject. • Move the AF point over the subject and press the shutter button halfway. • All the subjects covered by the AF points which flashed in red will be in focus. • If you press the depth-of-field preview button while the exposure reading is displayed in the viewfinder, you can see the depth of field. (→page 41) 3 Check the viewfinder display and take the picture. • In the example above, the focus will be sharp between the front person on the left and the rear person on the right. The < > mode cannot be used if the lens' focus mode switch is set to (or on older lenses). • If the aperture blinks, it indicates that the exposure level is correct but the desired depth of field cannot be achieved. Either use a wide-angle lens or move further away from the subjects. • In this shooting mode, you cannot freely change the shutter speed and aperture. If the camera sets a slow shutter speed, hold the camera steady or use a tripod. • If flash is used, the result will be the same as using flash in the < > mode. 43
-
 1
1 -
2
-
3
-
4
-
5
-
6
-
7
-
8
-
9
-
10
-
11
-
12
-
13
-
14
-
15
-
16
-
17
-
18
-
19
-
20
-
21
-
22
-
23
-
24
-
25
-
26
-
27
-
28
-
29
-
30
-
31
-
32
-
33
-
34
-
35
-
36
-
37
-
 38
38 -
 39
39 -
 40
40 -
 41
41 -
 42
42 -
 43
43 -
 44
44 -
 45
45 -
 46
46 -
 47
47 -
 48
48 -
49
-
50
-
51
-
52
-
53
-
54
-
55
-
56
-
57
-
58
-
59
-
60
 |
 |