Canon CanoScan D646U CanoScan D646U Quick Start Guide - Page 10
Using the Macintosh Platform
 |
View all Canon CanoScan D646U manuals
Add to My Manuals
Save this manual to your list of manuals |
Page 10 highlights
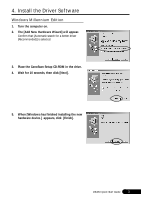
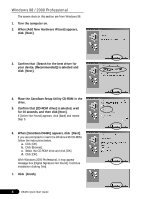
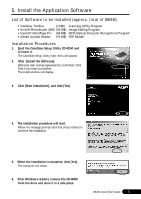
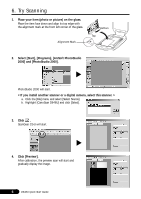
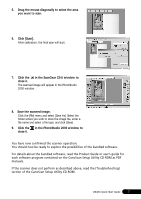
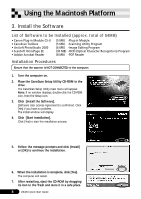
Using the Macintosh Platform 3. Install the Software List of Software to be Installed (approx. total of 54MB) • Canon Plug-in Module CS-U • CanoScan Toolbox • ArcSoft PhotoStudio 2000 • ScanSoft OmniPage SE • Adobe Acrobat Reader (5 MB) -Plug-in Module (5 MB) -Scanning Utility Program (6 MB) -Image Editing Program (30 MB) -OCR (Optical Character Recognition) Program (8 MB) -PDF Reader Installation Procedures Ensure that the scanner is NOT CONNECTED to the computer. 1. Turn the computer on. 2. Place the CanoScan Setup Utility CD-ROM in the drive. The CanoScan Setup Utility main menu will appear. Note: If no window displays, double-click the CD-ROM icon, then the Setup icon. 3. Click [Install the Software]. [Software User License Agreement] is confirmed. Click [Yes] if you have no problem. The install window will display. 4. Click [Start Installation]. Click [Yes] to start the installation process. 5. Follow the message prompts and click [Install] or [OK] to continue the installation. 6. When the installation is complete, click [Yes]. The computer will restart. 7. After restarting, eject the CD-ROM by dragging its icon to the Trash and store it in a safe place. 8 D646U Quick Start Guide
-
 1
1 -
2
-
3
-
4
-
 5
5 -
 6
6 -
 7
7 -
 8
8 -
 9
9 -
 10
10 -
 11
11 -
 12
12 -
 13
13 -
 14
14
 |
 |
