Canon CanoScan D646U CanoScan D646U Quick Start Guide - Page 11
Connect the Computer, Try Scanning
 |
View all Canon CanoScan D646U manuals
Add to My Manuals
Save this manual to your list of manuals |
Page 11 highlights
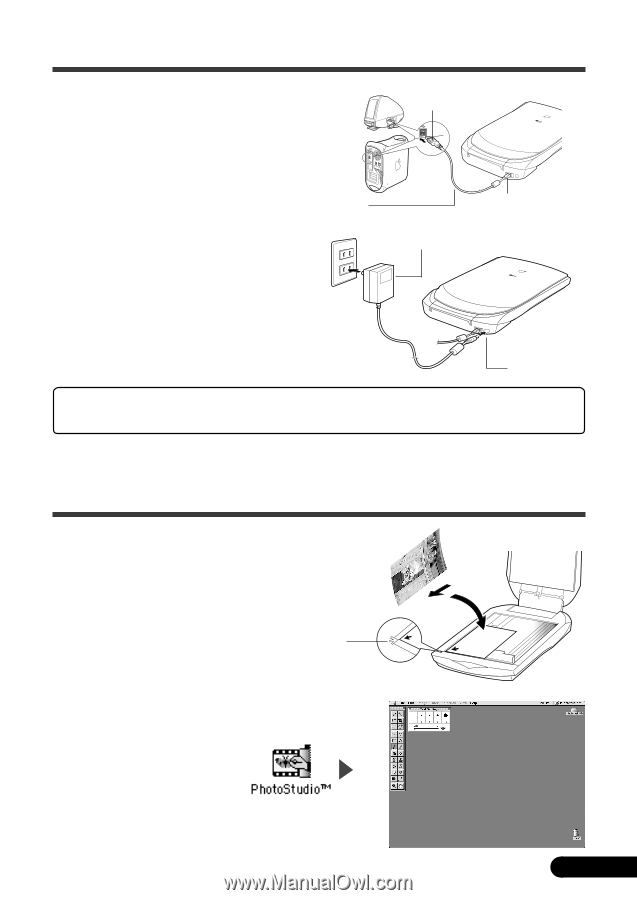
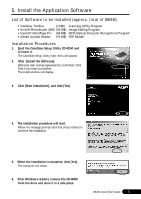
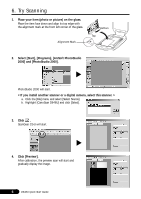
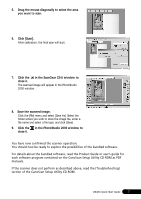
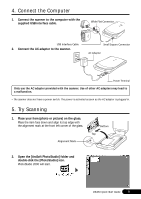
4. Connect the Computer 1. Connect the scanner to the computer with the supplied USB interface cable. Wide Flat Connector USB Interface Cable 2. Connect the AC adapter to the scanner. Small Square Connector AC Adapter Power Terminal Only use the AC adapter provided with the scanner. Use of other AC adapters may lead to a malfunction. • The scanner does not have a power switch. The power is activated as soon as the AC adapter is plugged in. 5. Try Scanning 1. Place your item (photo or picture) on the glass. Place the item face down and align its top edge with the alignment mark at the front left corner of the glass. Alignment Mark Bottom Top 2. Open the [ArcSoft PhotoStudio] folder and double-click the [PhotoStudio] icon. PhotoStudio 2000 will start. D646U Quick Start Guide 9
-
 1
1 -
2
-
3
-
4
-
5
-
 6
6 -
 7
7 -
 8
8 -
 9
9 -
 10
10 -
 11
11 -
 12
12 -
 13
13 -
 14
14
 |
 |