Canon CanoScan D660U CanoScan D660U Setup - Page 1
Canon CanoScan D660U Manual
 |
View all Canon CanoScan D660U manuals
Add to My Manuals
Save this manual to your list of manuals |
Page 1 highlights
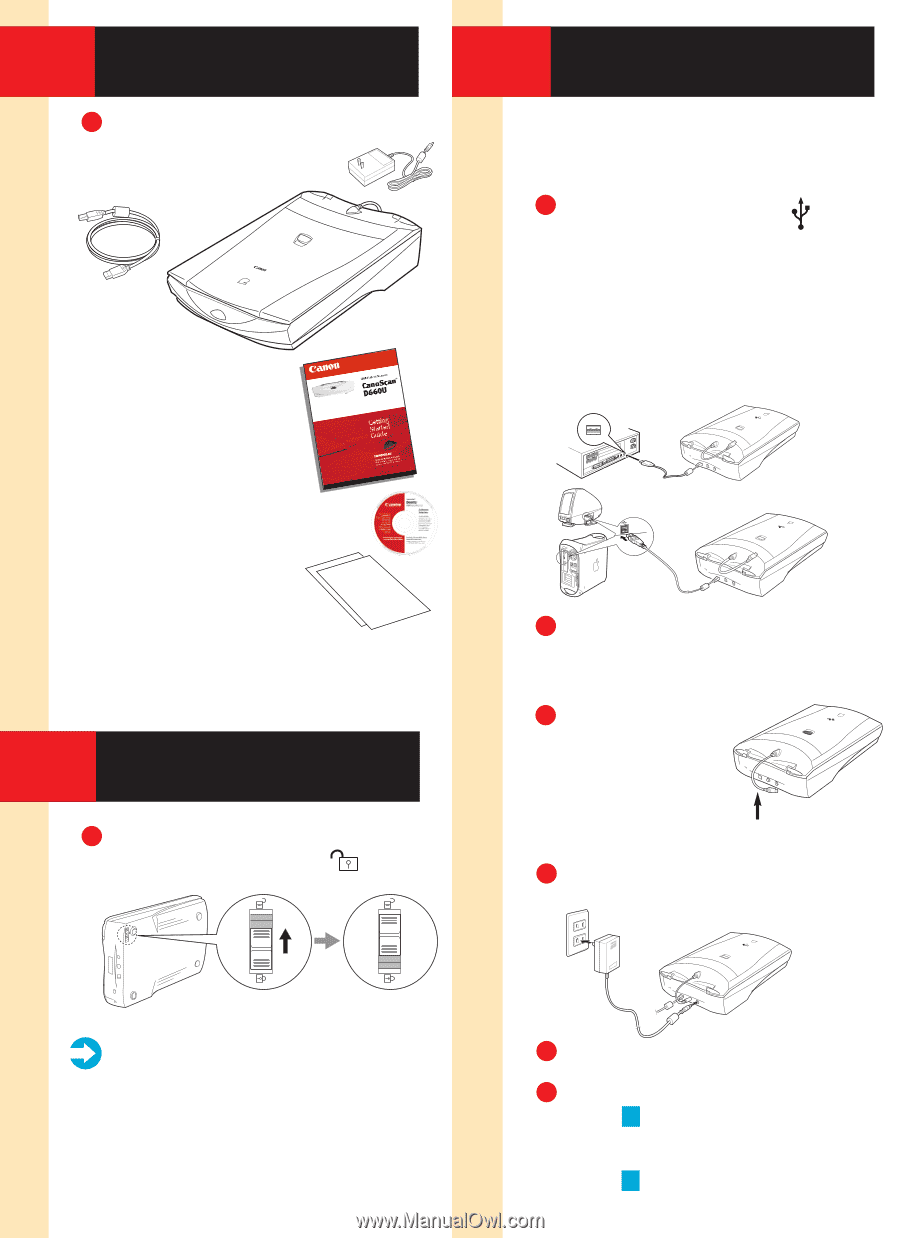
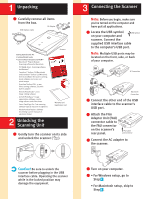
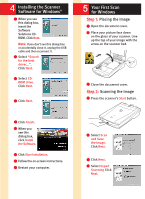
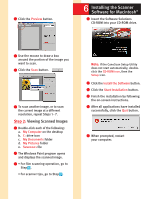
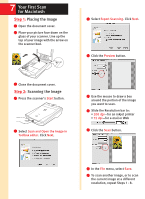
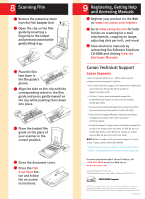
1 Unpacking 1 Carefully remove all items from the box. AC Adapter USB Interface Cable Getting Started Guide Kit: • Getting Started Guide • Canon Software Solutions CD-ROM- s Macintosh® Plug-in Module: Scanning software for Macintosh s PC TWAIN driver: Scanning software for Windows® s CanoScan® Toolbox CS (Macintosh) and ScanGear® Toolbox CS (Windows): One-click software for easier scanning; loads software and scans and prints images s ScanGear Toolbox FAU: 35 mm film-scanning software; use with built-in adapter s ArcSoft PhotoStudio™ 2000: Image editing software s ArcSoft PhotoBase™: Image organization software; create image albums and slide shows s Caere OmniPage Pro: Text scanning software (optical character recognition) s Adobe Acrobat Reader: Software for viewing scanner manuals in electronic format 2 Unlocking the Scanning Unit Scanner Warranty Card Registration Card 1 Gently turn the scanner on its side and unlock the scanner ( ). 3 Connecting the Scanner Note: Before you begin, make sure you've turned on the computer and have quit all applications. 1 Locate the USB symbol USB Symbol on your computer and scanner. Connect the supplied USB interface cable to the computer's USB port. Note: Multiple USB ports may be located on the front, side, or back of your computer. PC Connection Macintosh Connection 2 Connect the other end of the USB interface cable to the scanner's USB port. 3 Attach the Film Adapter Unit (FAU) connector cable to the FAU connector on the scanner's rear panel. FAU Cable and Connector 4 Connect the AC adapter to the scanner. Caution! Be sure to unlock the scanner before plugging in the USB interface cable. Operating the scanner while in the locked position may damage the equipment. 5 Turn on your computer. 6 • For Windows setup, go to Step 4 . • For Macintosh setup, skip to Step 6 .
-
 1
1 -
 2
2 -
 3
3 -
 4
4 -
 5
5 -
 6
6
 |
 |