Canon CanoScan LiDE 500F CanoScan LiDE500F Quick Start Guide - Page 8
Connecting the Scanner - windows 7
 |
View all Canon CanoScan LiDE 500F manuals
Add to My Manuals
Save this manual to your list of manuals |
Page 8 highlights
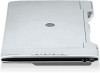
Connecting the Scanner Connecting the Scanner 1 Connect the scanner to the computer with the supplied USB interface cable. USB Connector Wide Flat Connector Small Square Connector USB Interface Cable • Only use the USB interface cable provided with the scanner. Use of other cables may lead to a malfunction. • When the scanner is connected to the USB 1.1 port on Windows XP and "HI-SPEED USB Device Plugged into non-HI-SPEED USB Hub" message appears, ignore the message. The scanner operates in this condition without problems. • The scanner does not have a power switch. The power is activated as soon as the computer is turned on. There are cable holders on the side of the scanner to hold the USB cable. Use the holders to organize the cable. Hold the cable with the holders before setting up the stand in the upright position. Cable Holders 8
-
 1
1 -
2
-
 3
3 -
 4
4 -
 5
5 -
 6
6 -
 7
7 -
 8
8 -
 9
9 -
 10
10 -
 11
11 -
 12
12 -
 13
13 -
14
-
15
-
16
-
17
-
18
-
19
-
20
-
21
-
22
 |
 |
