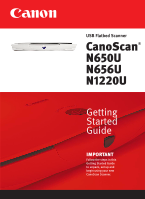
Canon CanoScan N650U Getting Started Guide - Page 4
Installing the Scanner, Software for Macintosh
 |
View all Canon CanoScan N650U manuals
Add to My Manuals
Save this manual to your list of manuals |
Page 4 highlights
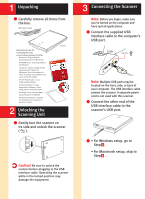
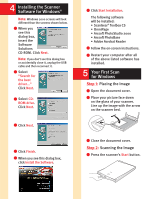
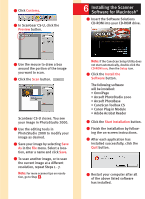
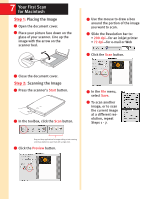
2 Click Custom1. 3 In ScanGear CS-U, click the Preview button. 6 Installing the Scanner Software for Macintosh® 1 Insert the Software Solutions CD-ROM into your CD-ROM drive. 4 Use the mouse to draw a box around the portion of the image you want to scan. 5 Click the Scan button. ScanGear CS-U closes. You see your image in PhotoStudio 2000. 6 Use the editing tools in PhotoStudio 2000 to modify your image as desired. 7 Save your image by selecting Save As in the File menu. Select a location, enter a name and click Save. 8 To scan another image, or to scan the current image at a different resolution, repeat Steps 1 - 7. Note: For more scanner tips on resolu- tion, go to Step 8 . Note: If the CanoScan Setup Utility does not start automatically, double-click the CD-ROM icon, then the Setup icon. 2 Click the Install the Software button. The following software will be installed: • OmniPage • Arcsoft PhotoStudio 2000 • Arcsoft PhotoBase • CanoScan Toolbox CS • Canon Plug-in Module • Adobe Acrobat Reader 3 Click the Start Installation button. 4 Finish the installation by following the on-screen instructions. 5 After each application has installed successfully, click the Quit button. 6 Restart your computer after all of the above listed software has installed.
-
 1
1 -
 2
2 -
 3
3 -
 4
4 -
 5
5 -
 6
6
 |
 |
