Canon EOS 30D ImageBrowser 6.1.1a for Macintosh Instruction Manual - Page 52
Adjusting RAW Images, Processing RAW Images].
 |
UPC - 013803065114
View all Canon EOS 30D manuals
Add to My Manuals
Save this manual to your list of manuals |
Page 52 highlights
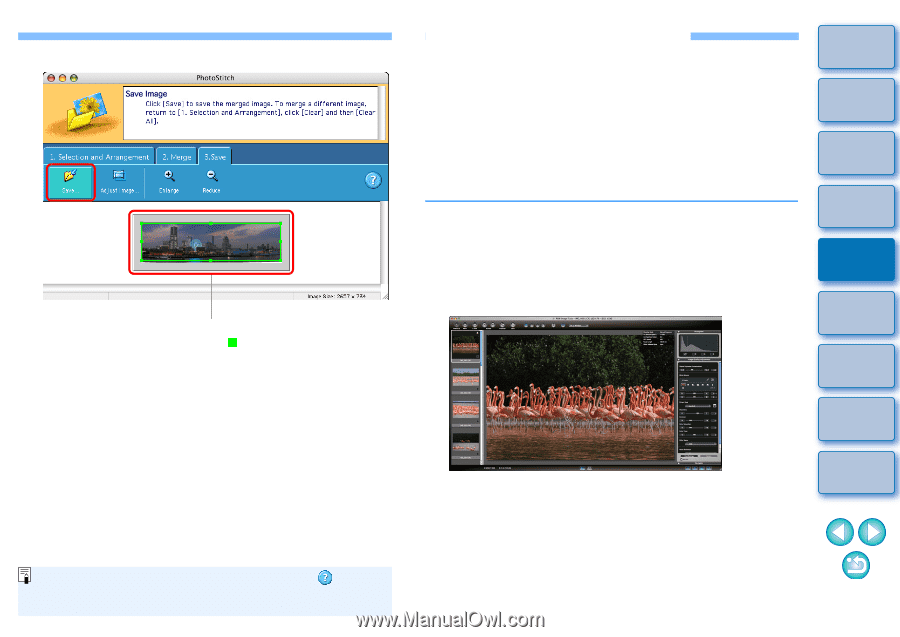
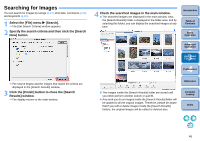
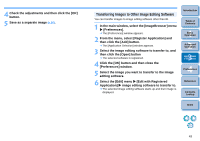
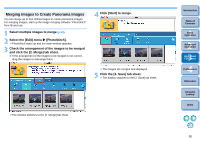
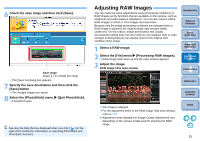
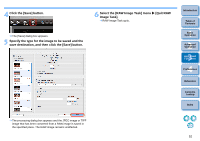
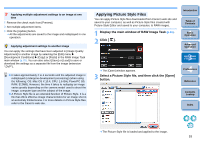
6 Check the save range and then click [Save]. Save range Drag [ ] to change the range The [Save As] dialog box appears. 7 Specify the save destination and then click the [Save] button. The merged images are saved. 8 Select the [PhotoStitch] menu X [Quit PhotoStitch]. PhotoStitch quits. See also the Help that are displayed when you click [ ] on the right of the window for information on operating PhotoStitch and PhotoStitch functions. Adjusting RAW Images You can make the same adjustments (reset processing conditions) to RAW images as the functions that are available on the camera, such as brightness and white balance adjustment. You can also convert edited RAW images to JPEG or TIFF images and save them. Because only the image processing conditions are changed when a RAW image is adjusted, the original image data remains totally unaffected. For this reason, image deterioration that usually accompanies editing does not occur and you can readjust, redo or undo changes knowing that you can always revert to the original shot condition of the image. 1 Select a RAW image. 2 Select the [File] menu X [Processing RAW Images]. RAW Image Task starts up and the main window appears. 3 Adjust the image. RAW Image Task main window Introduction Table of Contents 1Basic Operation 2Advanced Operation 3High-Level Functions 4 Preferences Reference The image is adjusted. For the adjustment items in the RAW Image Task main window, refer to p.70. Adjustment items displayed in [Image Quality Adjustment] vary depending on the camera model used for shooting the RAW image. Contents Lookup Index 51
-
 1
1 -
2
-
3
-
4
-
5
-
6
-
7
-
8
-
9
-
10
-
11
-
12
-
13
-
14
-
15
-
16
-
17
-
18
-
19
-
20
-
21
-
22
-
23
-
24
-
25
-
26
-
27
-
28
-
29
-
30
-
31
-
32
-
33
-
34
-
35
-
36
-
37
-
38
-
39
-
40
-
41
-
42
-
43
-
44
-
45
-
46
-
 47
47 -
 48
48 -
 49
49 -
 50
50 -
 51
51 -
 52
52 -
 53
53 -
 54
54 -
 55
55 -
 56
56 -
 57
57 -
58
-
59
-
60
-
61
-
62
-
63
-
64
-
65
-
66
-
67
-
68
-
69
-
70
-
71
-
72
-
73
-
74
-
75
 |
 |