Canon EOS M3 User Guide - Page 48
Other Shooting Modes
 |
View all Canon EOS M3 manuals
Add to My Manuals
Save this manual to your list of manuals |
Page 48 highlights
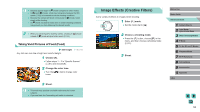
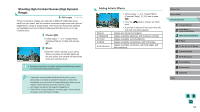
3 Other Shooting Modes Shoot more effectively in various scenes, and take shots enhanced with unique image effects or captured using special functions Shooting with Your Favorite Settings (Creative Assist) Even if you don't know much about photography, you can select from onscreen options written in plain English to change the brightness, blur the background, and take pictures that are all your own. You can also save your favorite settings and easily load them back in later. Settings can even be applied from images shot in [ ] mode. When you display images shot in [ ] mode, the camera can show you which [ ] mode settings correspond to which camera settings, making it easier to step up to the Creative Auto shooting modes or [ ]). The following options can be changed. Background This lets you define how the background appears. The higher the value this is, the sharper the background gets. The lower the value, the more blurred the background. Brightness This lets you adjust the image brightness. The higher this value, the brighter the image is. Contrast This lets you adjust the contrast. The higher this is, the stronger the contrast between light and dark colors. Saturation This lets you define how vivid the colors are. The higher this value, the more colorful the image; the lower it is, the more subdued and refined it becomes. Color tone This lets you define the tone of the colors. Higher values result in warmer colors, while lower ones make the colors seem colder. Monochrome You can choose from five color tones in Monochrome: [ B/W], [ Sepia], [ Blue], [ Purple] and [ Green]. Set this to [ ] to shoot in color. If this is set to anything besides [ ], [Saturation] and [Color tone] are not available. Before Use Basic Guide Advanced Guide 1 Camera Basics 2 Auto Mode / Hybrid Auto Mode 3 Other Shooting Modes 4 P Mode 5 Tv, Av, aMn,danMdMCoMdeodes 6 Playback Mode 7 Wi-Fi Functions 8 Set-Up Menu 9 Accessories 10 Appendix Index 48
-
 1
1 -
2
-
3
-
4
-
5
-
6
-
7
-
8
-
9
-
10
-
11
-
12
-
13
-
14
-
15
-
16
-
17
-
18
-
19
-
20
-
21
-
22
-
23
-
24
-
25
-
26
-
27
-
28
-
29
-
30
-
31
-
32
-
33
-
34
-
35
-
36
-
37
-
38
-
39
-
40
-
41
-
42
-
 43
43 -
 44
44 -
 45
45 -
 46
46 -
 47
47 -
 48
48 -
 49
49 -
 50
50 -
 51
51 -
 52
52 -
 53
53 -
54
-
55
-
56
-
57
-
58
-
59
-
60
-
61
-
62
-
63
-
64
-
65
-
66
-
67
-
68
-
69
-
70
-
71
-
72
-
73
-
74
-
75
-
76
-
77
-
78
-
79
-
80
-
81
-
82
-
83
-
84
-
85
-
86
-
87
-
88
-
89
-
90
-
91
-
92
-
93
-
94
-
95
-
96
-
97
-
98
-
99
-
100
-
101
-
102
-
103
-
104
-
105
-
106
-
107
-
108
-
109
-
110
-
111
-
112
-
113
-
114
-
115
-
116
-
117
-
118
-
119
-
120
-
121
-
122
-
123
-
124
-
125
-
126
-
127
-
128
-
129
-
130
-
131
-
132
-
133
-
134
-
135
-
136
-
137
-
138
-
139
-
140
-
141
-
142
-
143
-
144
-
145
-
146
-
147
-
148
-
149
-
150
-
151
-
152
-
153
-
154
-
155
-
156
-
157
-
158
-
159
-
160
-
161
-
162
-
163
-
164
-
165
-
166
-
167
-
168
-
169
-
170
-
171
-
172
-
173
-
174
-
175
-
176
-
177
-
178
-
179
-
180
-
181
-
182
-
183
-
184
-
185
-
186
-
187
-
188
-
189
-
190
-
191
-
192
-
193
-
194
-
195
-
196
-
197
-
198
-
199
-
200
-
201
 |
 |