Canon ES8600 ES8600 8mm Video Camcorder NTSC-E Instruction Manual - Page 11
Charging and attaching the battery pack - camera
 |
UPC - 013803027174
View all Canon ES8600 manuals
Add to My Manuals
Save this manual to your list of manuals |
Page 11 highlights
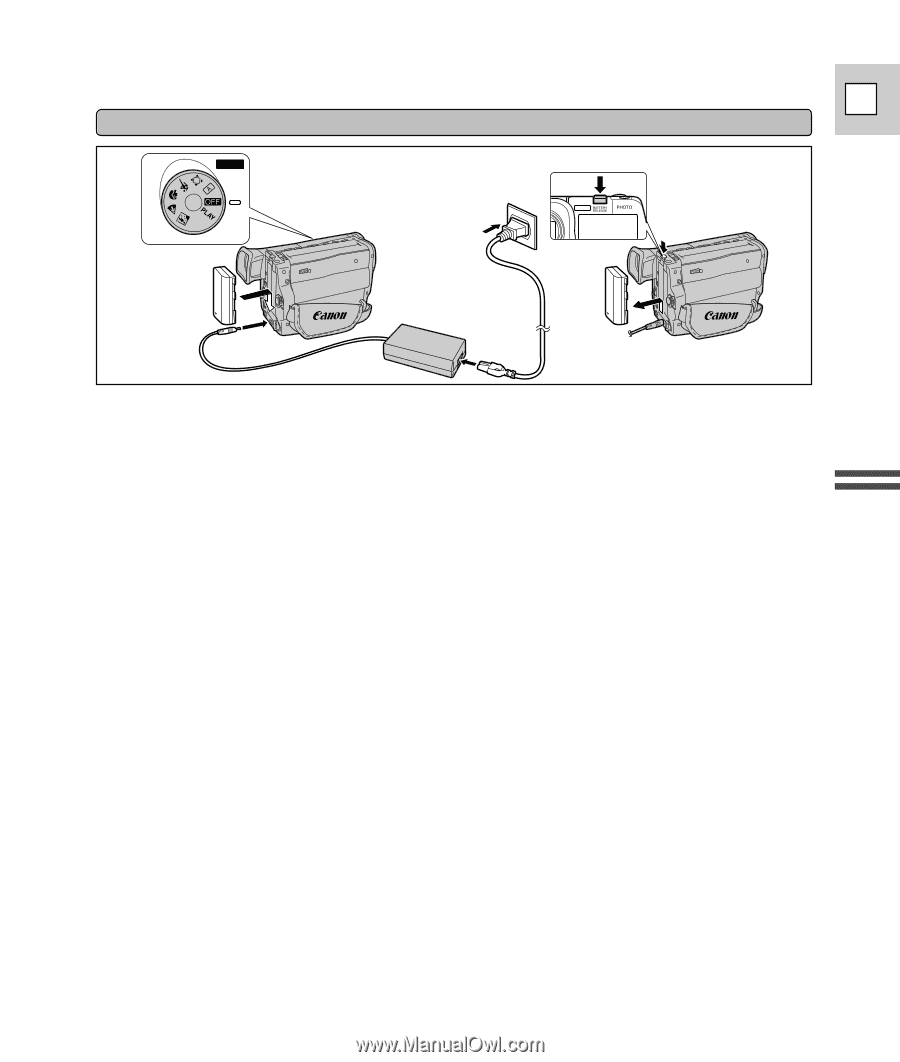
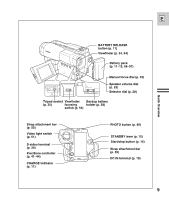
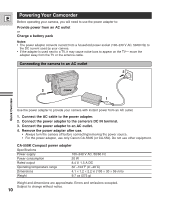
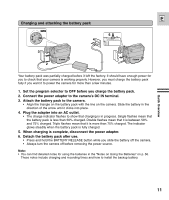
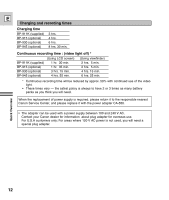
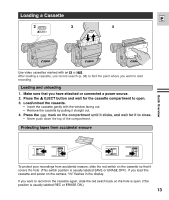
E Charging and attaching the battery pack POWER 6 4 3 2 Quick Overview Your battery pack was partially charged before it left the factory. It should have enough power for you to check that your camera is working properly. However, you must charge the battery pack fully if you want it to power the camera for more than a few minutes. 1. Set the program selector to OFF before you charge the battery pack. 2. Connect the power adapter to the camera's DC IN terminal. 3. Attach the battery pack to the camera. • Align the triangle on the battery pack with the line on the camera. Slide the battery in the direction of the arrow until it clicks into place. 4. Plug the adapter into an AC outlet. • The charge indicator flashes to show that charging is in progress. Single flashes mean that the battery pack is less than 50% charged. Double flashes mean that it is between 50% and 75% charged. Triple flashes mean that it is more than 75% charged. The indicator glows steadily when the battery pack is fully charged. 5. When charging is complete, disconnect the power adapter. 6. Detach the battery pack after use. • Press and hold the BATTERY RELEASE button while you slide the battery off the camera. • Always turn the camera off before removing the power source. Note: • You can find detailed notes for using the batteries in the "Notes on Using the Batteries" on p. 56. These notes include charging and recording times and how to install the backup battery. 11
-
 1
1 -
2
-
3
-
4
-
5
-
 6
6 -
 7
7 -
 8
8 -
 9
9 -
 10
10 -
 11
11 -
 12
12 -
 13
13 -
 14
14 -
 15
15 -
 16
16 -
17
-
18
-
19
-
20
-
21
-
22
-
23
-
24
-
25
-
26
-
27
-
28
-
29
-
30
-
31
-
32
-
33
-
34
-
35
-
36
-
37
-
38
-
39
-
40
-
41
-
42
-
43
-
44
-
45
-
46
-
47
-
48
-
49
-
50
-
51
-
52
-
53
-
54
-
55
-
56
-
57
-
58
-
59
-
60
-
61
-
62
-
63
-
64
-
65
-
66
-
67
-
68
-
69
-
70
-
71
-
72
-
73
-
74
-
75
 |
 |