Canon PowerShot A510 Software Starter Guide Ver.22 - Page 56
ImageBrowser Auto Start Settings - OS X v10.1
 |
View all Canon PowerShot A510 manuals
Add to My Manuals
Save this manual to your list of manuals |
Page 56 highlights
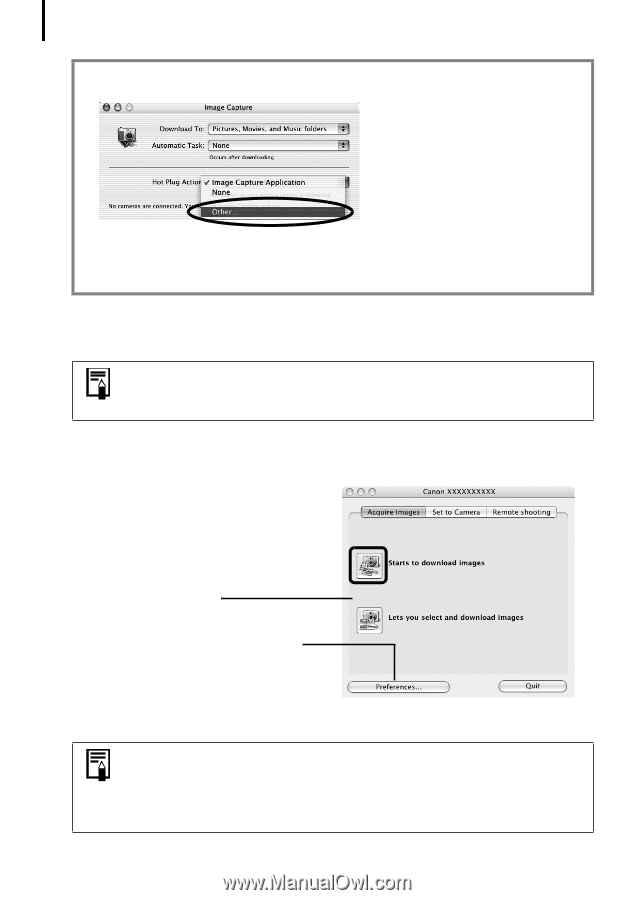
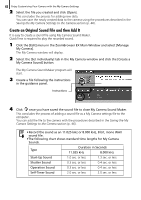
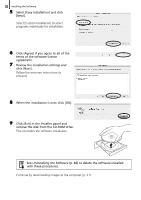
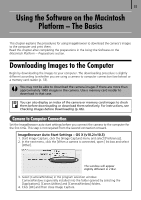
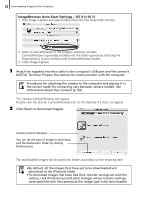
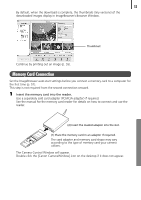
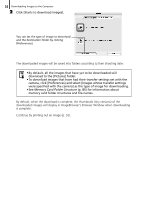
52 Downloading Images to the Computer ImageBrowser Auto Start Settings - OS X (v10.1) 1. Start Image Capture and select [Other] from the Hot Plug Action list box. 2. Select [CameraWindow] in the program selection window. CameraWindow is generally installed into the folder opened by selecting the [Applications], [Canon Utilities] and [CameraWindow] folders. 3. Close Image Capture. 1 Attach the supplied interface cable to the computer's USB port and the camera's DIGITAL Terminal. Prepare the camera for communication with the computer. Procedures for attaching the camera to the computer and placing it in the correct mode for connecting vary between camera models. See Information about Your Camera (p. 94). The Camera Control Window will appear. Double-click the [Canon CameraWindow] icon on the desktop if it does not appear. 2 Click [Starts to download images]. Camera Control Window You can set the type of image to download and the destination folder by clicking [Preferences]. The downloaded images will be saved into folders according to their shooting date. • By default, all the images that have yet to be downloaded will download to the [Pictures] folder. • To download images that have had their transfer settings set with the camera, click [Preferences] and select [Images whose transfer settings were specified with the camera] as the image type to be downloaded.
-
 1
1 -
2
-
3
-
4
-
5
-
6
-
7
-
8
-
9
-
10
-
11
-
12
-
13
-
14
-
15
-
16
-
17
-
18
-
19
-
20
-
21
-
22
-
23
-
24
-
25
-
26
-
27
-
28
-
29
-
30
-
31
-
32
-
33
-
34
-
35
-
36
-
37
-
38
-
39
-
40
-
41
-
42
-
43
-
44
-
45
-
46
-
47
-
48
-
49
-
50
-
 51
51 -
 52
52 -
 53
53 -
 54
54 -
 55
55 -
 56
56 -
 57
57 -
 58
58 -
 59
59 -
 60
60 -
 61
61 -
62
-
63
-
64
-
65
-
66
-
67
-
68
-
69
-
70
-
71
-
72
-
73
-
74
-
75
-
76
-
77
-
78
-
79
-
80
-
81
-
82
-
83
-
84
-
85
-
86
-
87
-
88
-
89
-
90
-
91
-
92
-
93
-
94
-
95
-
96
-
97
-
98
-
99
-
100
-
101
-
102
-
103
-
104
-
105
-
106
 |
 |