Canon PowerShot S120 User Guide - Page 12
Initial Preparations
 |
View all Canon PowerShot S120 manuals
Add to My Manuals
Save this manual to your list of manuals |
Page 12 highlights
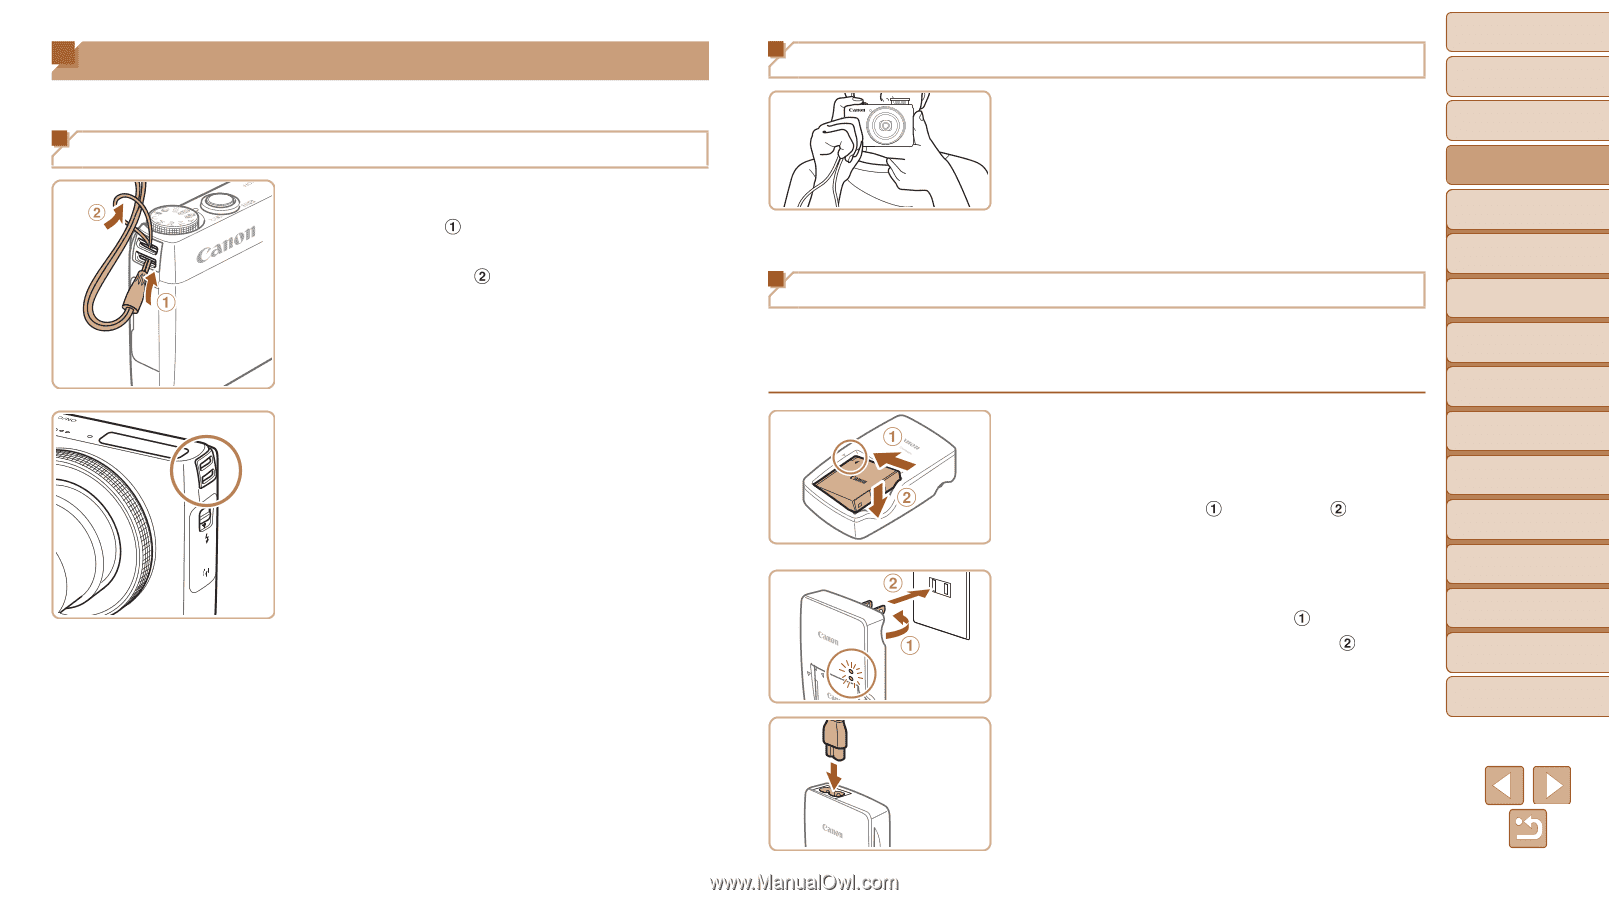
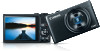
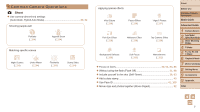
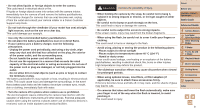
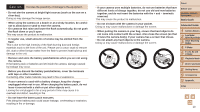
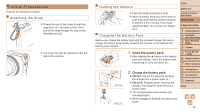
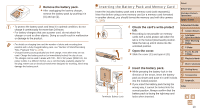
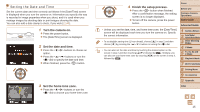
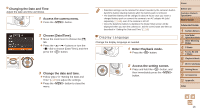
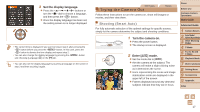
Initial Preparations Prepare for shooting as follows. Attaching the Strap zzThread the end of the strap through the strap hole ( ), and then pull the other end of the strap through the loop on the threaded end ( ). zzThe strap can also be attached to the left side of the camera. Holding the Camera zzPlace the strap around your wrist. zzWhen shooting, keep your arms close to your body and hold the camera securely to prevent it from moving. If you have raised the flash, do not rest your fingers on it. Charging the Battery Pack Before use, charge the battery pack with the included charger. Be sure to charge the battery pack initially, because the camera is not sold with the battery pack charged. 1 Insert the battery pack. zzAfter aligning the marks on the battery pack and charger, insert the battery pack by pushing it in ( ) and down ( ). CB-2LY CB-2LYE 2 Charge the battery pack. zzCB‑2LY: Flip out the plug ( ) and plug the charger into a power outlet ( ). zzCB-2LYE: Plug the power cord into the charger, then plug the other end into a power outlet. zzThe charging lamp turns orange and charging begins. zzWhen charging is finished, the lamp turns green. Cover Before Use Common Camera Operations Basic Guide Advanced Guide 1 Camera Basics 2 Auto Mode / Hybrid Auto Mode 3 Other Shooting Modes 4 P Mode 5 Tv, Av, M, and C Mode 6 Playback Mode 7 Wi-Fi Functions 8 Setting Menu 9 Accessories 10 Appendix Index 12
-
 1
1 -
2
-
3
-
4
-
5
-
6
-
 7
7 -
 8
8 -
 9
9 -
 10
10 -
 11
11 -
 12
12 -
 13
13 -
 14
14 -
 15
15 -
 16
16 -
 17
17 -
18
-
19
-
20
-
21
-
22
-
23
-
24
-
25
-
26
-
27
-
28
-
29
-
30
-
31
-
32
-
33
-
34
-
35
-
36
-
37
-
38
-
39
-
40
-
41
-
42
-
43
-
44
-
45
-
46
-
47
-
48
-
49
-
50
-
51
-
52
-
53
-
54
-
55
-
56
-
57
-
58
-
59
-
60
-
61
-
62
-
63
-
64
-
65
-
66
-
67
-
68
-
69
-
70
-
71
-
72
-
73
-
74
-
75
-
76
-
77
-
78
-
79
-
80
-
81
-
82
-
83
-
84
-
85
-
86
-
87
-
88
-
89
-
90
-
91
-
92
-
93
-
94
-
95
-
96
-
97
-
98
-
99
-
100
-
101
-
102
-
103
-
104
-
105
-
106
-
107
-
108
-
109
-
110
-
111
-
112
-
113
-
114
-
115
-
116
-
117
-
118
-
119
-
120
-
121
-
122
-
123
-
124
-
125
-
126
-
127
-
128
-
129
-
130
-
131
-
132
-
133
-
134
-
135
-
136
-
137
-
138
-
139
-
140
-
141
-
142
-
143
-
144
-
145
-
146
-
147
-
148
-
149
-
150
-
151
-
152
-
153
-
154
-
155
-
156
-
157
-
158
-
159
-
160
-
161
-
162
-
163
-
164
-
165
-
166
-
167
-
168
-
169
-
170
-
171
-
172
-
173
-
174
-
175
-
176
-
177
-
178
-
179
-
180
-
181
-
182
-
183
-
184
-
185
-
186
-
187
-
188
-
189
-
190
-
191
-
192
-
193
-
194
-
195
-
196
-
197
-
198
-
199
-
200
-
201
-
202
-
203
-
204
-
205
-
206
-
207
-
208
-
209
-
210
-
211
-
212
-
213
-
214
-
215
 |
 |