Canon RC-IP00 Remote Camera Controller User Manual - Page 10
Adjusting the Camera Functions, Adjusting Using Function Group Buttons, Adjusting Using CAMERA CONTROL
 |
View all Canon RC-IP00 manuals
Add to My Manuals
Save this manual to your list of manuals |
Page 10 highlights
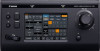
Operation Adjusting the Camera Functions Adjusting Using Function Group Buttons 1 Tap the Function Group button. Functions with a preconfigured combination are assigned to the buttons and knobs. For example, by tapping the [White Balance] button, the [USER1] button can be used to toggle the white balance setting between "AWB"/"Daylight"/"Tungsten"/"Kelv"/ "Manual"/"SetA"/"SetB". Tapping the selected Function Group button again clears the function group selection. Function Group Button Default Setting White Balance F1: WB R:Gain, F2: WB B:Gain, F3: None, F4: PT Speed/None, USER1: White Balance Mode, USER2: WB Calibration Black Balance F1: Master Pedestal, F2: Black Gamma Level, F3: None, User1: None, User2: None, F4: PT Speed/None Black R/B F1: Master Black R, F2: Master Black B, F3: None, User1: None, User2: None, F4: PT Speed/None Speed F1: Focus Speed, F2: Zoom Speed, F3: None, User1: None, User2: None, F4: PT Speed/None Exposure/Focus F1: Focus, F2: Iris, F3: None, User1: One Shot AF, User2: Shooting Mode, F4: PT Speed/ None 2 To change the function, tap the corresponding button on the operation panel to select a function, followed by tapping the [ENTER] button. Adjusting Using CAMERA CONTROL 1 Select a camera to operate. (A P8 "Selecting a Camera") 2 Tap the [CAMERA CONTROL] tab. 3 Adjust the Functions. The adjustable items are as follows. Note that some items might not be adjustable depending on the camera that is connected. [White Balance], [Gain], [Shutter], [Iris] (AUTO ON/OFF), [Focus] (AUTO ON/OFF), [ND], [Sharpness] Adjusting Using FUNC 1 Select a camera to operate. (A P8 "Selecting a Camera") 2 Tap the [FUNC] tab. 3 Adjust the Functions. If the function you want to select is not displayed, tap to jump to the next page. The adjustable items are as follows. Some menus items may not be adjustable depending on the camera that is connected. Digital Zoom, D.Tele-Converter, Soft Zoom Control, PT Acceleration, Image Stabilizer, Focus limit, AF Mode, Face Detection AF, AF Speed, AF Response, AWB Response, AE Response, ND Filter Mode, Auto Slow Shutter, Flicker Reduction, IR Cut Filter, Wiper, Washer, AUX1, AUX2, AUX3, AUX4 Tracing Recording Camera Operations (Tracing) 1 Select a camera to operate. (A P8 "Selecting a Camera") 2 Tap the [STORE] button on the operation panel. 3 Tap the [TRACE] tab and select a number. 4 Tap the [Start Rec] button and operate the camera. 5 Tap the [Stop Rec] button to register the operations. Memo : 0 This function is only supported on IP cameras. 0 Tapping the [Cancel] button while recording is in progress erases the trace record. Playing Camera Operations (Tracing) 1 Select a camera to operate. (A P8 "Selecting a Camera") 2 Tap the [VIEW] button on the operation panel. 3 Tap the [TRACE] tab and select a number. 4 Tap the [Prepare Trace] button to shift to the position to start tracing. 5 Tap the [Execute Trace] button to execute tracing. Memo : 0 Tapping the [Cancel] button stops the tracing process. 0 Selecting the number in the [DELETE] tab and tapping [ENTER] erases the recorded trace. 10 Adjusting the Camera Functions
-
 1
1 -
2
-
3
-
4
-
 5
5 -
 6
6 -
 7
7 -
 8
8 -
 9
9 -
 10
10 -
 11
11 -
 12
12 -
 13
13 -
 14
14 -
 15
15 -
16
-
17
-
18
-
19
-
20
-
21
 |
 |
