Canon RC-IP00 Remote Camera Controller User Manual - Page 11
Settings, Setup Flow, Basic Operations of Menu Screen, Settings Menu
 |
View all Canon RC-IP00 manuals
Add to My Manuals
Save this manual to your list of manuals |
Page 11 highlights
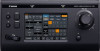
Settings Setup Flow When setting up the system for the first time, or when new cameras are added, set up in the manner as follows. Be sure to perform an operation check after the setup. 1 IP address settings Configure the IP address of the connected device according to the system configuration. (A P16 "Network Settings") 2 Camera setup Set up the connected camera. (A P15 "Camera Settings Menu") 3 Remote control settings For configuring the functions to be assigned to the buttons and knobs of this unit. (A P9 "Changing an Assigned Function") Basic Operations of Menu Screen 1 Tap the [SETTINGS] button on the home screen. The settings menu appears. 2 Select the item to be configured. Settings Menu o Video Allows you to switch the video outputs of the connected cameras on or off. (A P15 "Switching the Camera Video Output On/Off") o MENU Control Allows you to display and operate the settings menu of the selected camera. (A P15 "Camera Settings Menu") o Function Allows you to configure the settings for this unit. 0 Touch Screen Volume Allows you to configure the operation sound of the operation panel. 0 Brightness Allows you to configure the brightness of the operation panel. 0 Power Save Allows you to configure the duration of time before this unit enters into power save mode. Tapping the operation panel while in the Power Save mode exits the mode. Power save mode is disabled while the settings menu screen is displayed. 0 Default Setting Allows you to restore the default settings of this unit. Tapping the button changes the button color. Tap the [ENTER] button in this condition and then turn off the power to restore the default settings. 0 Default Setting User Initializes the function that is assigned to a button. Tapping the button changes the button color. Tapping the [ENTER] button in this state executes initialization and displays "Completed". Tap the [Close] button to complete the configuration. 0 Setting DataUSB Allows you to write the settings of this unit to a USB drive and vice versa. Connect the USB drive to the SERVICE terminal on the rear panel of this unit. Memo : 0 Format the USB drive with FAT32/16 in advance. This unit does not support formatting. o Network Allows you to configure settings related to the network. (A P16 "Network Settings on This Controller") o Touch Screen Allows you to calibrate the operation panel. Tapping the [Touch Screen] button displays the adjustment screen. Operate according to the on-screen instructions. Setup Flow 11
-
 1
1 -
2
-
3
-
4
-
5
-
 6
6 -
 7
7 -
 8
8 -
 9
9 -
 10
10 -
 11
11 -
 12
12 -
 13
13 -
 14
14 -
 15
15 -
 16
16 -
17
-
18
-
19
-
20
-
21
 |
 |
