Canon VB-S805D Mark II Network Camera Operation Guide - Page 149
[Video and Audio] > [Privacy Mask] Setting Privacy Mask, Registering Privacy Masks
 |
View all Canon VB-S805D Mark II manuals
Add to My Manuals
Save this manual to your list of manuals |
Page 149 highlights
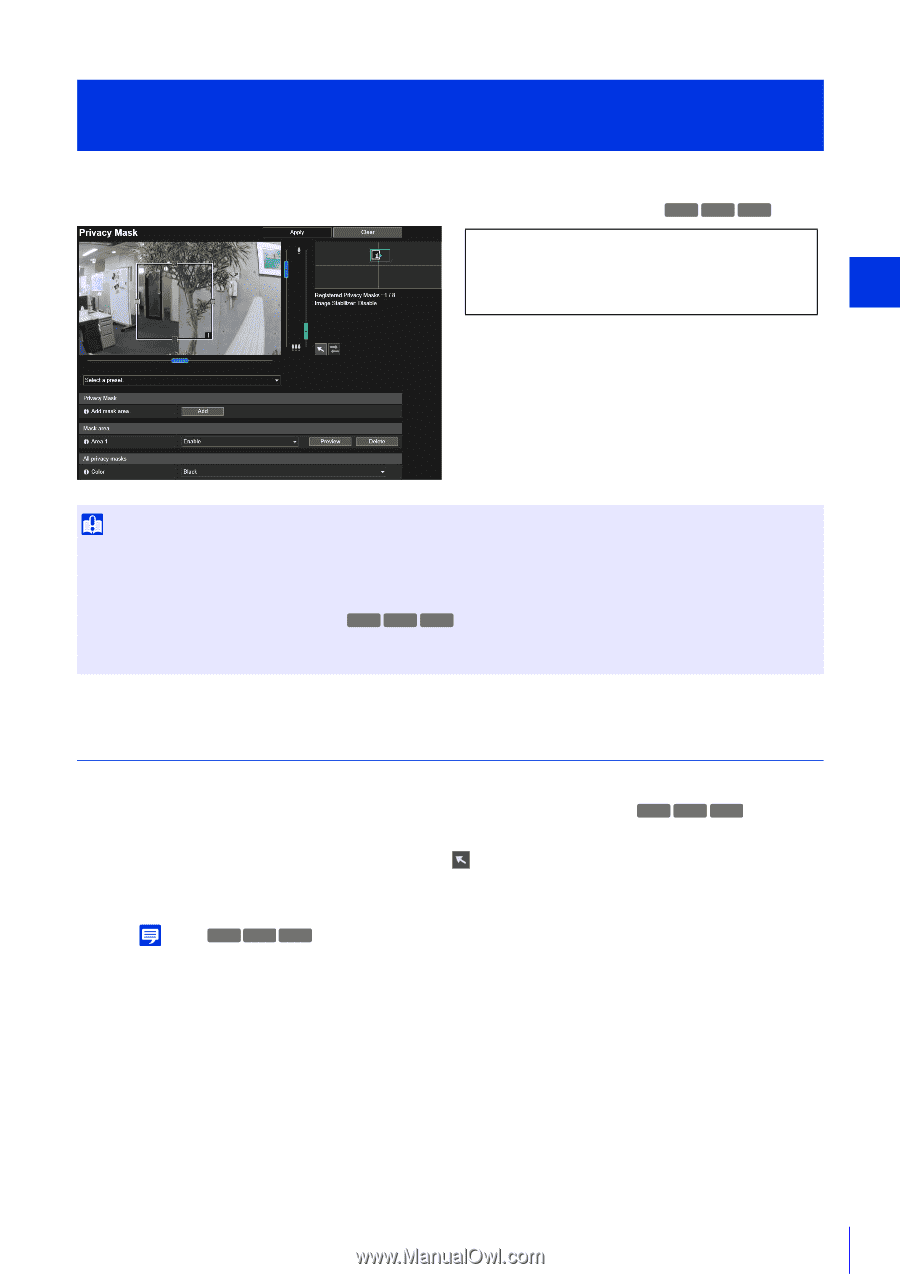
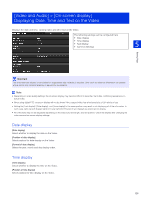
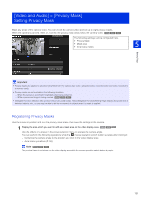
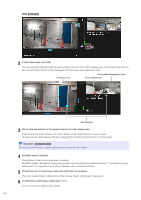
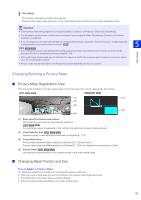
[Video and Audio] > [Privacy Mask] Setting Privacy Mask Mask any areas of the camera video. You can check the camera video and set up to eight privacy masks. When the camera is panned, tilted, or zoomed, the privacy mask areas follow the camera video. HM4x S30 S31 The following settings can be configured here. • Privacy Mask • Mask area • All privacy masks 5 Setting Page Important • Privacy masks are applied to all video transmitted from the camera (live video, uploaded video, recorded video and video recorded to a memory card). • Privacy masks are not available in the following situations. - When the camera is launched immediately after being turned on. - While a panorama image is being created. HM4x S30 S31 • Intelligent Function detection also works in the privacy mask areas. The [Intelligence Function] Setting Page displays the profile line of detected objects, etc., so you may be able to tell the movement of subjects even if a mask is applied. Registering Privacy Masks Use the mouse to position and size the privacy mask areas, then save the settings to the camera. 1 Display the area which you want to add as a mask area on the video display area. HM4x S30 S31 Use the sliders or a preset in the preset selection menu to operate the camera angle. You can perform the following operations while the mouse operation switch button is purple after clicking it. - Centering the camera angle to the position you click in the video display area - Area zoom operations (P. 58) Note HM4x S30 S31 The preview frame is not shown on the video display area while the mouse operation switch button is purple. 131
-
 1
1 -
2
-
3
-
4
-
5
-
6
-
7
-
8
-
9
-
10
-
11
-
12
-
13
-
14
-
15
-
16
-
17
-
18
-
19
-
20
-
21
-
22
-
23
-
24
-
25
-
26
-
27
-
28
-
29
-
30
-
31
-
32
-
33
-
34
-
35
-
36
-
37
-
38
-
39
-
40
-
41
-
42
-
43
-
44
-
45
-
46
-
47
-
48
-
49
-
50
-
51
-
52
-
53
-
54
-
55
-
56
-
57
-
58
-
59
-
60
-
61
-
62
-
63
-
64
-
65
-
66
-
67
-
68
-
69
-
70
-
71
-
72
-
73
-
74
-
75
-
76
-
77
-
78
-
79
-
80
-
81
-
82
-
83
-
84
-
85
-
86
-
87
-
88
-
89
-
90
-
91
-
92
-
93
-
94
-
95
-
96
-
97
-
98
-
99
-
100
-
101
-
102
-
103
-
104
-
105
-
106
-
107
-
108
-
109
-
110
-
111
-
112
-
113
-
114
-
115
-
116
-
117
-
118
-
119
-
120
-
121
-
122
-
123
-
124
-
125
-
126
-
127
-
128
-
129
-
130
-
131
-
132
-
133
-
134
-
135
-
136
-
137
-
138
-
139
-
140
-
141
-
142
-
143
-
 144
144 -
 145
145 -
 146
146 -
 147
147 -
 148
148 -
 149
149 -
 150
150 -
 151
151 -
 152
152 -
 153
153 -
 154
154 -
155
-
156
-
157
-
158
-
159
-
160
-
161
-
162
-
163
-
164
-
165
-
166
-
167
-
168
-
169
-
170
-
171
-
172
-
173
-
174
-
175
-
176
-
177
-
178
-
179
-
180
-
181
-
182
-
183
-
184
-
185
-
186
-
187
-
188
-
189
-
190
-
191
-
192
-
193
-
194
-
195
-
196
-
197
-
198
-
199
-
200
-
201
-
202
-
203
-
204
-
205
-
206
-
207
-
208
-
209
-
210
-
211
-
212
-
213
-
214
-
215
-
216
-
217
-
218
-
219
-
220
-
221
-
222
-
223
-
224
-
225
-
226
-
227
-
228
-
229
-
230
-
231
-
232
-
233
-
234
-
235
-
236
-
237
-
238
-
239
-
240
-
241
-
242
-
243
-
244
-
245
-
246
-
247
-
248
-
249
-
250
-
251
-
252
-
253
-
254
-
255
-
256
-
257
-
258
-
259
-
260
 |
 |