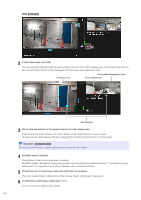
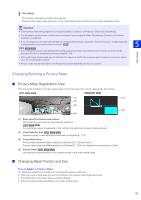
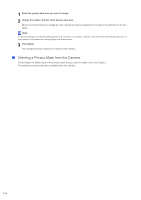
Canon VB-S805D Mark II Network Camera Operation Guide - Page 153
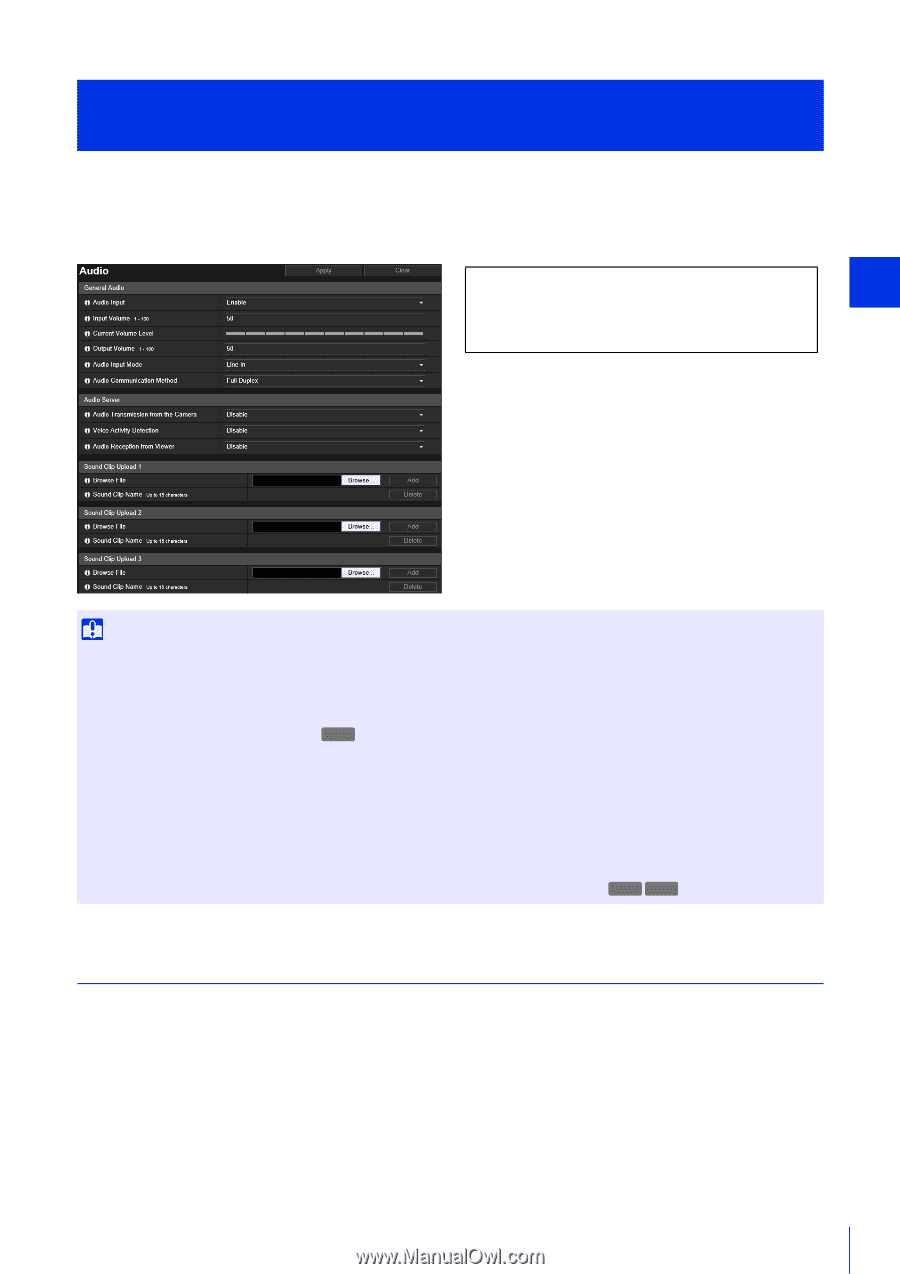
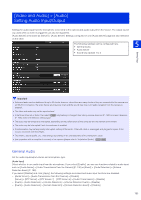
[Video and Audio] > [Audio] Setting Audio Input/Output, General Audio
 |
View all Canon VB-S805D Mark II manuals
Add to My Manuals
Save this manual to your list of manuals |
Page 153 highlights
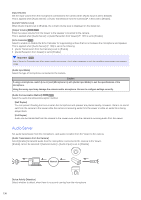
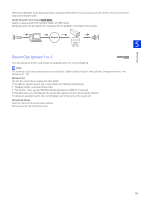
[Video and Audio] > [Audio] Setting Audio Input/Output Settings for audio input from the microphone connected to the camera and audio output from the Viewer. The output sound clip used when an event is triggered can also be registered. [Audio Server] is the same as [Server] > [Audio Server]. Settings configured on one [Audio Server] page are also reflected on the other. The following settings can be configured here. • General Audio 5 • Audio Server • Sound Clip Upload 1 to 3 Setting Page Important • Video and audio can be distributed to up to 30 clients. However, when there are many clients or they are connected to the camera over an SSL/TLS connection, the video frame rate may slow down and the sound may drop out if audio reception from the camera is enabled. • The video and audio may not be synchronized. • If the [Input Volume] or [Echo Canceller] ( H730 only) setting is changed after setting volume detection (P. 152) or scream detection (P. 153), check the detection setting again. • The audio may be temporarily interrupted, depending on the performance of the computer and the network environment. • The audio may be interrupted if anti-virus software is enabled. • Communication may be temporarily interrupted, cutting off the audio, if the LAN cable is unplugged and plugged in again. If this occurs, reconnect from the Viewer. • The volume, sound quality, etc., may change depending on the characteristics of the microphone used. • Use a speaker with an amplifier to connect to the camera (please refer to "Installation Guide"). HM4x H730 General Audio Set the audio input/output volume and microphone type. [Audio Input] Select whether to use audio input from the microphone. If you select [Enable], you can use functions related to audio input such as [Audio Server] > [Audio Transmission from the Camera] (P. 136) or [Event] > [Audio Detection] > [Volume Detection Event] (P. 152). If you select [Disable] and click [Apply], the following settings are locked and audio input functions are disabled. - [Audio Server] > [Audio Transmission from the Camera] > [Disable] - [Server] > [RTP Server] > [RTP Stream 1] - [RTP Stream 5] > [Audio Transmission] > [Disable] - [Event] > [Audio Detection] > [Volume Detection] > [Volume Detection Event] > [Disable] - [Event] > [Audio Detection] > [Scream Detection] > [Scream Detection Event] > [Disable] 135
-
 1
1 -
2
-
3
-
4
-
5
-
6
-
7
-
8
-
9
-
10
-
11
-
12
-
13
-
14
-
15
-
16
-
17
-
18
-
19
-
20
-
21
-
22
-
23
-
24
-
25
-
26
-
27
-
28
-
29
-
30
-
31
-
32
-
33
-
34
-
35
-
36
-
37
-
38
-
39
-
40
-
41
-
42
-
43
-
44
-
45
-
46
-
47
-
48
-
49
-
50
-
51
-
52
-
53
-
54
-
55
-
56
-
57
-
58
-
59
-
60
-
61
-
62
-
63
-
64
-
65
-
66
-
67
-
68
-
69
-
70
-
71
-
72
-
73
-
74
-
75
-
76
-
77
-
78
-
79
-
80
-
81
-
82
-
83
-
84
-
85
-
86
-
87
-
88
-
89
-
90
-
91
-
92
-
93
-
94
-
95
-
96
-
97
-
98
-
99
-
100
-
101
-
102
-
103
-
104
-
105
-
106
-
107
-
108
-
109
-
110
-
111
-
112
-
113
-
114
-
115
-
116
-
117
-
118
-
119
-
120
-
121
-
122
-
123
-
124
-
125
-
126
-
127
-
128
-
129
-
130
-
131
-
132
-
133
-
134
-
135
-
136
-
137
-
138
-
139
-
140
-
141
-
142
-
143
-
144
-
145
-
146
-
147
-
 148
148 -
 149
149 -
 150
150 -
 151
151 -
 152
152 -
 153
153 -
 154
154 -
 155
155 -
 156
156 -
 157
157 -
 158
158 -
159
-
160
-
161
-
162
-
163
-
164
-
165
-
166
-
167
-
168
-
169
-
170
-
171
-
172
-
173
-
174
-
175
-
176
-
177
-
178
-
179
-
180
-
181
-
182
-
183
-
184
-
185
-
186
-
187
-
188
-
189
-
190
-
191
-
192
-
193
-
194
-
195
-
196
-
197
-
198
-
199
-
200
-
201
-
202
-
203
-
204
-
205
-
206
-
207
-
208
-
209
-
210
-
211
-
212
-
213
-
214
-
215
-
216
-
217
-
218
-
219
-
220
-
221
-
222
-
223
-
224
-
225
-
226
-
227
-
228
-
229
-
230
-
231
-
232
-
233
-
234
-
235
-
236
-
237
-
238
-
239
-
240
-
241
-
242
-
243
-
244
-
245
-
246
-
247
-
248
-
249
-
250
-
251
-
252
-
253
-
254
-
255
-
256
-
257
-
258
-
259
-
260
 |
 |