Canon imageCLASS MF3240 imageCLASS MF3200 Series Basic Guide - Page 113
shown below, and pull it out, tab A on the sealing tape B
 |
View all Canon imageCLASS MF3240 manuals
Add to My Manuals
Save this manual to your list of manuals |
Page 113 highlights
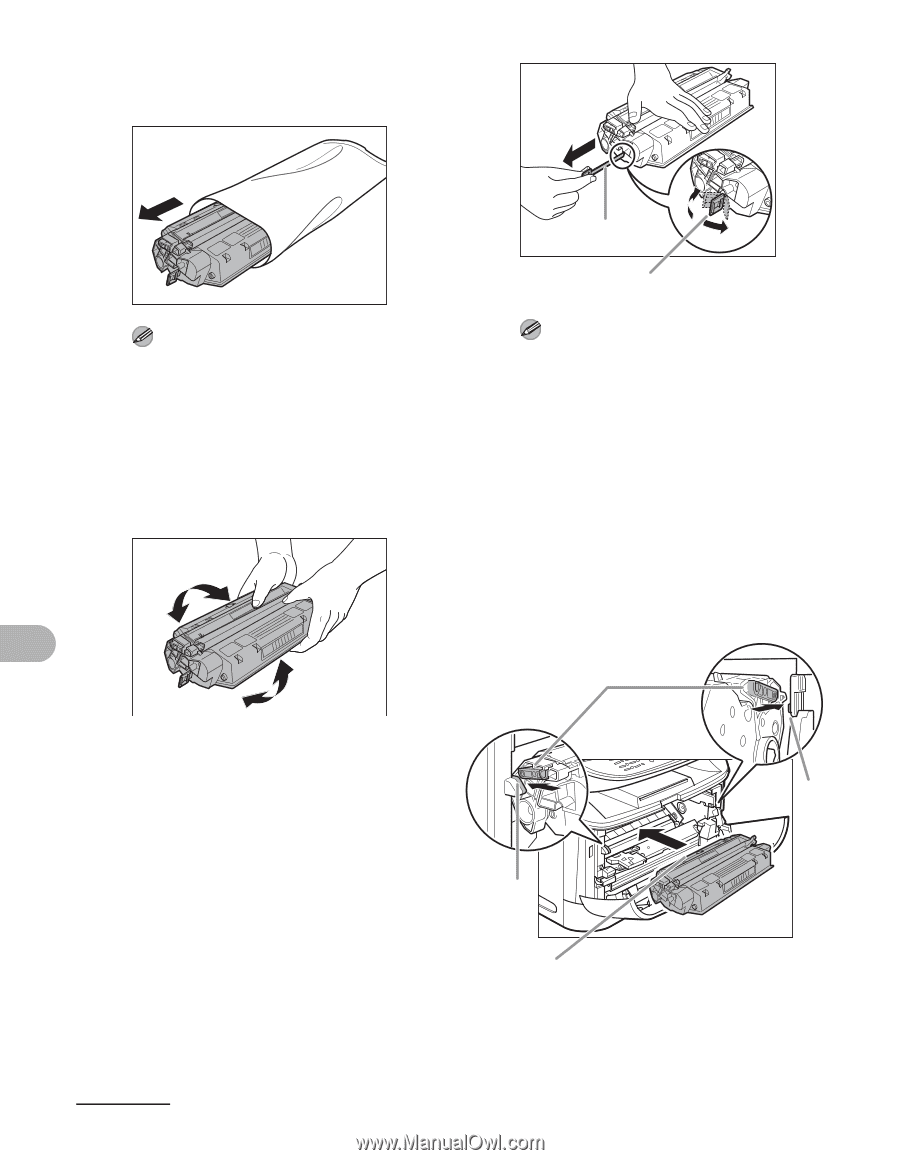
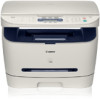
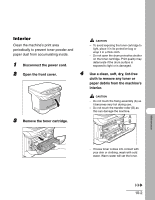
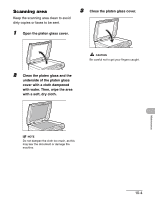
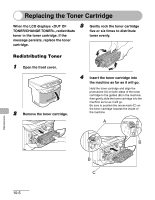
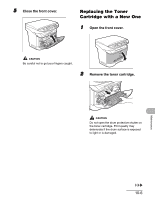
3 Remove the new toner cartridge from the protective bag. B A NOTE NOTE Save the protective bag. You may need it later when you remove the toner cartridge To avoid breaking the tape, do not pull out the tape at an upward or downward angle. from the machine. 4 Gently rock the toner cartridge 6 Insert the toner cartridge into the machine as far as it will go. five or six times to distribute toner inside. Hold the toner cartridge and align the protrusions (A) on both sides of the toner cartridge to the guides (B) in the machine, then gently slide the toner cartridge into the machine as far as it will go. Be sure to position the arrow mark (C) on the toner cartridge towards the inside of the machine. A 5 Place the toner cartridge on a flat and stable surface. Fold the tab (A) on the sealing tape (B) as B shown below, and pull it out straight while supporting the toner cartridge. B Make sure that the tab itself is detached from the toner cartridge. C Maintenance 10-7
-
 1
1 -
2
-
3
-
4
-
5
-
6
-
7
-
8
-
9
-
10
-
11
-
12
-
13
-
14
-
15
-
16
-
17
-
18
-
19
-
20
-
21
-
22
-
23
-
24
-
25
-
26
-
27
-
28
-
29
-
30
-
31
-
32
-
33
-
34
-
35
-
36
-
37
-
38
-
39
-
40
-
41
-
42
-
43
-
44
-
45
-
46
-
47
-
48
-
49
-
50
-
51
-
52
-
53
-
54
-
55
-
56
-
57
-
58
-
59
-
60
-
61
-
62
-
63
-
64
-
65
-
66
-
67
-
68
-
69
-
70
-
71
-
72
-
73
-
74
-
75
-
76
-
77
-
78
-
79
-
80
-
81
-
82
-
83
-
84
-
85
-
86
-
87
-
88
-
89
-
90
-
91
-
92
-
93
-
94
-
95
-
96
-
97
-
98
-
99
-
100
-
101
-
102
-
103
-
104
-
105
-
106
-
107
-
 108
108 -
 109
109 -
 110
110 -
 111
111 -
 112
112 -
 113
113 -
 114
114 -
 115
115 -
 116
116 -
 117
117 -
 118
118 -
119
-
120
-
121
-
122
-
123
-
124
-
125
-
126
-
127
-
128
-
129
-
130
-
131
-
132
-
133
-
134
-
135
-
136
-
137
-
138
-
139
-
140
-
141
-
142
-
143
-
144
-
145
-
146
-
147
-
148
-
149
-
150
-
151
-
152
-
153
-
154
-
155
-
156
-
157
-
158
-
159
-
160
-
161
 |
 |