Canon imageCLASS MF3240 imageCLASS MF3200 Series Basic Guide - Page 130
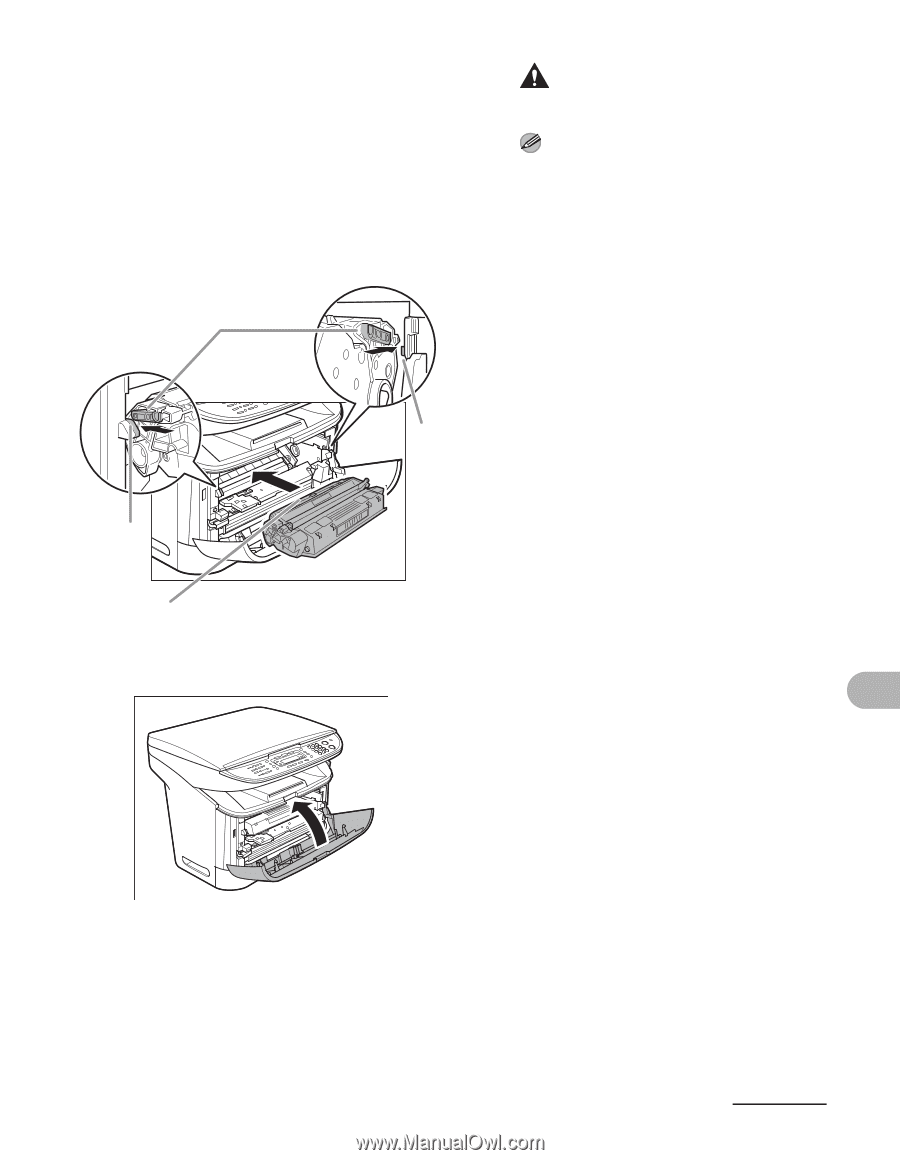
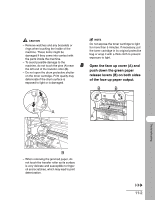
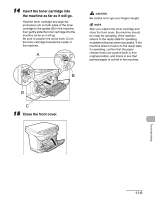
Insert the toner cartridge into, the machine as far as it will go., Close the front cover.
 |
View all Canon imageCLASS MF3240 manuals
Add to My Manuals
Save this manual to your list of manuals |
Page 130 highlights
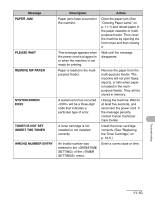
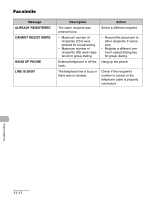
14 Insert the toner cartridge into the machine as far as it will go. Hold the toner cartridge and align the protrusions (A) on both sides of the toner cartridge to the guides (B) in the machine, then gently slide the toner cartridge into the machine as far as it will go. Be sure to position the arrow mark (C) on the toner cartridge towards the inside of the machine. A B B C 15 Close the front cover. CAUTION Be careful not to get your fingers caught. NOTE After you replace the toner cartridge and close the front cover, the machine should be ready for operating. If the machine returns to the ready state for operating, troubleshooting has been successful. If the machine does not return to the ready state for operating, confirm that the paper release levers are pushed back to their original position, and check to see that jammed paper is not left in the machine. Troubleshooting 11-6
-
 1
1 -
2
-
3
-
4
-
5
-
6
-
7
-
8
-
9
-
10
-
11
-
12
-
13
-
14
-
15
-
16
-
17
-
18
-
19
-
20
-
21
-
22
-
23
-
24
-
25
-
26
-
27
-
28
-
29
-
30
-
31
-
32
-
33
-
34
-
35
-
36
-
37
-
38
-
39
-
40
-
41
-
42
-
43
-
44
-
45
-
46
-
47
-
48
-
49
-
50
-
51
-
52
-
53
-
54
-
55
-
56
-
57
-
58
-
59
-
60
-
61
-
62
-
63
-
64
-
65
-
66
-
67
-
68
-
69
-
70
-
71
-
72
-
73
-
74
-
75
-
76
-
77
-
78
-
79
-
80
-
81
-
82
-
83
-
84
-
85
-
86
-
87
-
88
-
89
-
90
-
91
-
92
-
93
-
94
-
95
-
96
-
97
-
98
-
99
-
100
-
101
-
102
-
103
-
104
-
105
-
106
-
107
-
108
-
109
-
110
-
111
-
112
-
113
-
114
-
115
-
116
-
117
-
118
-
119
-
120
-
121
-
122
-
123
-
124
-
 125
125 -
 126
126 -
 127
127 -
 128
128 -
 129
129 -
 130
130 -
 131
131 -
 132
132 -
 133
133 -
 134
134 -
 135
135 -
136
-
137
-
138
-
139
-
140
-
141
-
142
-
143
-
144
-
145
-
146
-
147
-
148
-
149
-
150
-
151
-
152
-
153
-
154
-
155
-
156
-
157
-
158
-
159
-
160
-
161
 |
 |