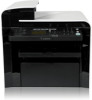
Canon imageCLASS MF4570dn imageCLASS MF4570dn Starter Guide - Page 21
Installing with USB Connection - driver windows 7
 |
View all Canon imageCLASS MF4570dn manuals
Add to My Manuals
Save this manual to your list of manuals |
Page 21 highlights
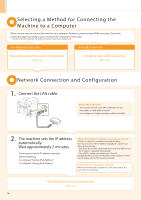
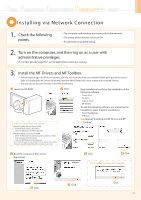
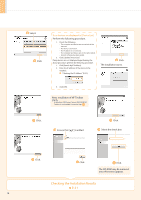
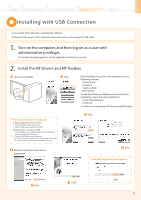
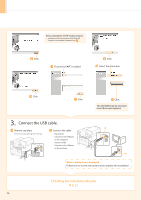
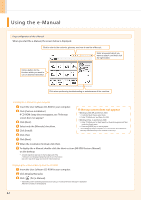
1 Preface 2 Installing the Machine 3 Configuring and Connecting the Fax 4 Connecting to a Computer and Installing the Drivers Appendix Installing with USB Connection Connect the USB cable after installing the software. Ensure that the power of the machine is turned on when connecting the USB cable. 1. Turn on the computer, and then log on as a user with administrative privileges. If you have already logged on, exit all applications which are running. 2. Install the MF Drivers and MF Toolbox. Insert the CD-ROM. Click. [Easy Installation] performs the installation of the following software. • Printer driver • Fax driver • Scanner driver • MF Toolbox To add the following software and manual to the installation, select [Custom Installation]. • Presto! PageManager • e-Manual e-Manual "Installing the MF Drivers and MF Toolbox" If the top screen does not appear • Windows 2000, XP, and Server 2003 1. From the [Start] menu, select [Run]. 2. Enter "D:\Minst.exe", and then click [OK]. • Windows Vista, 7, and Server 2008 1. Enter "D:\Minst.exe" in [Start Search] or [Search programs and files] under the [Start] menu. 2. Press the [ENTER] key on the keyboard. * The CD-ROM drive name is indicated as "D:" in this manual. The CD-ROM drive name may differ depending on the computer you are using. Read the contents of the License Agreement. Click. Click. If the following dialog box appears Click. Click. Click. 19
-
 1
1 -
2
-
3
-
4
-
5
-
6
-
7
-
8
-
9
-
10
-
11
-
12
-
13
-
14
-
15
-
 16
16 -
 17
17 -
 18
18 -
 19
19 -
 20
20 -
 21
21 -
 22
22 -
 23
23 -
 24
24 -
 25
25 -
 26
26 -
27
-
28
 |
 |
