Canon imageCLASS MF4570dn imageCLASS MF4570dn Starter Guide - Page 9
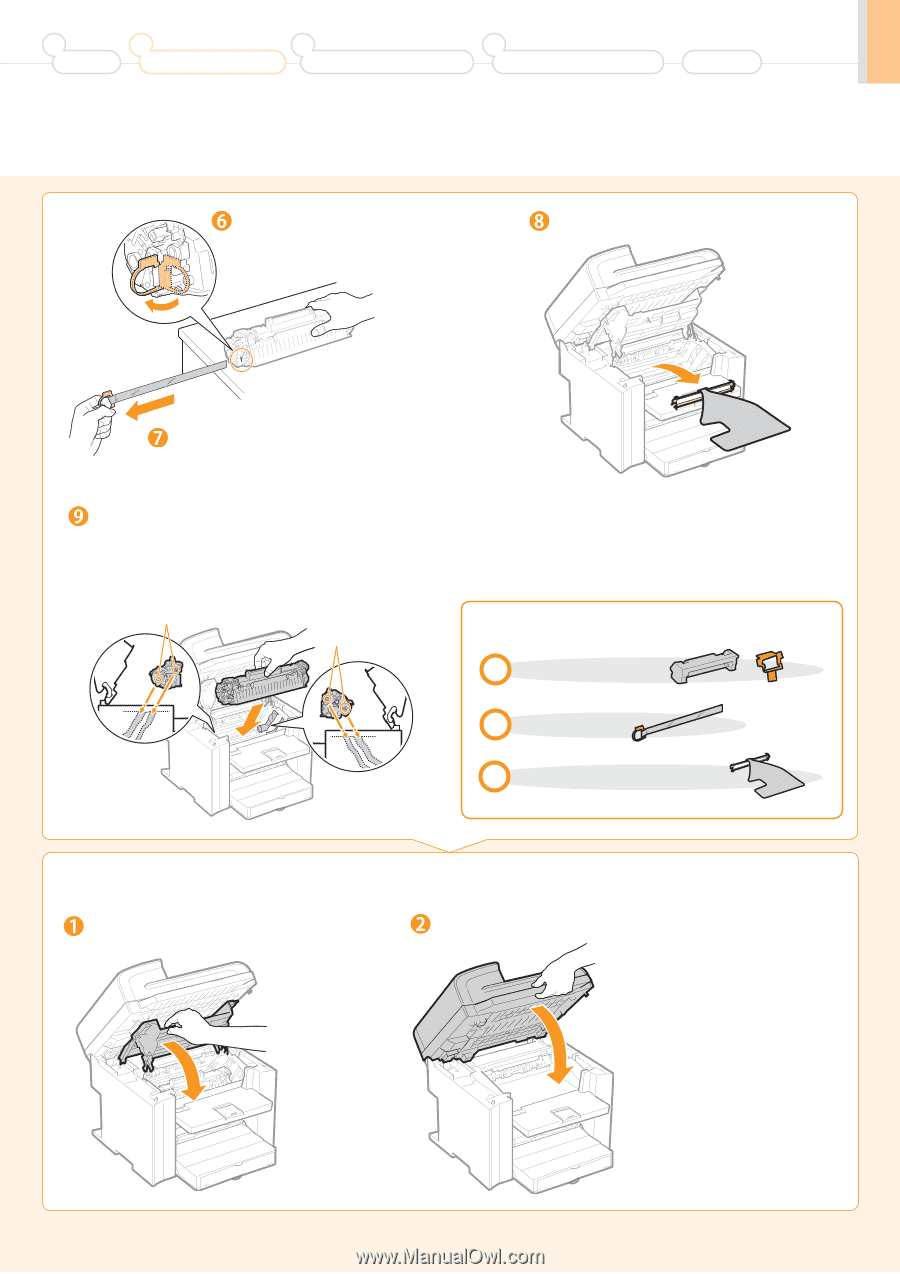
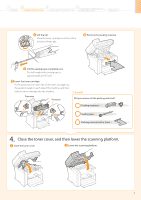
Close the toner cover, and then lower the scanning platform.
 |
View all Canon imageCLASS MF4570dn manuals
Add to My Manuals
Save this manual to your list of manuals |
Page 9 highlights
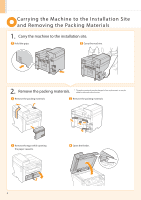
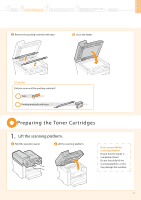
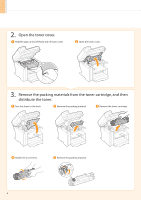
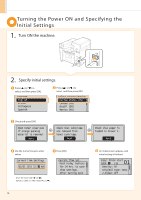
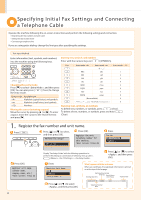
1 Preface 2 Installing the Machine 3 Configuring and Connecting the Fax 4 Connecting to a Computer and Installing the Drivers Appendix Lift the tab. Place the toner cartridge on a flat surface, and then lift the tab. Remove the packing material. Pull the sealing tape completely out. The full length of the sealing tape is approximately 20" (50 cm). Insert the toner cartridge. Fit the protrusions on each side of the toner cartridge into the guides located on each side of the machine, and then slide the toner cartridge into the machine. Protrusion Protrusion Check! Did you remove all the packing materials? Packing materials x2 Sealing tape x1 Packing material with a sheet x1 4. Close the toner cover, and then lower the scanning platform. Close the toner cover. Lower the scanning platform. 7
-
 1
1 -
2
-
3
-
 4
4 -
 5
5 -
 6
6 -
 7
7 -
 8
8 -
 9
9 -
 10
10 -
 11
11 -
 12
12 -
 13
13 -
 14
14 -
15
-
16
-
17
-
18
-
19
-
20
-
21
-
22
-
23
-
24
-
25
-
26
-
27
-
28
 |
 |