Canon imageCLASS MF6530 MF6500 Series Scanner Drivere Guide - Page 34
Click [OK], [Save] or [Forward]., Adjust the position of the right side of
 |
View all Canon imageCLASS MF6530 manuals
Add to My Manuals
Save this manual to your list of manuals |
Page 34 highlights
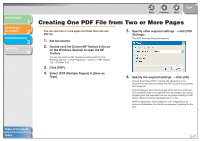
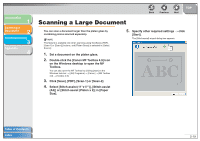
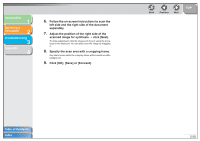
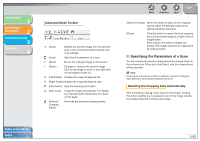
Introduction 1 Scanning a Document 2 Troubleshooting 3 Appendix 4 6. Follow the on-screen instructions to scan the left side and the right side of the document separately. 7. Adjust the position of the right side of the scanned image for synthesis → click [Next]. To make adjustment, click the image and move it using the arrow keys on the keyboard. You can also move the image by dragging it. 8. Specify the scan area with a cropping frame. Any blank areas inside the cropping frame will be saved as white background. 9. Click [OK], [Save] or [Forward]. Back Previous Next TOP Table of Contents Index 2-20
-
 1
1 -
2
-
3
-
4
-
5
-
6
-
7
-
8
-
9
-
10
-
11
-
12
-
13
-
14
-
15
-
16
-
17
-
18
-
19
-
20
-
21
-
22
-
23
-
24
-
25
-
26
-
27
-
28
-
 29
29 -
 30
30 -
 31
31 -
 32
32 -
 33
33 -
 34
34 -
 35
35 -
 36
36 -
 37
37 -
 38
38 -
 39
39 -
40
-
41
-
42
-
43
-
44
-
45
-
46
-
47
-
48
-
49
-
50
-
51
-
52
-
53
-
54
-
55
-
56
-
57
-
58
-
59
-
60
-
61
-
62
-
63
-
64
-
65
-
66
-
67
-
68
-
69
-
70
-
71
-
72
-
73
-
74
-
75
-
76
-
77
-
78
-
79
-
80
 |
 |
1
2
3
4
TOP
Back
Previous
Next
2-20
Introduction
Scanning a
Document
Troubleshooting
Appendix
Table of Contents
Index
6.
Follow the on-screen instructions to scan the
left side and the right side of the document
separately.
7.
Adjust the position of the right side of the
scanned image for synthesis
→
click [Next].
To make adjustment, click the image and move it using the arrow
keys on the keyboard. You can also move the image by dragging
it.
8.
Specify the scan area with a cropping frame.
Any blank areas inside the cropping frame will be saved as white
background.
9.
Click [OK], [Save] or [Forward].