Canon imagePROGRAF W2200S User Guide - Page 94
Caution, Important, on the tabs d of the second protective cap c as shown in
 |
View all Canon imagePROGRAF W2200S manuals
Add to My Manuals
Save this manual to your list of manuals |
Page 94 highlights
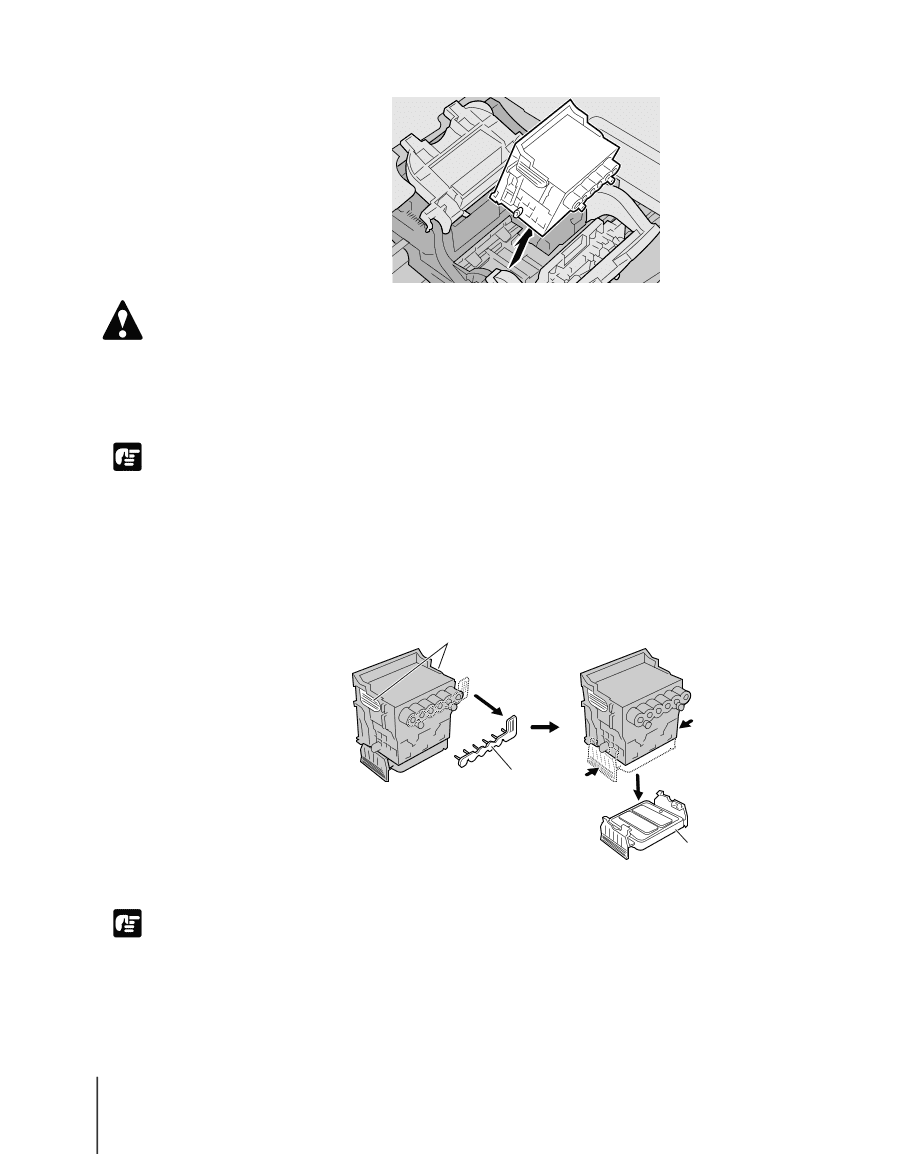
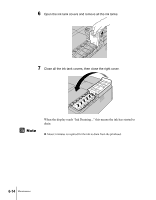
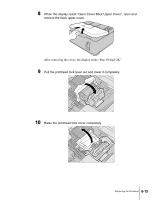
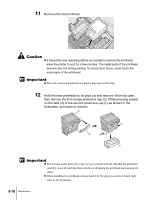
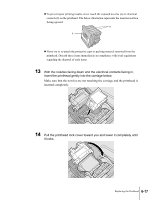
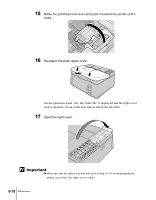
11 Remove the old printhead. Caution z If the printer was operating before you started to remove the printhead, allow the printer to cool for a few minutes. The metal parts of the printhead become very hot during printing. To avoid minor burns, never touch the metal parts of the printhead. Important z Place the removed printhead in a plastic bag and seal the bag. 12 Hold the new printhead by its grips (a) and remove it from its case, then remove the first orange protective cap (b). While pressing inward on the tabs (d) of the second protective cap (c) as shown in the illustration, pull down to remove. a d b d c Important z The nozzles under protective cap 2 (c) are covered with ink. Handle the printhead carefully to avoid touching these nozzles or dropping the printhead and causing ink stains. z When handling the printhead, always hold it by the grips (a) on the left and right sides of the printhead. 6-16 Maintenance
-
 1
1 -
2
-
3
-
4
-
5
-
6
-
7
-
8
-
9
-
10
-
11
-
12
-
13
-
14
-
15
-
16
-
17
-
18
-
19
-
20
-
21
-
22
-
23
-
24
-
25
-
26
-
27
-
28
-
29
-
30
-
31
-
32
-
33
-
34
-
35
-
36
-
37
-
38
-
39
-
40
-
41
-
42
-
43
-
44
-
45
-
46
-
47
-
48
-
49
-
50
-
51
-
52
-
53
-
54
-
55
-
56
-
57
-
58
-
59
-
60
-
61
-
62
-
63
-
64
-
65
-
66
-
67
-
68
-
69
-
70
-
71
-
72
-
73
-
74
-
75
-
76
-
77
-
78
-
79
-
80
-
81
-
82
-
83
-
84
-
85
-
86
-
87
-
88
-
 89
89 -
 90
90 -
 91
91 -
 92
92 -
 93
93 -
 94
94 -
 95
95 -
 96
96 -
 97
97 -
 98
98 -
 99
99 -
100
-
101
-
102
-
103
-
104
-
105
-
106
-
107
-
108
-
109
-
110
-
111
-
112
-
113
-
114
-
115
-
116
-
117
-
118
-
119
-
120
-
121
-
122
-
123
-
124
-
125
-
126
-
127
-
128
-
129
-
130
-
131
-
132
-
133
-
134
-
135
-
136
-
137
-
138
-
139
-
140
-
141
-
142
-
143
-
144
-
145
-
146
-
147
-
148
-
149
-
150
-
151
-
152
-
153
-
154
 |
 |