Canon imagePROGRAF iPF8300S iPF8300S Basic Guide No.2 - Page 13
Adj. Priority, Print Length, Control, Panel, Adjust Length, Control Panel, Priority, Print Quality,
 |
View all Canon imagePROGRAF iPF8300S manuals
Add to My Manuals
Save this manual to your list of manuals |
Page 13 highlights
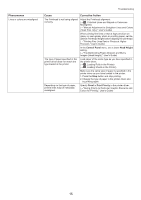
Troubleshooting Phenomenon Image edges are blurred or white banding occurs The contrast becomes uneven during printing The length of printed images is inaccurate in the feeding direction Cause The Platen suction is too strong. Incorrect Printhead alignment value. The type of paper specified in the printer driver does not match the type loaded in the printer. The paper feed amount is out of adjustment. The type of paper specified in the printer driver does not match the type loaded in the printer. In the Control Panel menu, Adj. Priority is set to Print Quality. The type of paper specified in the printer driver does not match the type loaded in the printer. Corrective Action In the Control Panel menu, reduce the level of VacuumStrngth. (→"Adjusting the Vacuum Strength (VacuumStrngth)," User's Guide) Close the blue Switch on the platen so that it matches the paper size. (→"Setting the Blue Switch on the Platen," User's Guide) When printing fine lines or text at high precision on glossy or semi-glossy photo or proofing paper, set the optimal Printhead height before aligning the printhead. (→"Enhancing Printing Quality," User's Guide) In the Control Panel menu, use a lower Head Height setting. (→"Troubleshooting Paper Abrasion and Blurry Images (Head Height)," User's Guide) Load paper of the same type as you have specified in the printer driver. (→ , Loading Rolls in the Printer) (→ , Loading Sheets in the Printer) Make sure the same type of paper is specified in the printer driver as you have loaded in the printer. 1. Press the Stop button and stop printing. 2. Change the type of paper in the printer driver and try printing again. Adjust the feed amount. (→"Adjusting the Feed Amount," User's Guide) Load paper of the same type as you have specified in the printer driver. (→ , Loading Rolls in the Printer) (→ , Loading Sheets in the Printer) Make sure the same type of paper is specified in the printer driver as you have loaded in the printer. 1. Press the Stop button and stop printing. 2. Change the type of paper in the printer driver and try printing again. Set Adj. Priority to Print Length in the Control Panel menu, and then execute Adjust Length. (→"Adjusting the Feed Amount," User's Guide) Load paper of the same type as you have specified in the printer driver. (→ , Loading Rolls in the Printer) (→ , Loading Sheets in the Printer) Make sure the same type of paper is specified in the printer driver as you have loaded in the printer. 1. Press the Stop button to stop printing. 2. Change the type of paper in the printer driver and try printing again. 13
-
 1
1 -
2
-
3
-
4
-
5
-
6
-
7
-
 8
8 -
 9
9 -
 10
10 -
 11
11 -
 12
12 -
 13
13 -
 14
14 -
 15
15 -
 16
16 -
 17
17 -
 18
18 -
19
-
20
-
21
-
22
-
23
-
24
-
25
-
26
-
27
-
28
-
29
-
30
-
31
-
32
-
33
-
34
-
35
-
36
-
37
-
38
-
39
-
40
-
41
-
42
-
43
-
44
-
45
-
46
-
47
-
48
-
49
-
50
-
51
-
52
 |
 |
