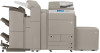
Canon imageRUNNER ADVANCE C7055 Voice Guidance Kit Users Guide for imageRUNNER - Page 39
Main Power and Control Panel Power, How to Turn ON the Main Power
 |
View all Canon imageRUNNER ADVANCE C7055 manuals
Add to My Manuals
Save this manual to your list of manuals |
Page 39 highlights
Before You Start Using This Product Main Power and Control Panel Power The machine is provided with two power 1 switches, a main power switch and a (Control Panel Power Switch), as well as a breaker that detects excess current or leakage current. How to Turn ON the Main Power This section explains how to turn ON the main power. IMPORTANT Please seek assistance when performing this procedure. 1 Make sure that the power plug is firmly inserted into the power outlet. WARNING Do not connect or disconnect the power cord with wet hands, as this may result in electrical shock. Main Power and Control Panel Power 1-23
-
 1
1 -
2
-
3
-
4
-
5
-
6
-
7
-
8
-
9
-
10
-
11
-
12
-
13
-
14
-
15
-
16
-
17
-
18
-
19
-
20
-
21
-
22
-
23
-
24
-
25
-
26
-
27
-
28
-
29
-
30
-
31
-
32
-
33
-
 34
34 -
 35
35 -
 36
36 -
 37
37 -
 38
38 -
 39
39 -
 40
40 -
 41
41 -
 42
42 -
 43
43 -
 44
44 -
45
-
46
-
47
-
48
-
49
-
50
-
51
-
52
-
53
-
54
-
55
-
56
-
57
-
58
-
59
-
60
-
61
-
62
-
63
-
64
-
65
-
66
-
67
-
68
-
69
-
70
-
71
-
72
-
73
-
74
-
75
-
76
-
77
-
78
-
79
-
80
-
81
-
82
-
83
-
84
-
85
-
86
-
87
-
88
-
89
-
90
-
91
-
92
-
93
-
94
-
95
-
96
-
97
-
98
-
99
-
100
-
101
-
102
-
103
-
104
-
105
-
106
-
107
-
108
-
109
-
110
-
111
-
112
-
113
-
114
-
115
-
116
-
117
-
118
-
119
-
120
-
121
-
122
-
123
-
124
-
125
-
126
-
127
-
128
-
129
-
130
-
131
-
132
-
133
-
134
-
135
-
136
-
137
-
138
-
139
-
140
-
141
-
142
-
143
-
144
-
145
-
146
-
147
-
148
-
149
-
150
-
151
-
152
-
153
-
154
-
155
-
156
-
157
-
158
-
159
-
160
-
161
-
162
-
163
-
164
-
165
-
166
-
167
-
168
-
169
-
170
-
171
-
172
-
173
-
174
-
175
-
176
-
177
-
178
-
179
-
180
-
181
-
182
-
183
-
184
-
185
-
186
-
187
-
188
-
189
-
190
-
191
-
192
-
193
-
194
-
195
-
196
-
197
-
198
-
199
-
200
-
201
-
202
-
203
-
204
-
205
-
206
-
207
-
208
-
209
-
210
-
211
-
212
-
213
-
214
-
215
-
216
-
217
-
218
-
219
-
220
-
221
-
222
-
223
-
224
-
225
-
226
-
227
-
228
-
229
-
230
-
231
-
232
-
233
-
234
-
235
-
236
-
237
-
238
-
239
-
240
-
241
-
242
-
243
-
244
-
245
-
246
-
247
-
248
-
249
-
250
-
251
-
252
-
253
-
254
-
255
-
256
-
257
-
258
-
259
-
260
-
261
-
262
-
263
-
264
-
265
-
266
-
267
-
268
-
269
-
270
-
271
-
272
-
273
-
274
-
275
-
276
 |
 |

1
Before You Start Using This Product
Main Power and Control Panel Power
1-23
Main Power and Control Panel Power
The machine is provided with two power
switches, a main power switch and a
(Control
Panel
Power
Switch), as well as
a breaker that detects excess current or
leakage current.
How to Turn ON the Main Power
This section explains how to turn ON the
main power.
IMPORTANT
Please seek assistance when performing
this procedure.
1
Make sure that the power plug is
fi
rmly inserted into the power outlet.
WARNING
Do not connect or disconnect the
power cord with wet hands, as this
may result in electrical shock.