Casio CTK-800 User Guide - Page 27
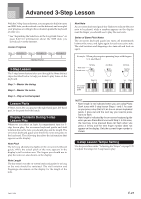
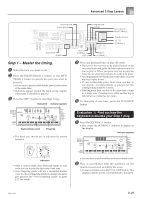
Step 1 - Master the timing.
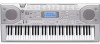 |
View all Casio CTK-800 manuals
Add to My Manuals
Save this manual to your list of manuals |
Page 27 highlights
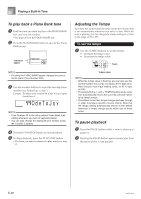
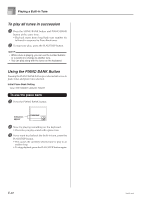
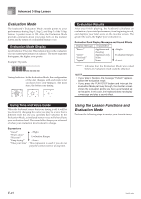
Advanced 3-Step Lesson PIANO BANK SONG BANK METRONOME SPEAK LEFT/TRACK 1 RIGHT/TRACK 2 Number buttons [+] / [-] SCORING 3 PLAY/STOP TEMPO Step 1 - Master the timing. 1 Select the tune you want to use. 2 Press the RIGHT/TRACK 2 button or the LEFT/ TRACK 1 button to specify the part you want to practice. • If you want to practice both hands, press both buttons at the same time. • Indicators appear around the hand on the display whose part is selected for practice. 3 Press the STEP 1 button to start Step 1 play. Note pitch Indicator appears A l oha Oe Keyboard keys used Fingering • The hand you should use is indicated by arrows around it. STEP 1 SCORING 1 STEP 2 STEP 3 SCORING 2 4 Press any keyboard keys to play the notes. • The key for the next note to be played flashes on the on-screen keyboard guide and the keyboard waits for you to play it. When you press any key to play the note, the on-screen key remains lit as the note plays. • Accompaniment (left-hand part) waits until you press any key to play a note. • If you accidentally press more than one key in succession, accompaniment is played for the corresponding number of notes. • Pressing more than one key at the same time counts as a single note. Pressing a key while another key is held down is counted as two notes. 5 To stop play at any time, press the PLAY/STOP button. Evaluation 1: Find out how the keyboard evaluates your Step 1 play. 1 Press the SCORING 1 button. • This causes the SCORING 1 indicator to appear on the display. Indicator appears Indicators • After a count sounds, they keyboard stands by and waits for you to play the first note of the tune. • Voice fingering guide will use a simulated human voice to call out fingering numbers during one-hand part practice. See "Voice Fingering Guide" on page E-27 for details. • A count beat sounds and then evaluation mode starts. 2 Play in accordance with the guidance on the monitor screen and as told by the voice. • To stop evaluation, press the PLAY/STOP button. This displays only the points accumulated up to that point. 706A-E-027A E-25
-
 1
1 -
2
-
3
-
4
-
5
-
6
-
7
-
8
-
9
-
10
-
11
-
12
-
13
-
14
-
15
-
16
-
17
-
18
-
19
-
20
-
21
-
 22
22 -
 23
23 -
 24
24 -
 25
25 -
 26
26 -
 27
27 -
 28
28 -
 29
29 -
 30
30 -
 31
31 -
 32
32 -
33
-
34
-
35
-
36
-
37
-
38
-
39
-
40
-
41
-
42
-
43
-
44
-
45
-
46
-
47
-
48
-
49
-
50
-
51
-
52
-
53
-
54
-
55
-
56
-
57
-
58
-
59
-
60
-
61
-
62
-
63
-
64
-
65
-
66
-
67
-
68
-
69
 |
 |
