Casio CTK-800 User Guide - Page 30
Bea t
 |
View all Casio CTK-800 manuals
Add to My Manuals
Save this manual to your list of manuals |
Page 30 highlights
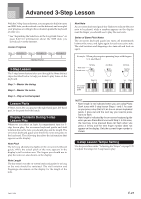
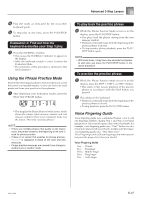
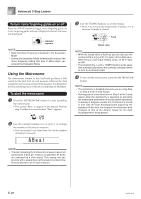
Advanced 3-Step Lesson To turn voice fingering guide on or off Press the SPEAK button to toggle voice fingering guide on (voice fingering guide indicator displayed) and off (indicator not displayed). Indicator appears NOTE • Note that Voice Fingering is disabled in the Evaluation Mode. • Exiting the Evaluation Mode automatically restores the Voice Fingering setting that was in effect when you entered the Evaluation Mode. Using the Metronome The metronome feature of this keyboard produces a bell sound for the first beat of each measure, followed by click sounds for each successive beat of the measure. It is the perfect tool for practicing tunes without accompaniment (rhythm). To start the metronome 1 Press the METRONOME button to start sounding the metronome. • This causes "Beat" to appear on the display. Perform step 2 within five seconds after "Beat" appears. 3 Use the TEMPO buttons to set the tempo. • Press to increase the tempo (make if faster) or to decrease it (make it slower). Flash Tempo value NOTE • While the tempo value is flashing, you can also use the number buttons or [+] and [-] to input a three-digit value. Note that you must input leading zeros, so 90 is input as 090. • Pressing both the and TEMPO buttons at the same time automatically returns the currently selected rhythm or tune to its default tempo. 4 To turn off the metronome, press the METRONOME button. NOTE • The metronome is disabled whenever you are using Step 1 or Step 2 of the 3-step lesson. • Starting play of a two-hand tune or Step 3 of the 3-step lesson while the metronome is operating or activating the metronome while either of the two above operations is already in progress causes the metronome to sound in time with the Auto Accompaniment played by the keyboard. At this time, the tempo of the metronome beat changes to that of the default tempo for the Auto Accompaniment being played. 2 Use the number buttons or [+] and [-] to change the number of beats per measure. • You can specify 0, or a value from 2 to 6 as the number of beats per measure. Bea t NOTE • The bell (indicating the first beat of a measure) does not sound while 0 beat per measure is specified. All beats are indicated by a click sound. This setting lets you practice with a steady beat, without worrying about how many beats there are in each measure. E-28 706A-E-030A
-
 1
1 -
2
-
3
-
4
-
5
-
6
-
7
-
8
-
9
-
10
-
11
-
12
-
13
-
14
-
15
-
16
-
17
-
18
-
19
-
20
-
21
-
22
-
23
-
24
-
 25
25 -
 26
26 -
 27
27 -
 28
28 -
 29
29 -
 30
30 -
 31
31 -
 32
32 -
 33
33 -
 34
34 -
 35
35 -
36
-
37
-
38
-
39
-
40
-
41
-
42
-
43
-
44
-
45
-
46
-
47
-
48
-
49
-
50
-
51
-
52
-
53
-
54
-
55
-
56
-
57
-
58
-
59
-
60
-
61
-
62
-
63
-
64
-
65
-
66
-
67
-
68
-
69
 |
 |
