Casio EX-H5SR User Manual - Page 126
To view copied images, from the computer.
 |
View all Casio EX-H5SR manuals
Add to My Manuals
Save this manual to your list of manuals |
Page 126 highlights
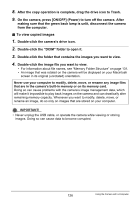
8. After the copy operation is complete, drag the drive icon to Trash. 9. On the camera, press [ON/OFF] (Power) to turn off the camera. After making sure that the green back lamp is unlit, disconnect the camera from the computer. . To view copied images 1. Double-click the camera's drive icon. 2. Double-click the "DCIM" folder to open it. 3. Double-click the folder that contains the images you want to view. 4. Double-click the image file you want to view. • For information about file names, see "Memory Folder Structure" on page 131. • An image that was rotated on the camera will be displayed on your Macintosh screen in its original (unrotated) orientation. Never use your computer to modify, delete, move, or rename any image files that are in the camera's built-in memory or on its memory card. Doing so can cause problems with the camera's image management data, which will make it impossible to play back images on the camera and can drastically alter remaining memory capacity. Whenever you want to modify, delete, move, or rename an image, do so only on images that are stored on your computer. IMPORTANT! • Never unplug the USB cable, or operate the camera while viewing or storing images. Doing so can cause data to become corrupted. 126 Using the Camera with a Computer
-
 1
1 -
2
-
3
-
4
-
5
-
6
-
7
-
8
-
9
-
10
-
11
-
12
-
13
-
14
-
15
-
16
-
17
-
18
-
19
-
20
-
21
-
22
-
23
-
24
-
25
-
26
-
27
-
28
-
29
-
30
-
31
-
32
-
33
-
34
-
35
-
36
-
37
-
38
-
39
-
40
-
41
-
42
-
43
-
44
-
45
-
46
-
47
-
48
-
49
-
50
-
51
-
52
-
53
-
54
-
55
-
56
-
57
-
58
-
59
-
60
-
61
-
62
-
63
-
64
-
65
-
66
-
67
-
68
-
69
-
70
-
71
-
72
-
73
-
74
-
75
-
76
-
77
-
78
-
79
-
80
-
81
-
82
-
83
-
84
-
85
-
86
-
87
-
88
-
89
-
90
-
91
-
92
-
93
-
94
-
95
-
96
-
97
-
98
-
99
-
100
-
101
-
102
-
103
-
104
-
105
-
106
-
107
-
108
-
109
-
110
-
111
-
112
-
113
-
114
-
115
-
116
-
117
-
118
-
119
-
120
-
 121
121 -
 122
122 -
 123
123 -
 124
124 -
 125
125 -
 126
126 -
 127
127 -
 128
128 -
 129
129 -
 130
130 -
 131
131 -
132
-
133
-
134
-
135
-
136
-
137
-
138
-
139
-
140
-
141
-
142
-
143
-
144
-
145
-
146
-
147
-
148
-
149
-
150
-
151
-
152
-
153
-
154
-
155
-
156
-
157
-
158
-
159
-
160
-
161
-
162
-
163
-
164
-
165
-
166
-
167
-
168
-
169
-
170
-
171
-
172
-
173
-
174
-
175
-
176
-
177
-
178
-
179
-
180
-
181
-
182
-
183
-
184
-
185
-
186
 |
 |
