Casio EX P505 Owners Manual - Page 183
VIEWING IMAGES ON A COMPUTER, Using the Camera with a Windows Computer - drivers
 |
UPC - 079767684006
View all Casio EX P505 manuals
Add to My Manuals
Save this manual to your list of manuals |
Page 183 highlights
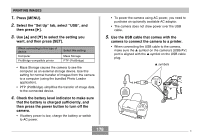
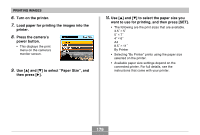
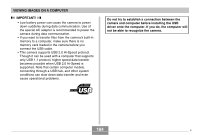
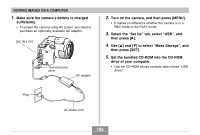
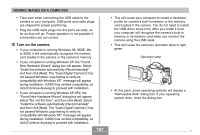
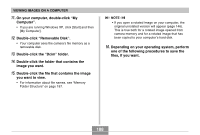
VIEWING IMAGES ON A COMPUTER VIEWING IMAGES ON A COMPUTER After using the USB cable to establish a USB connection between the camera and your computer, you can use your computer to view images in file memory and copy images to your computer's hard disk or other storage media. In order to establish a USB connection with a Windows computer, you first need to install the USB driver located on the CD-ROM that comes bundled with the camera onto your computer. Note that the procedure you need to perform depends on whether you are using computer running under Windows (see below) or a Macintosh (see page 191). Using the Camera with a Windows Computer The following are the general steps for viewing and copying files from a computer running under Windows. You can find details about each operation in the procedures that follow below. Note that you should also refer to the documentation that comes with your computer for other information about USB connections, etc. 1. Load a fully charged battery into the camera, and connect the camera to the computer. Next, configure the required camera settings for USB connection to a computer. 2. Install the USB driver onto your computer. • You need to perform this step only once, the first time you connect to your computer. 3. Use the USB cable to establish a connection between the camera and computer. 4. View and copy the images you want. 183
-
 1
1 -
2
-
3
-
4
-
5
-
6
-
7
-
8
-
9
-
10
-
11
-
12
-
13
-
14
-
15
-
16
-
17
-
18
-
19
-
20
-
21
-
22
-
23
-
24
-
25
-
26
-
27
-
28
-
29
-
30
-
31
-
32
-
33
-
34
-
35
-
36
-
37
-
38
-
39
-
40
-
41
-
42
-
43
-
44
-
45
-
46
-
47
-
48
-
49
-
50
-
51
-
52
-
53
-
54
-
55
-
56
-
57
-
58
-
59
-
60
-
61
-
62
-
63
-
64
-
65
-
66
-
67
-
68
-
69
-
70
-
71
-
72
-
73
-
74
-
75
-
76
-
77
-
78
-
79
-
80
-
81
-
82
-
83
-
84
-
85
-
86
-
87
-
88
-
89
-
90
-
91
-
92
-
93
-
94
-
95
-
96
-
97
-
98
-
99
-
100
-
101
-
102
-
103
-
104
-
105
-
106
-
107
-
108
-
109
-
110
-
111
-
112
-
113
-
114
-
115
-
116
-
117
-
118
-
119
-
120
-
121
-
122
-
123
-
124
-
125
-
126
-
127
-
128
-
129
-
130
-
131
-
132
-
133
-
134
-
135
-
136
-
137
-
138
-
139
-
140
-
141
-
142
-
143
-
144
-
145
-
146
-
147
-
148
-
149
-
150
-
151
-
152
-
153
-
154
-
155
-
156
-
157
-
158
-
159
-
160
-
161
-
162
-
163
-
164
-
165
-
166
-
167
-
168
-
169
-
170
-
171
-
172
-
173
-
174
-
175
-
176
-
177
-
 178
178 -
 179
179 -
 180
180 -
 181
181 -
 182
182 -
 183
183 -
 184
184 -
 185
185 -
 186
186 -
 187
187 -
 188
188 -
189
-
190
-
191
-
192
-
193
-
194
-
195
-
196
-
197
-
198
-
199
-
200
-
201
-
202
-
203
-
204
-
205
-
206
-
207
-
208
-
209
-
210
-
211
-
212
-
213
-
214
-
215
-
216
-
217
-
218
-
219
-
220
-
221
-
222
-
223
-
224
-
225
-
226
-
227
-
228
-
229
-
230
-
231
-
232
-
233
-
234
-
235
-
236
 |
 |