Casio FX 115ES User Guide - Page 74
Specifications - battery type
 |
UPC - 079767171131
View all Casio FX 115ES manuals
Add to My Manuals
Save this manual to your list of manuals |
Page 74 highlights
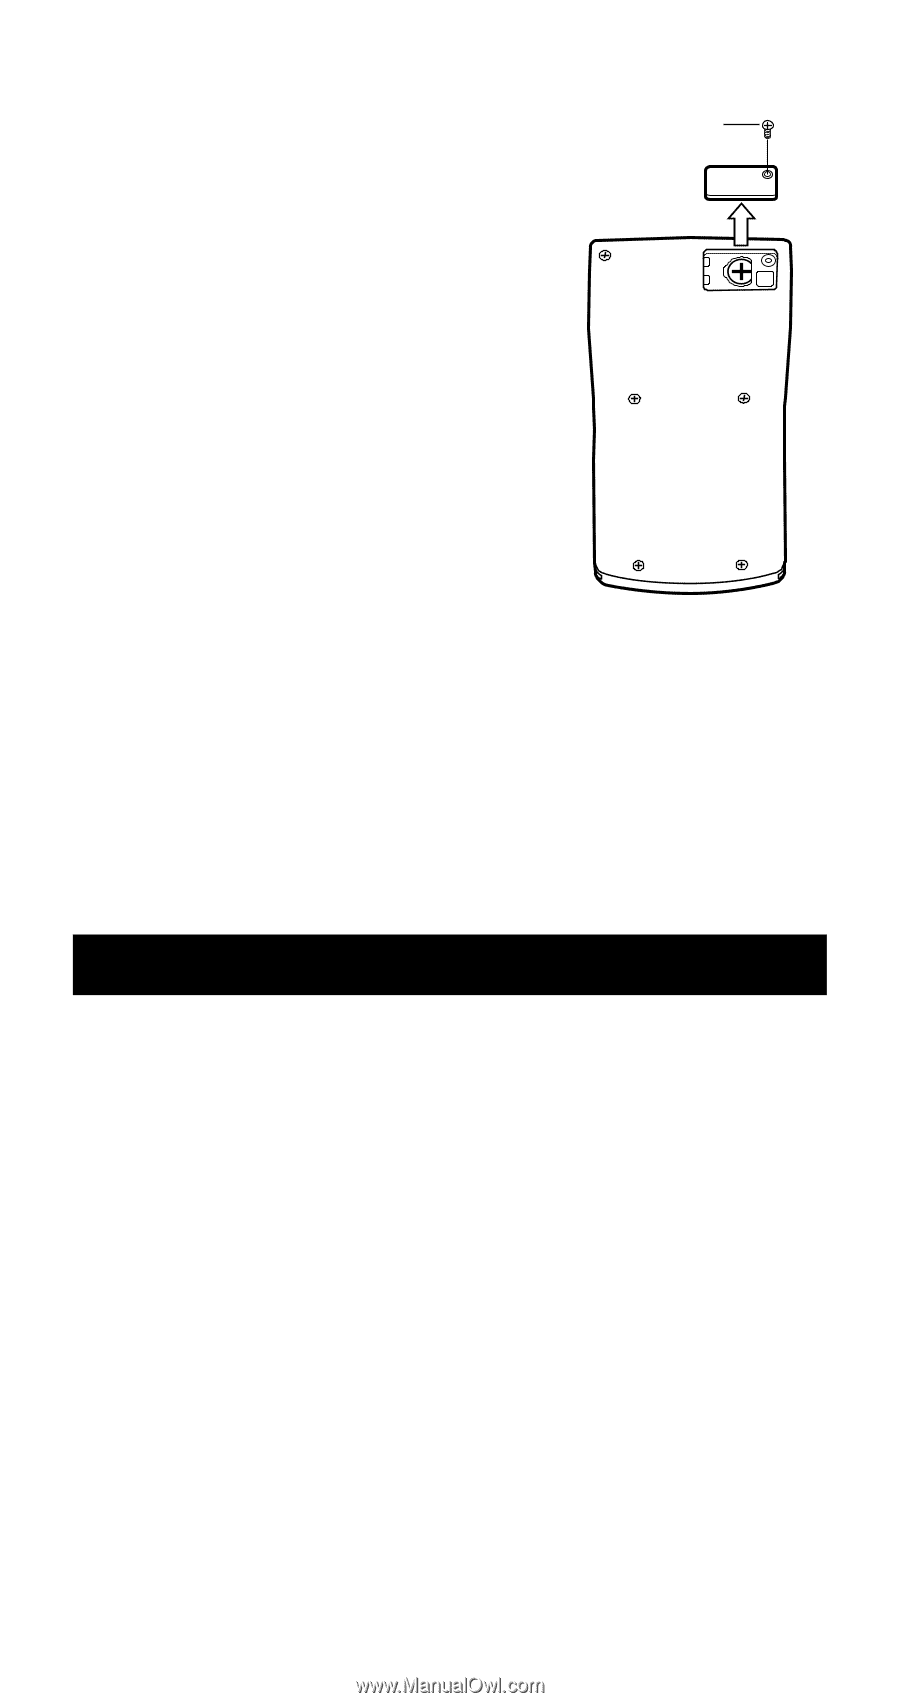
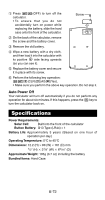
1 Press 1A(OFF) to turn off the calculator. • To ensure that you do not accidentally turn on power while replacing the battery, slide the hard case onto the front of the calculator. Screw 2 On the back of the calculator, remove the screw and the battery cover. 3 Remove the old battery. 4 Wipe a new battery with a dry cloth, and then load it into the calculator with its positive k side facing upwards (so you can see it). 5 Replace the battery cover and secure it in place with its screw. 6 Perform the following key operation: O19(CLR)3(All)=(Yes). • Make sure you perform the above key operation. Do not skip it. Auto Power Off Your calculator will turn off automatically if you do not perform any operation for about six minutes. If this happens, press the O key to turn the calculator back on. Specifications Power Requirements: Solar Cell: Built into the front of the calculator Button Battery: G13 Type (LR44) × 1 Battery Life: Approximately 3 years (Based on one hour of operation per day.) Operating Temperature: 0°C to 40°C Dimensions: 12.2 (H) × 80 (W) × 161 (D) mm 1/2Љ (H) ҂ 31/8Љ (W) ҂ 65/16Љ (D) Approximate Weight: 105g (3.7 oz) including the battery Bundled Items: Hard Case E-72
-
 1
1 -
2
-
3
-
4
-
5
-
6
-
7
-
8
-
9
-
10
-
11
-
12
-
13
-
14
-
15
-
16
-
17
-
18
-
19
-
20
-
21
-
22
-
23
-
24
-
25
-
26
-
27
-
28
-
29
-
30
-
31
-
32
-
33
-
34
-
35
-
36
-
37
-
38
-
39
-
40
-
41
-
42
-
43
-
44
-
45
-
46
-
47
-
48
-
49
-
50
-
51
-
52
-
53
-
54
-
55
-
56
-
57
-
58
-
59
-
60
-
61
-
62
-
63
-
64
-
65
-
66
-
67
-
68
-
 69
69 -
 70
70 -
 71
71 -
 72
72 -
 73
73 -
 74
74 -
 75
75
 |
 |