Casio XJ-A145U User Guide - Page 13
To display Wireless Connection 3 help, To display Wireless Connection 3 version information
 |
View all Casio XJ-A145U manuals
Add to My Manuals
Save this manual to your list of manuals |
Page 13 highlights
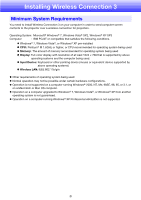
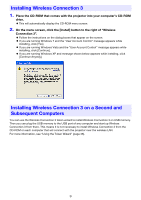
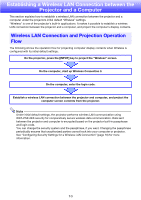
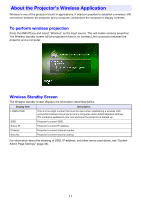
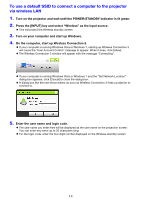
To display Wireless Connection 3 help On a Wireless Connection 3 window, click the function menu button and then click [Help] on the menu that appears. To display Wireless Connection 3 version information On a Wireless Connection 3 window, click the function menu button and then click [About] on the menu that appears. To close Wireless Connection 3 Perform either of the following operations. On a Wireless Connection 3 window, click the function menu button and then click [Exit] on the menu that appears. Click the close button in the upper right corner of a Wireless Connection 3 window. Using a Default SSID to Connect a Computer to the Projector via Wireless LAN This section explains how to use one of the three default SSIDs (casiolpj_default1, casiolpj_default2, casiolpj_default3) to establish a wireless LAN connection between the projector and a computer. Note The initial default SSID for the projector is casiolpj_default1. When using multiple projectors for simultaneous projection in the same area, each one must be assigned a different SSID for identification purposes. Since there are only three default SSIDs, you have up to three projectors with default SSIDs in the same area operating simultaneously. For more information, see "Wireless LAN Connection when Using Multiple Projectors at the Same Time" (page 16). Important! Note that only computer screen contents can be sent from your computer to the projector over a wireless LAN connection. Audio data cannot be sent. If you are running Wireless Connection 3 under Windows Vista or Windows 7, do not perform any of the operations that appear in the "User Account Control" message (such as software installation, new hardware connection, etc.) while there is a wireless connection between the computer and projector. 13
-
 1
1 -
2
-
3
-
4
-
5
-
6
-
7
-
 8
8 -
 9
9 -
 10
10 -
 11
11 -
 12
12 -
 13
13 -
 14
14 -
 15
15 -
 16
16 -
 17
17 -
 18
18 -
19
-
20
-
21
-
22
-
23
-
24
-
25
-
26
-
27
-
28
-
29
-
30
-
31
-
32
-
33
-
34
-
35
-
36
-
37
-
38
-
39
-
40
-
41
-
42
-
43
-
44
-
45
-
46
 |
 |
