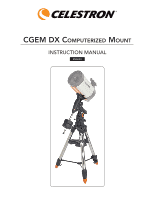
Celestron CGEM DX Mount and Tripod Computerized Telescope CGEM DX Mount Manual - Page 6
Bar Locking Nut
 |
View all Celestron CGEM DX Mount and Tripod Computerized Telescope manuals
Add to My Manuals
Save this manual to your list of manuals |
Page 6 highlights
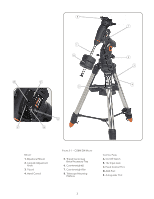
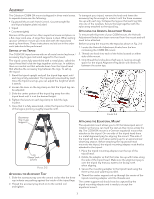
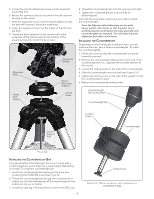
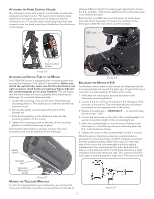
5. Locate the azimuth adjustment screws on the equatorial mount (Fig 2-3). 6. Retract the screws so they do not extend into the azimuth housing on the mount. 7. Hold the equatorial mount over the tripod adapter so that the azimuth housing is above the metal peg. 8. Lower the equatorial mount on the tripod so that the two are flush. 9. Thread the knob (attached to the central rod) on the underside of the tripod head into the bottom of the equatorial mount to hold it firmly in place. Alignment Peg Heavy Duty Tripod Equatorial Mount Tripod Mounting Adapter Tripod Head 4. Thread the counterweight bar into the opening until tight. 5. Tighten the counterweight bar lock nut fully for added support. Once the bar is securely in place you are ready to attach the counterweight. Since the fully assembled telescope can be quite heavy, position the mount so that the polar axis is pointing towards north before the tube assembly and counterweights are attached. This will make the polar alignment procedure much easier. Installing the Counterweight Depending on which telescope model you have, you will receive either one, two or three counterweights. To install the counterweight(s): 1. Orient the mount so that the counterweight bar points toward the ground 2. Remove the counterweight safety screw on the end of the counterweight bar (i.e., opposite the end that attaches to the mount). 3. Loosen the locking screw on the side of the counterweight. 4. Slide the counterweight onto the shaft (see Figure 2-5). 5. Tighten the locking screw on the side of the weight to hold the counterweight in place. 6. Replace the counterweight safety screw. Counterweight Bar Locking Nut Counterweight Bar Center Support Rod Locking Screw Counterweight Figure 2-4 Installing the Counterweight Bar To properly balance the telescope, the mount comes with a counterweight bar and at least one counterweight (depending on model). To install the counterweight bar: 1. Locate the counterweight bar locking nut from the box containing the CGEM DX mount (see Fig 2-5). 2. Thread the counterweight bar through the rounded end of locking nut until the threads pass all the way through and the locking nut can go no further. 3. Locate the opening in the equatorial mount on the DEC axis. 4 Safety Screw Figure 2-5 - Mount shown with two counterweights (CGEM DX 1400)
-
 1
1 -
 2
2 -
 3
3 -
 4
4 -
 5
5 -
 6
6 -
 7
7 -
 8
8 -
 9
9 -
 10
10 -
 11
11 -
 12
12 -
13
-
14
-
15
-
16
-
17
-
18
-
19
-
20
-
21
-
22
-
23
-
24
-
25
-
26
-
27
-
28
-
29
-
30
-
31
-
32
-
33
-
34
-
35
-
36
-
37
-
38
 |
 |
