Cisco 5580-40 Hardware Installation Guide - Page 70
Closing the Processor Retaining Bracket and Retaining Latch., Installing the Heatsink
 |
View all Cisco 5580-40 manuals
Add to My Manuals
Save this manual to your list of manuals |
Page 70 highlights
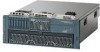
Upgrading the ASA 5580-20 to an ASA 5580-40 Chapter 4 Maintenance and Upgrade Procedures Figure 4-18 Closing the Processor Retaining Bracket and Retaining Latch. 242079 Step 9 Remove the heatsink cover. Caution After the cover is removed, do not touch the thermal interface media. Step 10 Install the heatsink, you must press hard to clamp it down, see Figure 4-19. Figure 4-19 Installing the Heatsink 242080 4-20 Cisco ASA 5580 Series Adaptive Security Appliance Hardware Installation Guide OL-12920-01
-
 1
1 -
2
-
3
-
4
-
5
-
6
-
7
-
8
-
9
-
10
-
11
-
12
-
13
-
14
-
15
-
16
-
17
-
18
-
19
-
20
-
21
-
22
-
23
-
24
-
25
-
26
-
27
-
28
-
29
-
30
-
31
-
32
-
33
-
34
-
35
-
36
-
37
-
38
-
39
-
40
-
41
-
42
-
43
-
44
-
45
-
46
-
47
-
48
-
49
-
50
-
51
-
52
-
53
-
54
-
55
-
56
-
57
-
58
-
59
-
60
-
61
-
62
-
63
-
64
-
 65
65 -
 66
66 -
 67
67 -
 68
68 -
 69
69 -
 70
70 -
 71
71 -
 72
72 -
 73
73 -
 74
74 -
 75
75 -
76
-
77
-
78
-
79
-
80
-
81
-
82
-
83
-
84
 |
 |

4-20
Cisco ASA 5580 Series Adaptive Security Appliance Hardware Installation Guide
OL-12920-01
Chapter 4
Maintenance and Upgrade Procedures
Upgrading the ASA 5580-20 to an ASA 5580-40
Figure 4-18
Closing the Processor Retaining Bracket and Retaining Latch.
Step 9
Remove the heatsink cover.
Caution
After the cover is removed, do not touch the thermal interface media.
Step 10
Install the heatsink, you must press hard to clamp it down, see
Figure 4-19
.
Figure 4-19
Installing the Heatsink
242079
2420
8
0