Cisco AS5200 Installation Guide - Page 4
Install the Universal Access Server - used
 |
View all Cisco AS5200 manuals
Add to My Manuals
Save this manual to your list of manuals |
Page 4 highlights
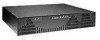
2 Install the Universal Access Server Front panel forward Rear panel forward Rear panel forward, center-mount telco 2 H10335 Prepare the Chassis for Rack-Mounting You can install the chassis in a rack or on a desktop. For a desktop installation, proceed to the next section, "Prepare the Chassis for Desktop Use." Note: Brackets are included. Screws are included for attaching the brackets to the chassis, but not for installing the chassis in a rack. You will need four additional screws to install the chassis in a rack. Step 1 Attach the brackets using one of the three methods shown above. Step 2 Install the chassis in a rack.
-
 1
1 -
 2
2 -
 3
3 -
 4
4 -
 5
5 -
 6
6 -
 7
7 -
 8
8 -
 9
9 -
 10
10 -
11
-
12
-
13
-
14
-
15
-
16
-
17
-
18
-
19
-
20
 |
 |

2
Prepare the Chassis for
Rack-Mounting
You can install the chassis in a rack or on a desktop.
For a desktop installation, proceed to the next
section, “Prepare the Chassis for Desktop Use.”
Note:
Brackets are included. Screws are included
for attaching the brackets to the chassis, but not for
installing the chassis in a rack. You will need four
additional screws to install the chassis in a rack.
Step 1
Attach the brackets using one of the three
methods shown above.
Step 2
Install the chassis in a rack.
H10335
Front panel forward
Rear panel forward
Rear panel forward,
center-mount telco
2
Install the Universal Access Server