Cisco E2000 User Manual - Page 30
Applications and Gaming > Port Range Forwarding, Port Range Forwarding, Port Range Triggering
 |
View all Cisco E2000 manuals
Add to My Manuals
Save this manual to your list of manuals |
Page 30 highlights
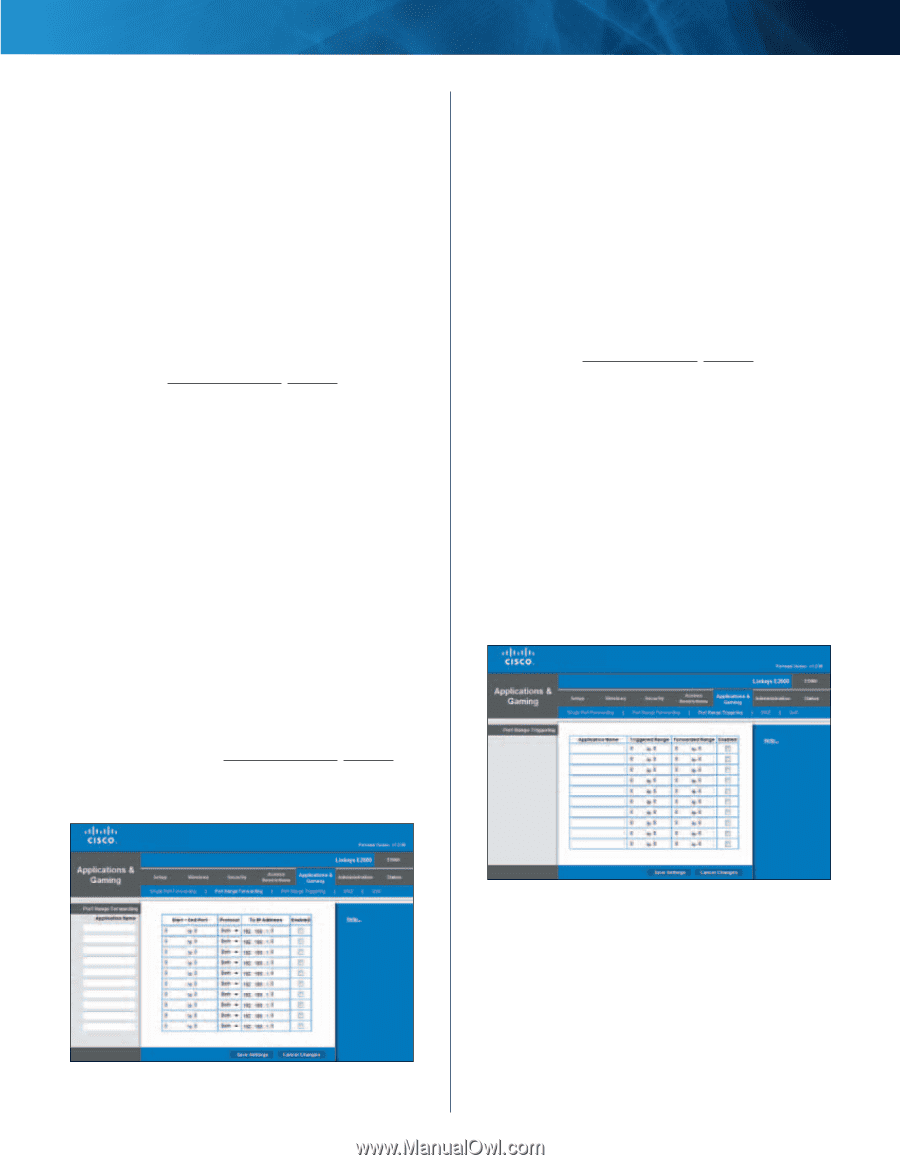
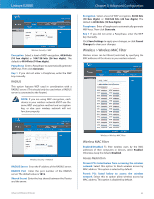
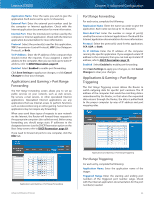
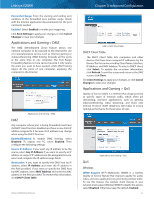
Linksys E2000 Application Name Enter the name you wish to give the application. Each name can be up to 12 characters. External Port Enter the external port number used by the computer or Internet application. Check with the Internet application documentation for more information. Internal Port Enter the internal port number used by the computer or Internet application. Check with the Internet application documentation for more information. Protocol Select the protocol(s) used for this application, TCP (Transmission Control Protocol), UDP (User Datagram Protocol), or Both. To IP Address Enter the IP address of the computer that should receive the requests. If you assigned a static IP address to the computer, then you can look up its static IP address; refer to DHCP Reservation, page 19. Enabled Select Enabled to enable port forwarding. Click Save Settings to apply your changes, or click Cancel Changes to clear your changes. Applications and Gaming > Port Range Forwarding The Port Range Forwarding screen allows you to set up public services on your network, such as web servers, ftp servers, e-mail servers, or other specialized Internet applications. (Specialized Internet applications are any applications that use Internet access to perform functions such as videoconferencing or online gaming. Some Internet applications may not require any forwarding.) When users send these types of requests to your network via the Internet, the Router will forward those requests to the appropriate computers (also called servers). Before using forwarding, you should assign static IP addresses to the designated servers (use the DHCP Reservation option on the Basic Setup screen; refer to DHCP Reservation, page 19). If you need to forward all ports to one computer, click the DMZ tab. Chapter 3: Advanced Configuration Port Range Forwarding For each entry, complete the following. Application Name Enter the name you wish to give the application. Each name can be up to 12 characters. Start~End Port Enter the number or range of port(s) used by the server or Internet applications. Check with the Internet application documentation for more information. Protocol Select the protocol(s) used for this application, TCP, UDP, or Both. To IP Address Enter the IP address of the computer running the specific application. If you assigned a static IP address to the computer, then you can look up its static IP address; refer to DHCP Reservation, page 19. Enabled Select Enabled to enable port forwarding. Click Save Settings to apply your changes, or click Cancel Changes to clear your changes. Applications & Gaming > Port Range Triggering The Port Range Triggering screen allows the Router to watch outgoing data for specific port numbers. The IP address of the computer that sends the matching data is remembered by the Router, so that when the requested data returns through the Router, the data is pulled back to the proper computer by way of IP address and port mapping rules. Applications and Gaming > Port Range Forwarding Advanced Wireless-N Router Applications and Gaming > Port Range Triggering Port Range Triggering For each entry, complete the following: Application Name Enter the application name of the trigger. Triggered Range Enter the starting and ending port numbers of the triggered port number range. Check with the Internet application documentation for the port number(s) needed. 30
-
 1
1 -
2
-
3
-
4
-
5
-
6
-
7
-
8
-
9
-
10
-
11
-
12
-
13
-
14
-
15
-
16
-
17
-
18
-
19
-
20
-
21
-
22
-
23
-
24
-
 25
25 -
 26
26 -
 27
27 -
 28
28 -
 29
29 -
 30
30 -
 31
31 -
 32
32 -
 33
33 -
 34
34 -
 35
35 -
36
-
37
-
38
-
39
-
40
-
41
-
42
-
43
-
44
-
45
-
46
-
47
-
48
-
49
-
50
-
51
-
52
-
53
-
54
-
55
-
56
-
57
-
58
-
59
 |
 |