Cisco E2000 User Manual - Page 4
Product Overview, Top, Back - support
 |
View all Cisco E2000 manuals
Add to My Manuals
Save this manual to your list of manuals |
Page 4 highlights
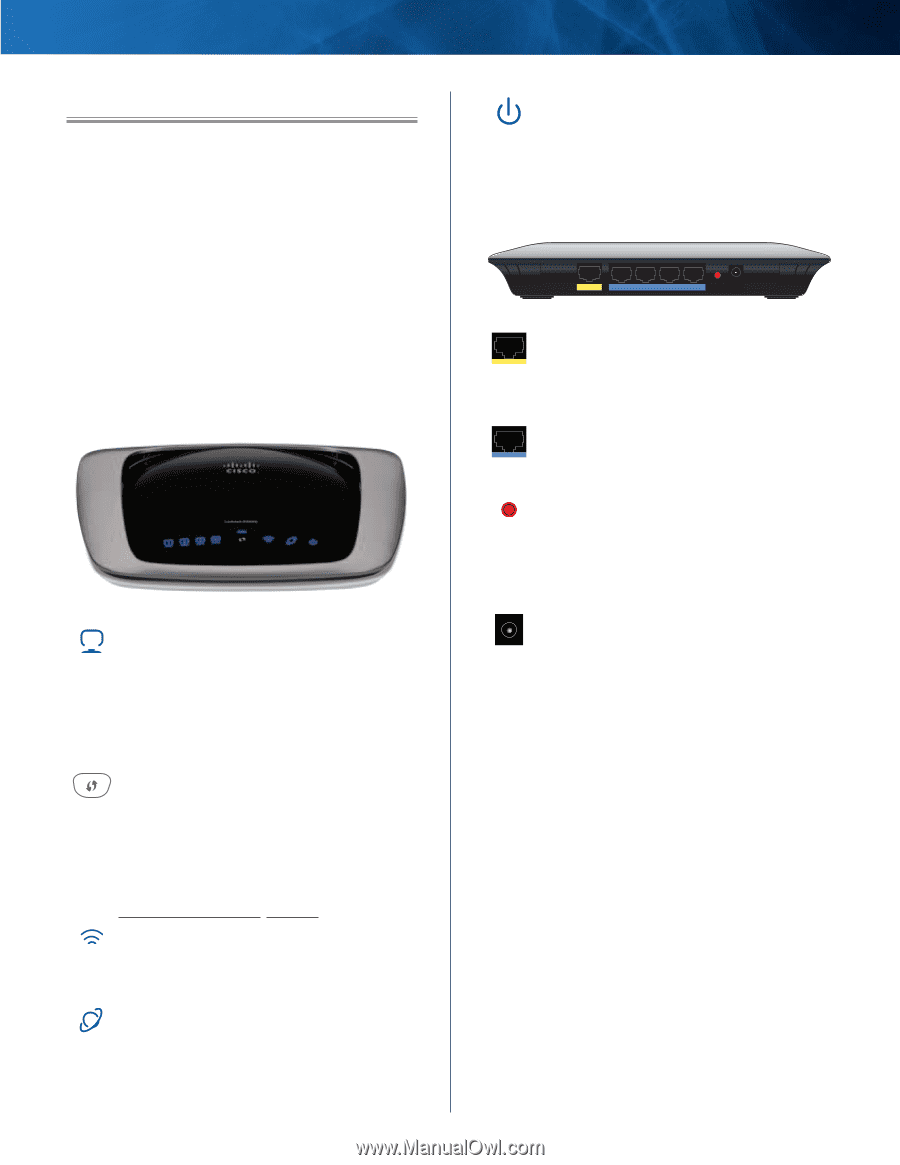
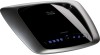
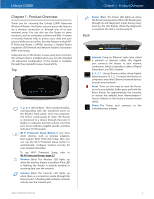
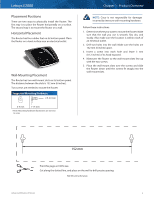
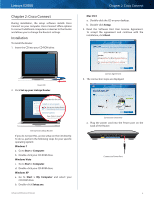
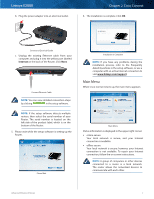
Linksys E2000 Chapter 1: Product Overview Thank you for choosing the Linksys E2000 Advanced Wireless-N Router. The Router lets you access the Internet via a wireless connection or through one of its four switched ports. You can also use the Router to share resources, such as computers, printers and files. A variety of security features help to protect your data and your privacy while you are online. Security features include WiFi Protected Access 2 (WPA2) security, a Stateful Packet Inspection (SPI) firewall and Network Address Translation (NAT) technology. Setup and use of the Router is easy using Cisco Connect, the software that is installed when you run the included CD. Advanced configuration of the Router is available through the provided browser‑based utility. Top 1, 2, 3, 4 (Green/Blue) These numbered LEDs, corresponding with the numbered ports on the Router's back panel, serve two purposes. The LED is continuously lit when the Router is connected to a device through that port. It flashes to indicates network activity over that port. Green indicates Gigabit speeds, and blue indicates 10/100 speeds. Wi-Fi Protected Setup Button If you have client devices, such as wireless adapters, that support Wi-Fi Protected Setup, then you can use the Wi-Fi Protected Setup button to automatically configure wireless security for your wireless network(s). To use Wi-Fi Protected Setup, refer to Wi-Fi Protected Setup, page 23. Wireless (Blue) The Wireless LED lights up when the wireless feature is enabled. If the LED is flashing, the Router is actively sending or receiving data over the network. Internet (Blue) The Internet LED lights up when there is a connection made through the Internet port. A flashing LED indicates network activity over the Internet port. Advanced Wireless-N Router Chapter 1: Product Overview Power (Blue) The Power LED lights up when the Router is powered on. When the Router goes through its self-diagnostic mode during every boot-up, the LED flashes. When the diagnostic is complete, the LED is continuously lit. Back Internet 4 3 Ethernet 2 1 Reset 12VDC Power Internet Using an Ethernet cable (also called a network or Internet cable), this Gigabit port connects the Router to your Internet connection, which is typically a cable or Digital Subscriber Line (DSL) modem. 4, 3, 2, 1 Using Ethernet cables, these Gigabit Ethernet ports (4, 3, 2, 1) connect the Router to computers and other Ethernet network devices on your wired network. Reset There are two ways to reset the Router to its factory defaults. Either press and hold the Reset button for approximately five seconds, or restore the defaults from Administration > Factory Defaults in the Router's browser-based utility. Power The Power port connects to the included power adapter. 4
-
 1
1 -
 2
2 -
 3
3 -
 4
4 -
 5
5 -
 6
6 -
 7
7 -
 8
8 -
 9
9 -
 10
10 -
11
-
12
-
13
-
14
-
15
-
16
-
17
-
18
-
19
-
20
-
21
-
22
-
23
-
24
-
25
-
26
-
27
-
28
-
29
-
30
-
31
-
32
-
33
-
34
-
35
-
36
-
37
-
38
-
39
-
40
-
41
-
42
-
43
-
44
-
45
-
46
-
47
-
48
-
49
-
50
-
51
-
52
-
53
-
54
-
55
-
56
-
57
-
58
-
59
 |
 |