Cisco SPA112 Administration Guide - Page 11
Overview of the Configuration Utility - admin guide
 |
View all Cisco SPA112 manuals
Add to My Manuals
Save this manual to your list of manuals |
Page 11 highlights
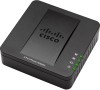
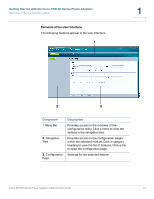
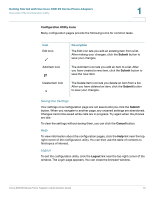
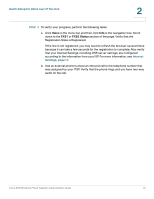
Getting Started with the Cisco SPA100 Series Phone Adapters Overview of the Configuration Utility 1 Overview of the Configuration Utility Launching the Configuration Utility STEP 1 Connect your computer to the same subnet as the ATA. For example, if the ATA is connected to a LAN port on your router, also connect your computer to a LAN port on your router. Note: The SPA122 includes a DHCP server that is enabled by default. You can connect your computer to the ETHERNET (Yellow) port of the ATA or to an Ethernet switch that is connected to the SPA122, and your computer will obtain an IP address in the 192.168.15.x range. You may need to verify that your computer's Ethernet adapter is set to obtain an IP address automatically (DHCP enabled). For more information, refer to the Help for your operating system. STEP 2 Power on your computer. STEP 3 Start a web browser on your computer. STEP 4 In the Address bar, enter the IP address of the ATA. • SPA112: Use the built-in IVR or your router's configuration utility to find the dynamically assigned IP address of the ATA. To use the IVR, connect an analog phone to the PHONE port of the ATA. Press the star key four times (****). Enter 110# to hear the IP address. • SPA122: Use the default local IP address of the ATA: 192.168.15.1 STEP 5 To log in for the first time as an administrator, enter the default administrator username, admin, and the default administrator password, admin. The password is case sensitive. The configuration also has a user account with limited access to configuration pages. The default username is cisco, and the default password is cisco. STEP 6 Enter the Connection Type and settings required by your Internet Service Provider. Types include DHCP (the default option), Static IP, and PPPoE (required for most DSL service). After entering these settings, click Submit to establish your Internet connection. STEP 7 Use the menus to configure your settings, as described in this administration guide. For more information, continue to Overview of the Configuration Utility, page 11. Cisco SPA100 Series Phone Adapters Administration Guide 11
-
 1
1 -
2
-
3
-
4
-
5
-
 6
6 -
 7
7 -
 8
8 -
 9
9 -
 10
10 -
 11
11 -
 12
12 -
 13
13 -
 14
14 -
 15
15 -
 16
16 -
17
-
18
-
19
-
20
-
21
-
22
-
23
-
24
-
25
-
26
-
27
-
28
-
29
-
30
-
31
-
32
-
33
-
34
-
35
-
36
-
37
-
38
-
39
-
40
-
41
-
42
-
43
-
44
-
45
-
46
-
47
-
48
-
49
-
50
-
51
-
52
-
53
-
54
-
55
-
56
-
57
-
58
-
59
-
60
-
61
-
62
-
63
-
64
-
65
-
66
-
67
-
68
-
69
-
70
-
71
-
72
-
73
-
74
-
75
-
76
-
77
-
78
-
79
-
80
-
81
-
82
-
83
-
84
-
85
-
86
-
87
-
88
-
89
-
90
-
91
-
92
-
93
-
94
-
95
-
96
-
97
-
98
-
99
-
100
-
101
-
102
-
103
-
104
-
105
-
106
-
107
-
108
-
109
-
110
-
111
-
112
-
113
-
114
-
115
-
116
-
117
-
118
-
119
-
120
-
121
-
122
-
123
-
124
-
125
-
126
-
127
-
128
-
129
-
130
-
131
-
132
-
133
-
134
-
135
-
136
-
137
-
138
-
139
-
140
-
141
-
142
-
143
-
144
-
145
-
146
-
147
 |
 |