Cisco VG202 Hardware Installation Guide - Page 33
Wall-Mounting the Chassis
 |
View all Cisco VG202 manuals
Add to My Manuals
Save this manual to your list of manuals |
Page 33 highlights
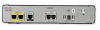
Chapter 3 Installing Cisco VG202 and Cisco VG204 Voice Gateways Wall-Mounting the Chassis • Power cord, 6 feet (1.8-meters long) • RJ-45-to-DB-25 adapter cable (labeled Console) • Grounding lug and fasteners Inspect all items for shipping damage. If anything appears damaged, or if you encounter problems when installing or configuring your system, contact a customer service representative. (See the "Obtaining Documentation and Submitting a Service Request" section on page xvi.) Wall-Mounting the Chassis The following warning applies only when the unit is wall-mounted: Warning This unit is intended to be mounted on a wall. Please read the wall-mounting instructions carefully before beginning installation. Failure to use the correct hardware or to follow the correct procedures could result in a hazardous situation to people and damage to the system. Statement 248 You can mount the voice gateway on a wall or other vertical surface by using the molded mounting-screw slots on the bottom of the voice gateway and two number-six, 3/4 inch (M3.5 x 20 mm) screws. You must provide the screws. Figure 3-2 shows the mounting-screw slots. Figure 3-2 Mounting-Screw Slots for Wall-Mounting a VG202 or VG204 Voice Gateway 1 1 2 2 231984 OL-15959-01 1 1 1 Rubber feet 2 Mounting-screw slots The following conditions must be met when you mount the voice gateway: • Because you will use the LEDs as status and problem indicators, the LEDs on the front panel must face upward and must be easily visible. • The back panel must face downward to reduce strain on the cable connections. Cisco VG202 and Cisco VG204 Voice Gateways Hardware Installation Guide 3-5
-
 1
1 -
2
-
3
-
4
-
5
-
6
-
7
-
8
-
9
-
10
-
11
-
12
-
13
-
14
-
15
-
16
-
17
-
18
-
19
-
20
-
21
-
22
-
23
-
24
-
25
-
26
-
27
-
 28
28 -
 29
29 -
 30
30 -
 31
31 -
 32
32 -
 33
33 -
 34
34 -
 35
35 -
 36
36 -
 37
37 -
 38
38 -
39
-
40
-
41
-
42
-
43
-
44
-
45
-
46
-
47
-
48
-
49
-
50
 |
 |
