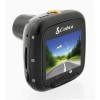
Cobra CDR 820 CDR 820 Manual - Page 12
Connecting to a Computer, Adjusting Camera Settings - specification
 |
View all Cobra CDR 820 manuals
Add to My Manuals
Save this manual to your list of manuals |
Page 12 highlights
Adjusting Camera Settings Your Dash Cam Still Photo Mode Settings • While in Still Photo mode, press the MENU button to enter the menu selection screen. Verify that Still Settings is selected, then press MODE to confirm. Press the UP and DOWN arrows to select the setting you'd like to modify, then press the MODE button to confirm. A window on the right edge of the screen will display the available options. Use the UP and DOWN arrows to make your selection, then press MODE to confirm. Still Photo Mode Settings Still Image Size This sets the level of detail in the photo. Higher M indicates more megapixels, which will give you a sharper image, but take up more memory. Options between 1M and 14M are available. Still Quality Select between Super High Quality (SHQ) and High Quality (HQ) Scene Exposure Select between Auto, Sport, Portrait, Landscape, Snow, Beach, and Fireworks. In very bright environments, use a positive EV. Dark environments use negative EV. Options between -2 and +2 are available. White Balance You can adjust the white balance based on the ambient lighting. Options include: Auto, Daylight, Cloudy, Flourescent 1, Flourescent 2, and Flourescent 3. ISO Sensitivity Increasing ISO will make the camera more sensitive to light. Try increasing ISO in low-light conditions, or leave it set to "Auto" Color Adjusts color saturation. Options include: natural, bright, and grey. Effect Photo effects include: Normal, retro, black and white, relief, negative, drawing, painting, crayon. 18 English Connecting to a Computer Your Dash Cam To connect your camera to a Computer • Connect the camera to your computer using the included USB to Mini-USB Cable. By default, your device connects to your computer in Mass Storage mode, and acts like a flash drive. Videos can be viewed with any standard video player that supports .avi files. NOTE: Quicktime, the native video player for Mac, only supports specific types of .avi files and cannot playback this camera's videos. For links to third party players that will work on Mac, visit www.cobra.com/support/ software-downloads. Movies that are locked begin with "SOS_" and movies that are not locked begin with "MOV_". Note that if the Memory card gets too full, videos that are not locked will be overwritten to make room for new videos. If you want to save any videos that begin with "MOV_" you should copy them to your computer, or Lock the files. To switch the camera's USB function If you prefer to connect your camera to your PC as a web or video camera, you can change this setting in the settings menu. Disconnect the camera from your PC, enter General Settings, and change the USB Function to MSDC. Then, when you reconnect your camera to your PC, it will use this function. 19


