Computer Associates ETRAVE7130BPWE User Guide - Page 15
Scanning Exclusions
 |
UPC - 757943273977
View all Computer Associates ETRAVE7130BPWE manuals
Add to My Manuals
Save this manual to your list of manuals |
Page 15 highlights
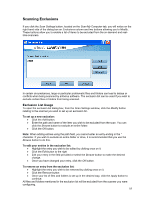
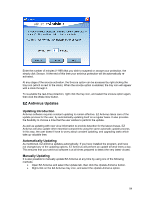
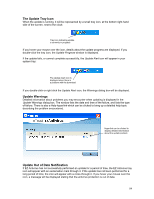
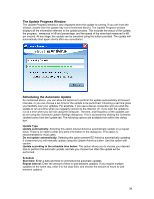
Scanning Exclusions If you click the Scan Settings button, located on the Scan My Computer tab, you will notice on the right hand side of the dialog box an Exclusions column and two buttons allowing you to Modify. These buttons allow you to enable a list of items to be excluded from the on-demand and realtime scanners. In certain circumstances, large or particular problematic files and folders can lead to delays or conflicts when being scanned by antivirus software. The exclusion list can be used if you wish to exclude certain files or folders from being scanned. Exclusion List Usage To open the exclusion list dialog box, from the Scan Settings window, click the Modify button relating to the scanner you wish to set up an exclusion for. To set up a new exclusion: • Click the Add button. • Enter the path and name of the item you wish to be excluded from the scan. You can click the Browse button to exclude an entire folder. • Click the OK button. Note: When adding entries using the path field, you cannot enter an entry ending in the * character. If you wish to exclude an entire folder or drive, it is recommended that you use the Browse button to do this. To edit your entries in the exclusion list: • Highlight the entry you wish to be edited by clicking once on it. • Click the Edit button to the right • Edit your entry in the field provided or select the Browse button to make the desired change. • Once you have changed your entry, click the OK button. To remove an entry from the exclusion list: • Highlight the entry you wish to be removed by clicking once on it. • Click the Remove button • Once your list of files and folders is set up in the desired way, click the Apply button to continue. All files and folders mentioned in the exclusion list will be excluded from the scanner you were configuring. 15
-
 1
1 -
2
-
3
-
4
-
5
-
6
-
7
-
8
-
9
-
 10
10 -
 11
11 -
 12
12 -
 13
13 -
 14
14 -
 15
15 -
 16
16 -
 17
17 -
 18
18 -
 19
19 -
 20
20 -
21
-
22
-
23
-
24
-
25
-
26
 |
 |
