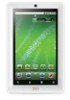
Creative ZiiO 7″ ZiiO User Guide EN - Page 3
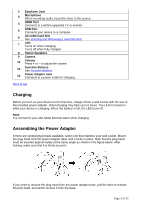
Charging, Assembling the Power Adapter
 |
View all Creative ZiiO 7″ manuals
Add to My Manuals
Save this manual to your list of manuals |
Page 3 highlights
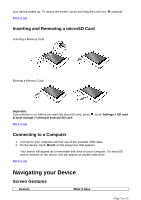
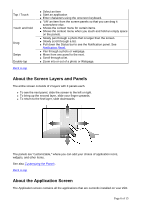
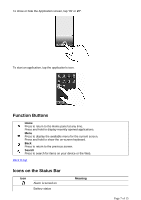
2 Earphone Jack 3 Microphone When recording audio, keep this close to the source. 4 HDMI Port Connects to a HDMI-supported TV or monitor. 5 USB Port Connects your device to a computer. 6 microSD Card Slot See Inserting and Removing a microSD card. 7 LED Turns on when charging. Turns off when fully charged. 9 Stereo Speakers 9 Camera 10 Volume Press + or - to adjust the volume. 11 Function Buttons See Function Buttons. 12 Power Adapter Jack Connects to a power outlet for charging. Back to top Charging Before you turn on your device for the first time, charge it from a wall socket with the use of the included power adapter. Initial charging may take up to 6 hours. The LED is turned on while your device is charging. When the battery is full, the LED turns off. Note: It is normal for your ZiiO tablet become warm while charging. Assembling the Power Adapter If there are several plug heads available, select one that matches your wall socket. Mount the plug head onto the power adapter base until it locks in place. Note that the plug head must be inserted approximately at the same angle as shown in the figure below. After locking, make sure that it is firmly secured. If you need to remove the plug head from the power adapter base, pull the latch to release the plug head, and gently remove it from the base. Page 3 of 15
-
 1
1 -
 2
2 -
 3
3 -
 4
4 -
 5
5 -
 6
6 -
 7
7 -
 8
8 -
 9
9 -
10
-
11
-
12
-
13
-
14
-
15
 |
 |
